Curbless Shower Waterproofing for Port Charlotte Bathrooms
Explore Our Services
Contact Us Today!
(239) 322-9295
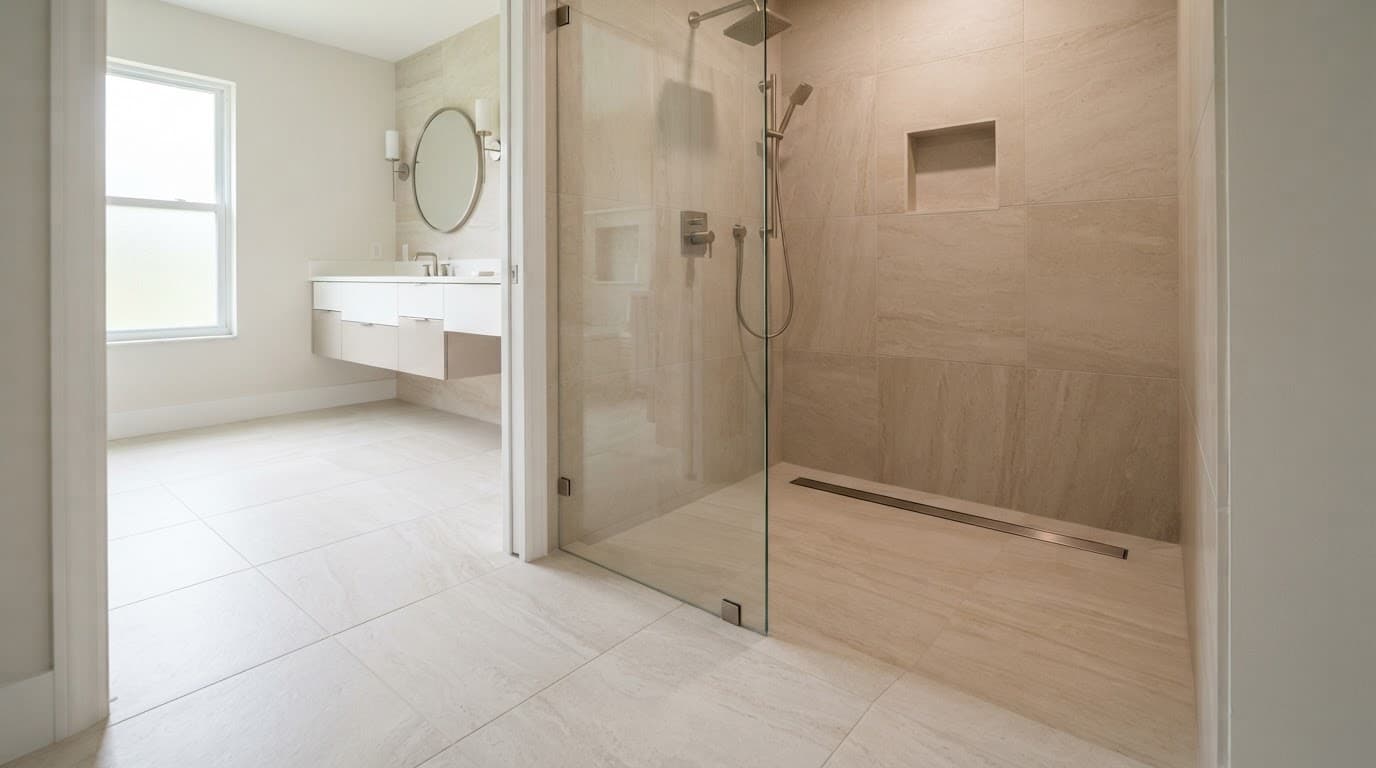
A curbless shower can make a Port Charlotte bathroom feel larger, safer, and easier to clean. Yet the flush entry only works when the drain, floor height, tile thickness, and waterproofing are planned as one system.
Good curbless shower waterproofing does more than cover the shower pan. It keeps water away from the slab, framing, walls, niches, and adjoining bathroom floor, even when Southwest Florida humidity slows drying. Before choosing tile, create an elevation plan, select an approved waterproofing system, and confirm the permit path with Charlotte County.
Why curbless shower waterproofing starts with the floor plan
A curb hides part of the floor buildup and gives water a physical boundary. A curbless design removes that boundary, so the shower entry, drain, slope, and waterproofing must work together.
The entry must stay flush while the floor slopes
Water still needs to flow toward the drain. The 2023 Florida Building Code, Plumbing, 8th Edition, includes a 2% slope requirement for shower floors and receptors, which equals 1/4 inch per foot.
That slope takes up nearly 1 inch across a 4-foot run. Tile, thinset, the drain body, waterproofing layer, and any mortar bed add more height. If the bathroom floor and shower floor don't account for all those layers, the entry may have a lip, a low spot, or water flowing into the room.
Many Port Charlotte homes use concrete slab-on-grade construction. A contractor may need to recess part of the slab, adjust the drain location, or use a low-profile approved system. The correct option depends on the home's structure and existing plumbing.
The membrane needs uninterrupted coverage
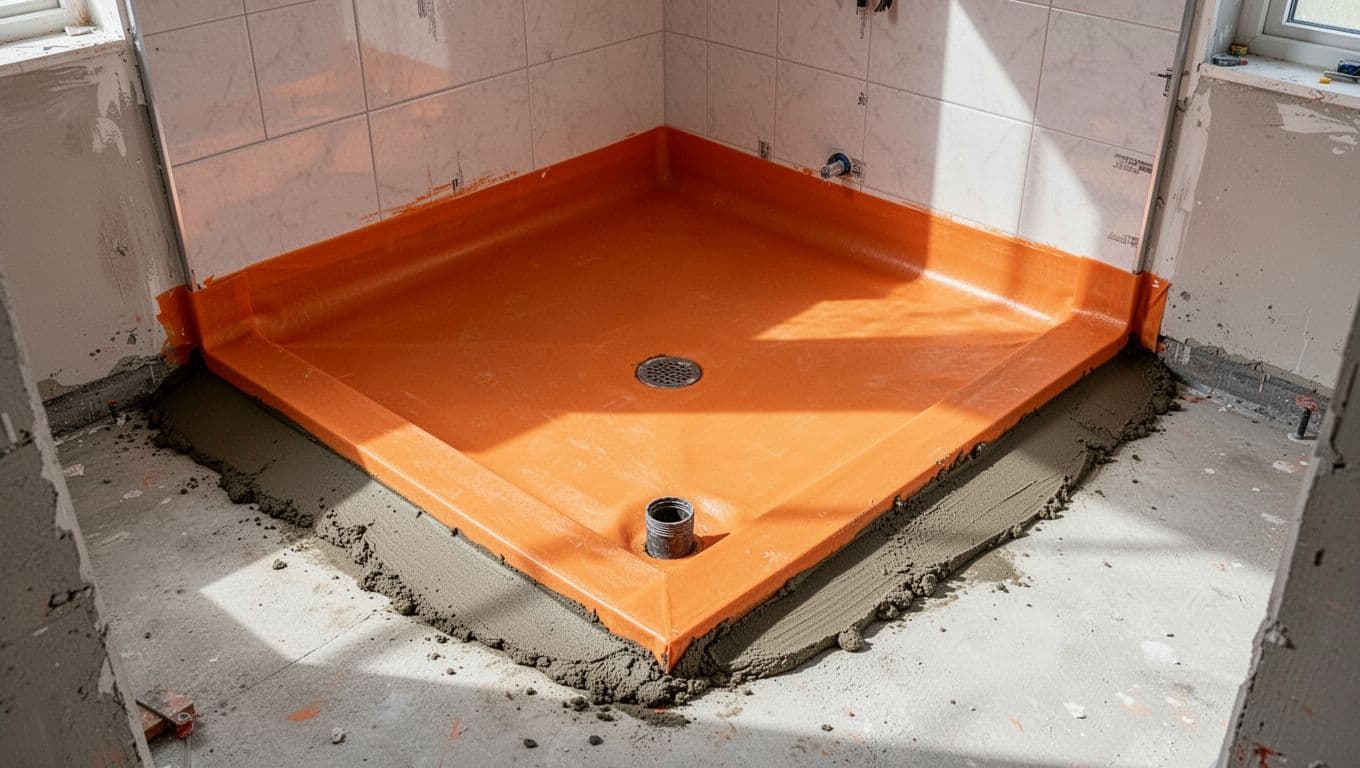
Waterproofing should form a continuous protected layer across the shower floor, walls, corners, changes of plane, niche, bench, and drain connection. Grout isn't waterproof, and surface caulk alone can't replace a properly installed membrane.
For site-built receptors, Florida code language addresses watertight lining, a minimum 2% slope, and a lining that rises at least 2 inches above the finished threshold. A sheet-applied, load-bearing bonded membrane can follow a different approved detail, so the installer must follow the complete system instructions rather than combine unrelated products.
A flush entry is a finish detail. The floor elevation and waterproofing system underneath it protect the bathroom.
Plan the slab, drain, and waterproofing system first
The design stage should happen before demolition. A good plan answers where the water goes, how the floor reaches the drain, and which materials create the waterproof boundary.
Check the existing slab and plumbing
Start by opening the floor only as much as needed to understand the current layout. The contractor should locate the existing drain, trap, supply lines, electrical runs, and any reinforcement or special slab conditions before cutting concrete.
Drain relocation often costs more than homeowners expect. The new location must provide enough fall in the drain line, fit the shower layout, and connect correctly to an approved flanged drain. Cutting the slab without checking utilities can create avoidable repairs.
The plan should also account for the bathroom door, toilet clearance, vanity location, and glass panel. A shower that looks spacious on paper can still create a tight entry if the surrounding fixtures aren't measured.
Choose compatible products
Use one complete waterproofing system whenever possible. That includes the membrane, corners, sealants, bonding materials, drain connection, and manufacturer-approved accessories.
The Florida code references shower lining materials such as plastic liners meeting ASTM D4068 or ASTM D4551 and sheet-applied bonded waterproof membranes meeting ANSI A118.10. Those standards don't mean every product works with every drain. Confirm compatibility before installation.
Wall surfaces inside the shower should use smooth, nonabsorbent, waterproof materials. Code language calls for coverage to at least 6 feet above the room floor or 70 inches above the drain, depending on the applicable provision and assembly.
Step-by-step curbless shower installation overview
The exact sequence varies by product and home, but a properly managed project usually follows these stages:
- Measure the finished elevations. Account for the slab or subfloor, mortar, membrane, thinset, tile, drain grate, and bathroom flooring. Mark the finished shower entry before setting the drain.
- Remove the existing finishes. Demolish the old shower pan, tile, backer board, and damaged materials. Keep the opening controlled so the contractor can inspect the framing and slab.
- Inspect and prepare the substrate. Repair cracks, remove loose concrete, confirm the floor is sound, and verify the shower footprint. Any slab cutting should happen only after the plumbing and structural conditions are checked.
- Set the drain and create the slope. Install the approved drain body and connect it to the existing waste line. Form the shower floor so water moves consistently toward the drain without birdbaths or reverse slope.
- Install the waterproofing. Cover the floor and required wall areas. Seal seams, inside and outside corners, fastener penetrations, niches, benches, and the drain connection according to the system details.
- Complete the required water test and inspections. Where the adopted liner and inspection provisions apply, the code describes plugging the drain and filling the receptor to at least 2 inches of water measured at the threshold. Keep the area undisturbed until the test and inspection are complete.
- Install tile and finish details. Set the floor tile to preserve the drainage plane. Then install wall tile, glass, trim, fixtures, and the bathroom flooring transition without puncturing the waterproofing.
Port Charlotte permits and inspection planning
Don't assume a curbless shower is only a tile upgrade. Charlotte County lists replacement of floor tile in a tub or shower area, including replacement of the shower pan, as permit-required work. Plumbing changes, drain relocation, electrical work, and structural modifications can also affect the permit scope.
Verify the permit path with Charlotte County
The local authority having jurisdiction is Charlotte County Community Development, Building Construction Services. Its office is at 18400 Murdock Circle in Port Charlotte. The county lists BuildingConstruction@CharlotteCountyFL.gov and 941-743-1201 for building questions.
Ask which permits and inspections apply to your exact project. Requirements can change based on the home's location, the work's scope, the drainage changes, and whether other bathroom systems are modified. The contractor should identify these items before demolition begins.
Charlotte County also asks applicants to have Florida Product Approval numbers, called FL numbers, or Miami-Dade County Product Approval numbers, called NOA numbers, ready when applicable. This matters when the project includes approved products or assemblies that require documentation.
Keep inspection points visible
Waterproofing inspections happen before tile hides the membrane. Schedule the inspection after the membrane, seams, corners, drain connection, and wall coverage are complete, but before any finish material covers them.
Take clear photos of the shower floor, wall transitions, niche, bench, and drain before tiling. Photos don't replace an inspection, but they give you a useful record for future repairs.
Homeowners managing a larger renovation may also benefit from Southwest Florida home inspections at key stages of the project.
Curbless shower waterproofing inspection checklist
Before tile installation, review these items with the contractor and inspector:
- The finished entry matches the planned bathroom floor height.
- The shower floor slopes toward the drain with no low spots.
- The drain has a watertight connection to the membrane.
- Corners, seams, niches, benches, and pipe penetrations are sealed.
- The membrane reaches the required wall height and follows its installation details.
- The bathroom floor transition doesn't direct water toward the doorway.
- The required flood test has been completed and documented.
- The membrane, drain, sealants, and setting materials come from compatible systems.
Look across the floor with a straightedge or level before tile goes down. Small defects are easier to correct at this stage than after glass and fixtures are installed.
Common mistakes and realistic project costs
Most curbless shower failures start during planning, not when someone takes the first shower. A few shortcuts create expensive problems later.
Mistakes that cause leaks or poor drainage
Designing the shower around a finished tile photo can lead to the wrong floor height. The structure and drain should establish the elevation first.
Other common errors include mixing waterproofing brands, stopping the membrane at the shower entrance, leaving corners unsealed, placing fasteners through wet areas, and treating grout as the waterproof barrier. A linear drain also needs careful alignment. If the floor slopes away from it, water can collect at the entry.
Skipping the flood test creates another risk. Tile and grout can hide a failed drain connection, but they can't repair it.
Southwest Florida's high humidity makes ventilation and drying worth planning as well. A properly vented bathroom, a sloped shower floor, and a continuous membrane work together to reduce lingering moisture.
Budget for slab work and finish choices
In 2026, curbless shower remodeling in Southwest Florida commonly falls between $10,000 and $25,000 . Simple conversions may land near $10,000 to $14,000, while mid-range projects often reach $14,000 to $20,000. Complex work with slab modification, drain relocation, premium tile, custom glass, or broader bathroom repairs can exceed $20,000.
| Project scope | Planning range | Common cost drivers |
|---|---|---|
| Basic curbless conversion | $10,000 to $14,000 | Limited layout changes and standard finishes |
| Mid-range custom shower | $14,000 to $20,000 | New drain layout, upgraded tile, glass enclosure |
| Complex bathroom remodel | $20,000 to $25,000+ | Slab work, plumbing changes, custom finishes, hidden repairs |
These are planning ranges, not fixed bids. Ask each contractor to separate demolition, slab work, plumbing, waterproofing, tile, glass, permits, inspections, and cleanup. For broader local budgeting, review this bathroom remodeling cost guide.
Conclusion
A successful Port Charlotte curbless shower begins below the tile. The floor elevation must preserve a flush entry and a reliable 2% drainage slope, while the waterproofing system must connect continuously at every seam, corner, penetration, and drain.
Confirm the permit and inspection requirements with Charlotte County before work starts. Then choose a licensed contractor who can document the slab, plumbing, waterproofing, and flood-test stages. When you're ready to discuss the layout and budget, you can request a home renovation consultation for your Southwest Florida bathroom.