Plan a Recessed Medicine Cabinet Before Bathroom Framing
Explore Our Services
Contact Us Today!
(239) 322-9295
A medicine cabinet can clear a crowded vanity top without taking another inch from the room. However, a recessed medicine cabinet only fits cleanly when its location is planned before drywall closes the wall.
For Bonita Springs new builds and bathroom remodels, the small decisions made during framing can prevent expensive rework later. Cabinet size, stud spacing, pipe routes, wiring, tile layout, and mirror height all need a place on the plan.
Why Recessed Medicine Cabinet Planning Starts Before Framing
A surface-mounted cabinet can attach over finished drywall. A recessed unit needs a protected cavity inside the wall, so framing and rough-in work determine whether the desired cabinet will fit.
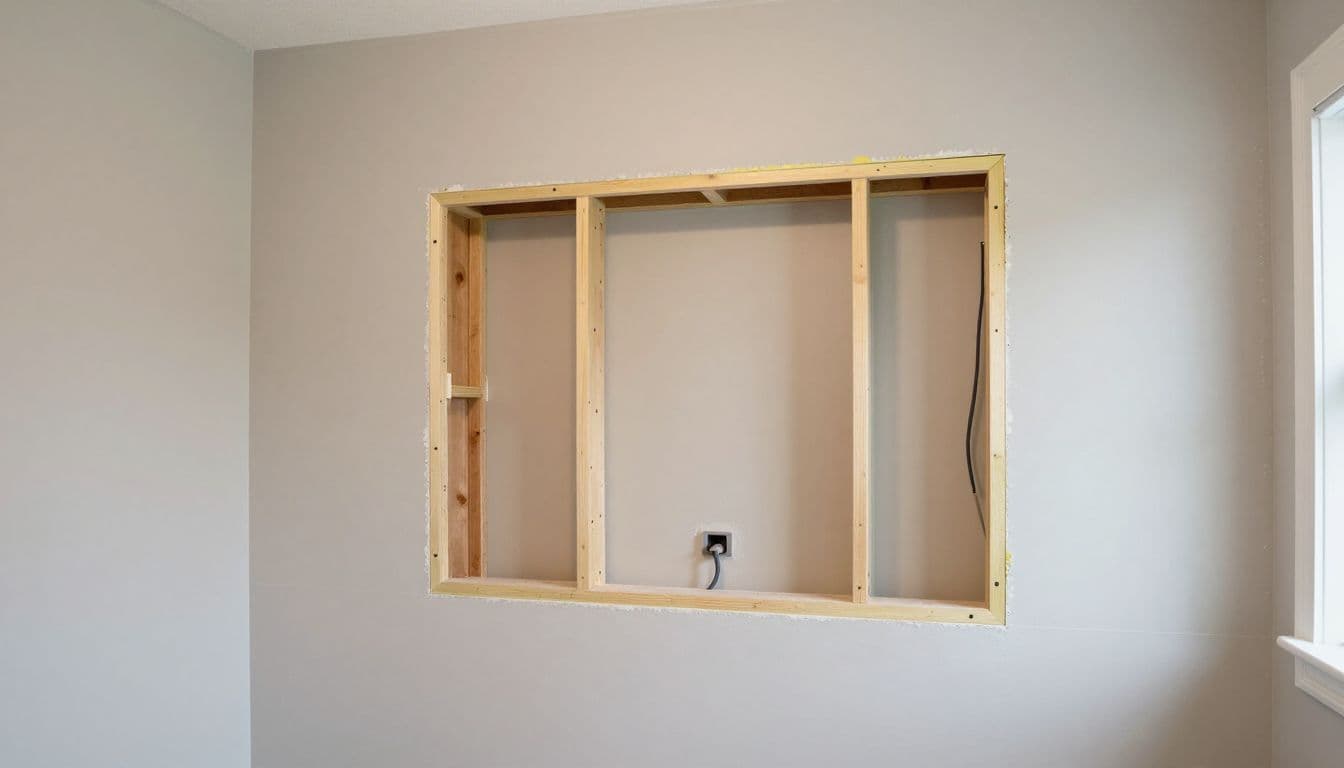
Standard stud bays can limit cabinet width
Most interior walls use studs spaced 16 inches on center, although homes may use different layouts. The open space between standard 2-by-4 studs is much narrower than 16 inches once the stud thickness is factored in.
Many recessed cabinets are made to fit between existing studs. Others are wider and need a framed header and sill, much like a small wall opening. That wider option can work well, but it needs a review before anyone alters framing.
Never cut a stud because a cabinet looks close to fitting. A wall may carry roof, ceiling, or floor loads. A qualified contractor or structural professional should review any framing change before work begins.
Cabinet depth matters as much as width
A 2-by-4 wall has a nominal depth of 3 1/2 inches before drywall. The cabinet box, its rear clearance, wiring, pipes, and any wall irregularities must fit within that space.
Some medicine cabinets are shallow enough for common interior partitions. Others need a deeper wall, a bumped-out section, or a surface-mounted installation. Exterior walls deserve extra caution because insulation, moisture control layers, and structural details may occupy the cavity.
Place the cabinet where it supports daily use. Centering it over the sink often looks right, yet that location may conflict with a vent stack, supply lines, or an electrical box. The wall plan must settle those conflicts before the room gets closed in.
Recessed Medicine Cabinet Dimensions vs. Rough Opening Dimensions
The cabinet's listed dimensions and the rough opening dimensions are related, but they are not interchangeable. Ordering or framing based on the wrong number is one of the most common causes of a cabinet that will not install properly.
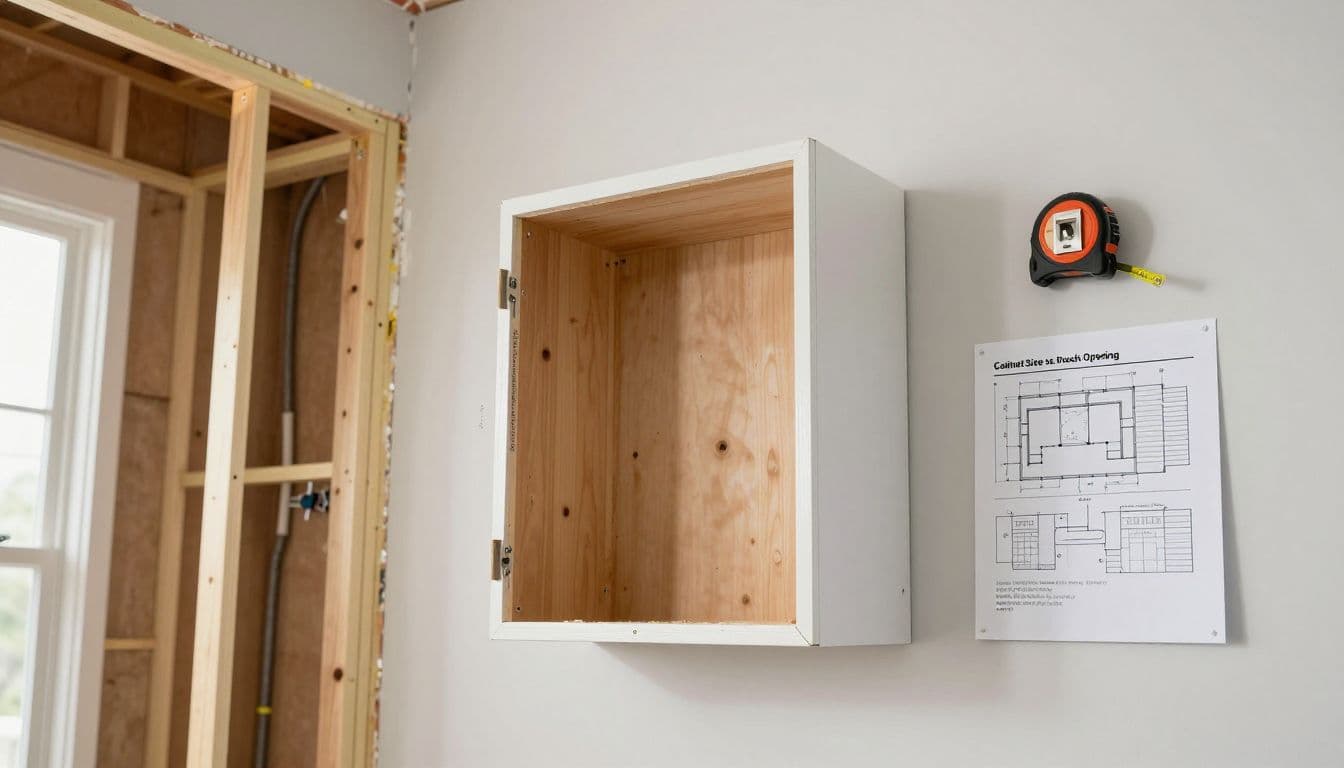
Cabinet dimensions describe the finished product
A product listing may show the overall outside width, height, and depth. Those measurements can include the door, frame, mirror, or face flange that overlaps the finished wall.
The cabinet box dimensions describe the portion that slides into the wall. A cabinet with a 24-inch mirror face might have a smaller metal or wood box behind it. The face frame covers the gap around the opening and creates the finished appearance.
Therefore, do not assume a 24-by-30-inch cabinet needs a 24-by-30-inch framed hole. That assumption can leave the opening too wide, too narrow, or incorrectly positioned.
Rough opening dimensions guide the framing
The rough opening is the framed space inside the wall where the cabinet box installs. Manufacturers provide the required opening width and height in the installation instructions. They may call for a tight fit, a modest clearance, or adjustable blocking.
Use the manufacturer's rough opening dimensions, not a measurement pulled from a retailer photo or an online product title. Check the instructions again after delivery because model revisions and door styles can change the required opening.
This quick comparison shows why both measurements belong on the framing plan:
| Measurement | What it describes | What to use it for |
|---|---|---|
| Overall cabinet size | Cabinet face, door, mirror, and frame | Confirming visual scale above the vanity |
| Cabinet box size | Portion that recesses into the wall | Checking wall depth and stud-bay fit |
| Rough opening size | Clear framed cavity required by the manufacturer | Building the opening before drywall |
| Finished installation height | Cabinet placement above the floor or vanity | Coordinating mirror, backsplash, and lighting |
The rough opening is a framing instruction, while the overall cabinet size is a finished-design measurement.
For example, if a cabinet has a 20-inch-wide box but the instructions require a 20 1/4-inch rough opening, frame for 20 1/4 inches. The small allowance may be needed for squaring, shimming, and fastening. Do not subtract or add clearance based on guesswork.
Pick the Exact Cabinet Before Ordering Framing Changes
A rough cabinet location is useful during early design. Final framing should wait until the actual model, installation guide, and mounting method are confirmed.
Compare recessed, semi-recessed, and surface-mounted options
A fully recessed cabinet places nearly the entire box inside the wall. It creates a clean profile and protects walkway space in a compact bathroom.
A semi-recessed cabinet projects farther from the wall but needs less cavity depth. It can solve a conflict with a shallow wall or existing pipes. Surface-mounted cabinets need no wall cavity and are often the simplest choice in a remodel where opening a wall would create too much disruption.
Browse bathroom remodeling services in Southwest Florida when the cabinet decision is part of a wider plan involving a vanity, tile, shower, or lighting change. Each finish choice affects the final placement.
Review details beyond the opening size
The cabinet's door swing needs room to open without hitting a sconce, faucet, or adjacent wall. Double-door units need centered placement over a double vanity. A cabinet with an integrated outlet, defogger, or interior lighting may need electrical planning before rough-in.
Also confirm the cabinet's mounting points. Some models fasten through the side walls into framing. Others use top and bottom blocking. A heavy mirrored cabinet may have instructions for added support.
Keep the model number, spec sheet, and finish selection with the construction documents. A screenshot without dimensions is not enough for field work.
Map Plumbing and Electrical Before Any Opening Is Framed
Bathroom walls often hold more systems than homeowners expect. A cabinet cavity can collide with water lines, drain vents, electrical cable, switch boxes, and low-voltage wiring.
Protect plumbing routes and vent stacks
The wall behind a vanity is a common plumbing location. Hot and cold supply lines may rise to the faucet, while a drain and vent can run through the same stud bay. Moving those components can affect the vanity, the shower, and fixtures on the other side of the wall.
First, review the plumbing drawing with the cabinet centered over the chosen vanity. Next, confirm which stud bays are free. If a vent stack occupies the desired location, selecting a narrower cabinet or a different cabinet style may be the sensible answer.
Relocating plumbing requires a qualified plumber. It can involve permits, inspections, venting rules, and access concerns that do not show up in a simple wall sketch. Homeowners planning new construction can also review Southwest Florida plumbing rough-in costs before late layout changes raise the budget.
Keep electrical work out of the cabinet cavity
Vanity lighting, receptacles, switches, and exhaust-fan wiring all compete for wall space. The electrician needs the final cabinet location before placing boxes and pulling cable.
Do not move wiring yourself to create room for a cabinet. Electrical work needs a licensed professional who can route and protect the wiring properly. The same rule applies to adding a powered cabinet, which can require a dedicated electrical plan.
Nail plates protect wiring or pipes where they pass close to the face of a stud. However, a nail plate does not make it acceptable to crowd a cabinet against a system that needs service space or proper support.
Frame the Opening in the Right Sequence
Once the cabinet model and wall conditions are confirmed, the framing process becomes direct. Careful layout keeps the opening square and puts the cabinet at the right finished height.
Mark finished heights, not just framing marks
Start with the finished floor elevation. Then mark the vanity height, countertop thickness, backsplash height, faucet clearance, and intended cabinet bottom. Tile thickness can change the visual relationship between the mirror and vanity, so include it in the calculation.
Set the cabinet based on the manufacturer instructions and the household using the bathroom. A taller cabinet may need a higher placement to maintain faucet clearance. In a shared bath, check that the mirror works for different users before framing begins.
Build a square, supported opening
Follow this sequence after the wall layout and trade routes are approved:
- Confirm the exact rough opening width, height, depth, mounting method, and cabinet orientation in the manufacturer guide.
- Mark the opening location on the studs using finished-floor reference marks. Check that the planned cabinet aligns with the vanity centerline.
- Add the required header, sill, and side framing or blocking. Keep the opening square by measuring diagonally from corner to corner.
- Recheck the clear opening after framing. Measure width at the top, middle, and bottom, then measure height at both sides.
- Photograph the wall before insulation and drywall. Include the framing, plumbing, wiring, and cabinet opening in the photos.
A cabinet box can hide small visual differences, but it cannot correct a twisted or undersized opening. If drywall is already installed, do not start cutting until a contractor confirms what sits behind it.
Bonita Springs Remodels Need Early Trade Coordination
New construction offers the cleanest opportunity to plan a recessed medicine cabinet. The designer, framer, plumber, electrician, and drywall crew can work from one approved location before materials arrive.
Existing bathrooms need more investigation
A remodel often begins with unknowns behind finished walls. A stud finder can help locate framing, yet it cannot confirm every pipe, cable, vent, or backing detail. Opening a small exploratory area may be necessary before committing to a recessed installation.
Older homes can contain past repairs or nonstandard framing. Therefore, treat the desired cabinet location as a proposal until the wall is exposed and inspected. A surface-mounted or semi-recessed cabinet may protect the renovation schedule when the cavity holds active systems.
Keep approvals and inspections in the project plan
Bonita Springs projects may involve local permitting and inspection requirements when structural framing, plumbing, or electrical systems change. Requirements depend on the scope and jurisdiction, so the contractor should verify the applicable process before work starts.
Late electrical changes can add cost because rough-in work happens inside the wall before finish materials go in. Reviewing electrical rough-in costs for Southwest Florida homes helps put that timing into perspective.
Clear communication between trades avoids a familiar problem: the cabinet opening is framed perfectly, but a pipe or electrical box occupies the space the next day.
A Better Wall Starts With a Verified Cabinet Plan
A recessed medicine cabinet looks simple once the mirror is installed. Its clean finish depends on decisions made much earlier, when framing and rough-in work are still visible.
Choose the exact cabinet, use its manufacturer-provided rough opening dimensions, and map the plumbing and electrical routes before framing. That preparation protects the wall, the budget, and the finished bathroom.