Bonita Springs New Custom Home Roof Truss Tie-Down Checklist
Explore Our Services
Contact Us Today!
(239) 322-9295
A roof can look complete long before its most important connections are ready for inspection. In Bonita Springs, this checklist helps keep the roof framing, wall system, and foundation working together against hurricane uplift.
Salt air, heavy rain, and coastal wind exposure add pressure to every connection. This is general educational information, not engineering approval. Verify details against the current Florida Building Code, applicable City of Bonita Springs or Lee County requirements, and approved structural plans. Confirm them with the project engineer or another licensed building professional.
Use this checklist early, before trusses arrive and before framing conceals the connectors an inspector needs to see.
Key Takeaways
- Confirm whether the property falls under City of Bonita Springs or unincorporated Lee County, then match the approved plans to the current Florida Building Code, local requirements, and site-specific wind criteria.
- Trace the continuous load path from every truss bearing point through connectors, walls, anchors, and the foundation; a hurricane tie cannot correct a missing or discontinuous connection elsewhere.
- Review truss shop drawings, mechanical routes, connector schedules, fastener requirements, and coastal corrosion protection before ordering or installing hardware.
- Follow the approved truss drawings and BCSI guidance for temporary bracing, permanent restraint, handling, storage, and any repair or modification.
- Keep connectors and supporting documents visible and organized for inspection, and obtain written direction from the engineer of record or responsible design professional when field conditions do not match the plans.
Confirm the Permit Jurisdiction and Wind Design First
Bonita Springs properties may fall under the City of Bonita Springs or unincorporated Lee County. Confirm the permitting authority for the parcel before the design team finalizes structural details. A mailing address alone doesn't settle the question.
As of August 2026, the Florida Building Code 8th Edition (2023) remains in effect. The 9th Edition is scheduled for December 31, 2026. For building code compliance, verify the current Florida Building Code edition and local amendments tied to the permit date. Local procedures can change, so confirm them when submitting the permit.
Match every document to the approved wind criteria
Permit drawings should state site-specific design criteria, including the wind speed and exposure. They should identify the risk category or importance factor, enclosure classification, and internal pressure assumptions. Include component-and-cladding pressures where required, plus the roof live load and seismic design category where applicable.
Confirm whether snow load calculations apply to the project. Don't import assumptions from another region.
Roof pitch and slope can affect design review, so verify that the geometry shown on the permit drawings matches the truss documents.
Lee County guidance includes example design-pressure tables for 150, 160, and 170 mph conditions, plus Exposure B and Exposure D. These examples are for reference only, not connector selections for a particular home.
The engineer of record must establish the actual wind speed, exposure, enclosure classification, and internal pressure assumptions. The engineer must also establish component-and-cladding pressures and any applicable load criteria for the home.
FEMA coastal construction guidance may offer supplemental background, but it doesn't replace the Florida Building Code or engineered plans.
Use this pre-order check:
- Confirm whether the lot is under City of Bonita Springs or Lee County review.
- Compare the package's roof truss design with the signed and sealed structural plans.
- Verify the wind-borne debris region requirements that apply to the site.
- Review local amendments and active permit comments before ordering connectors.
- Keep revised drawings, truss layouts, and product approvals together at the job site.
For broader planning issues that affect roof shape, openings, elevation, and permitting, review these Southwest Florida hurricane building codes.
Build a Continuous Load Path to the Foundation
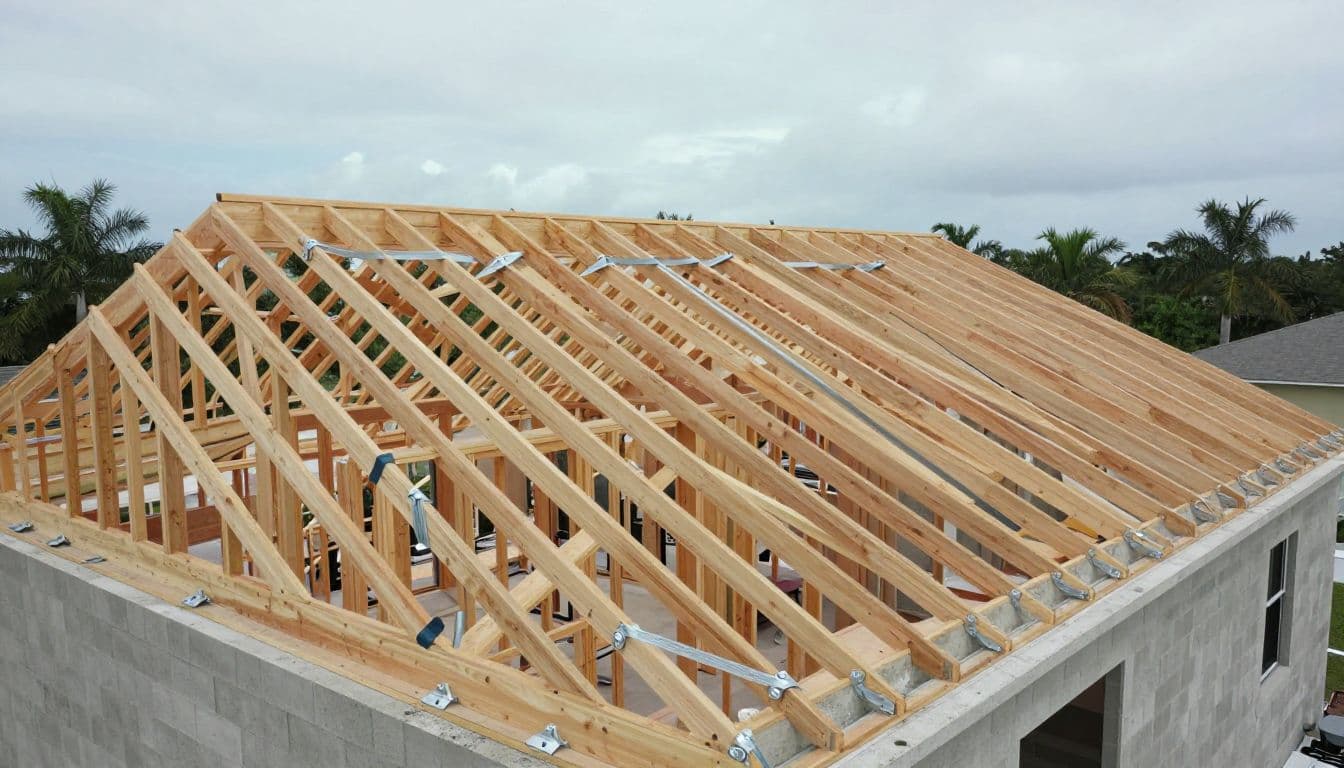
Wind doesn't stop at the roof edge. It pushes, pulls, and lifts across the roof assembly, transferring forces through sheathing, trusses, connectors, walls, anchors, and the foundation.
A hurricane tie is only one link in that chain. A rated truss-to-wall connector cannot compensate for a missing wall hold-down, an unapproved anchor detail, or discontinuous framing. The load-path review should also include permanent bracing shown on the approved plans.
Trace the load path at each bearing point
Follow each connection downward from every truss bearing location identified in the plans. Include exterior walls, interior bearing walls, girder truss supports, porch transitions, and roof-to-wall elevation changes.
For a concrete block home, the connection may continue through a bond beam, embedded anchor, strap, or other support shown in the approved structural details. In wood-frame sections, it may run through studs, headers, posts, and hold-down hardware shown in those details; these are general conditions, not blanket connector approvals.
A roof system can pass a visual check and still have a broken load path hidden below the truss bearing.
Compare each support condition with the engineer-approved detail, especially at girder trusses, interior bearing walls, porch transitions, and changes in roof elevation. Check that the connector schedule identifies the correct support condition.
Don't assume hardware approved for a wood top plate applies to a masonry wall, a built-up beam, or a different truss reaction. If the schedule and field condition don't agree, get clarification from the engineer of record or a licensed building professional.
Review Truss Shop Drawings Before Delivery
Truss shop drawings are part of the structural conversation, not a delivery receipt. The City of Bonita Springs residential permitting procedures call for an engineered truss layout when trusses are used. Compare the roof truss design with the architectural and structural sheets before fabrication.
The truss designer works from supplied criteria, while the building designer remains responsible for the building's overall structural design and permanent bracing information. Confirm the shop package uses the criteria identified in the approved structural documents, including the roof live load and seismic design category where applicable. Coordinate timber versus steel trusses through project-specific engineering, without assuming either system fits every project. Any revision, repair, or field conflict affecting the roof truss design requires written direction from the responsible truss design professional before installation.
Verify the manufacturer or supplier documentation identified in the actual project package, and cite a structural wood corporation only when it is the genuinely applicable named source.
Before release, have the builder compare itemized truss quotes for scope, quantities, truss types, revisions, and included engineering documents. A quote supports procurement review, not structural approval.
Coordinate mechanical routes before approval
Plumbing vents, HVAC ducts, recessed fixtures, solar equipment, electrical runs, and mechanical and plumbing chases can collide with truss webs. Solve those conflicts during the shop-drawing review. A redesigned truss or planned chase is safer than an improvised field change.
Coordinate timber versus steel trusses through project-specific engineering, without assuming either system fits every project.
BCSI guidance is clear: never cut, alter, or drill a structural truss member unless the truss design drawing permits it. That rule also applies to notching, moving a web, or disturbing a metal connector plate.
Review these items with the builder, truss supplier, and design team:
- Match truss labels, span directions, bearing points, and on-center spacing to the approved layout.
- Confirm girder trusses and concentrated reactions have the designed support below.
- Locate attic access, ducts, vents, and plumbing chases before releasing trusses for production.
- Request written repair or modification details from the responsible truss design professional for damaged trusses or site conflicts.
- Verify raised heel trusses where the plans call for adequate eave ventilation and insulation space.
Raised heels can preserve room for insulation above exterior walls while allowing airflow at the eaves. Rafter vents and baffles may be part of that assembly, but their placement and all eave details must follow the approved design, not a field estimate.
Inspect Hardware, Fasteners, and Coastal Corrosion Protection
A connector's published capacity depends on using it exactly as designed. The model, metal thickness, fastener type and count, orientation, wood species, support condition, and installation location all affect performance.
Bonita Springs brings added exposure to salt air and moisture. Review hardware finishes and fasteners for site conditions and compatibility with the materials they contact. Avoid mixing metals or using fasteners contrary to the connector manufacturer's instructions.
Review straps, clips, anchors, and related hardware as a coordinated system of uplift resistance connectors.
Verify every connector against the schedule
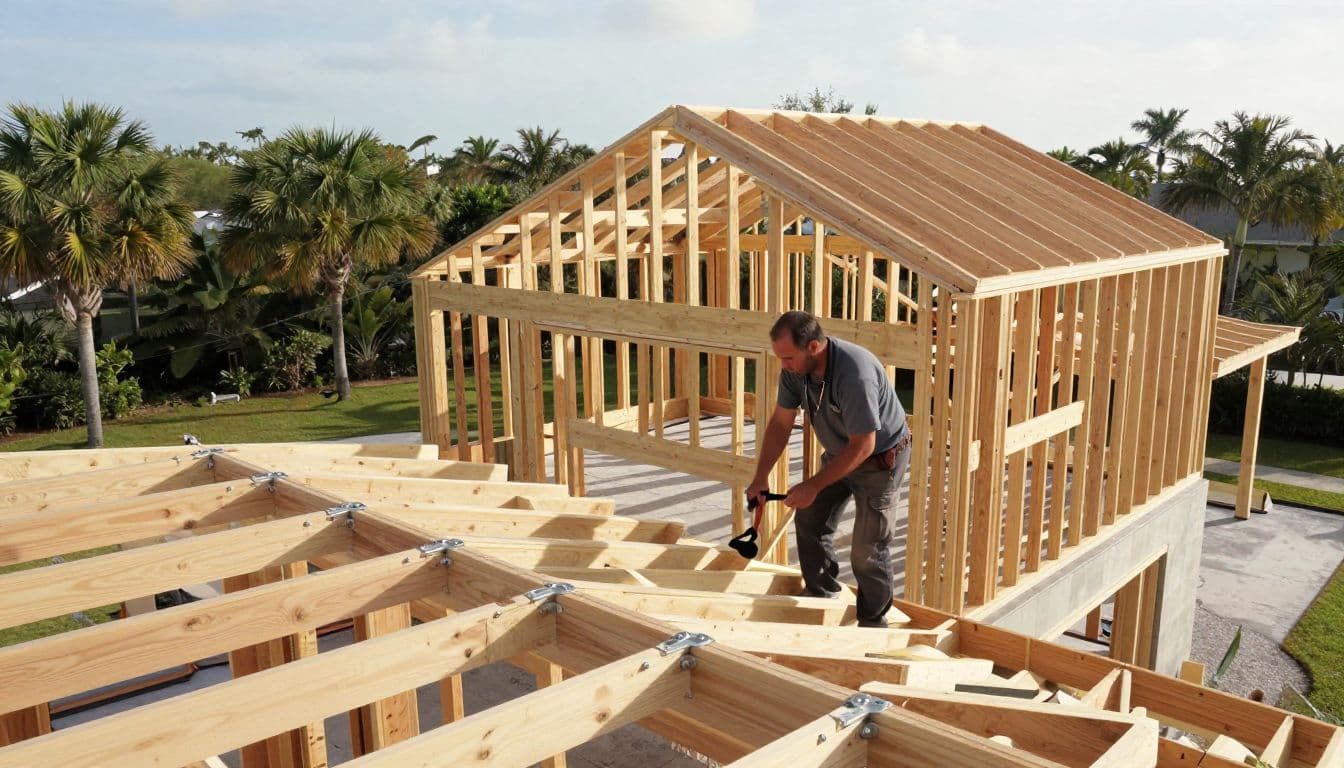
The approved structural plans, connector schedule, and truss drawings should agree. If they don't, pause the work and seek clarification from the project engineer, engineer of record, manufacturer, or licensed building professional.
Use this field review:
- Check the connector model at each required truss-to-wall location against the approved structural plans, connector schedule, and truss drawings.
- For hurricane tie connections, confirm the intended orientation and full bearing on the required framing.
- Verify the required fastener type and count against the approved detail and manufacturer instructions.
- Treat roofing nails, common nails, screws, and straps as noninterchangeable substitutions.
- Check that straps, anchors, and connectors are free of damage, bending, heavy corrosion, and paint contamination.
- Keep required hardware visible during inspection preparation, consistent with project and jurisdiction guidance.
A missing fastener can change the designed connection. A field-bent strap may also perform differently than intended. Pause work and refer any discrepancy to the appropriate project professional before continuing.
Install Temporary and Permanent Truss Bracing
Trusses can be unstable during installation, even when each unit is correctly manufactured. The Structural Building Components Association's BCSI materials distinguish temporary erection bracing from permanent bracing in the completed roof system.
Temporary bracing supports the work during placement. Roof sheathing may contribute to permanent restraint where the design allows, but it doesn't automatically replace every required brace.
Follow BCSI and the truss design drawings
For current erection, restraint, and bracing guidance, consult the BCSI bracing booklet. The approved truss drawings and building designer's bracing requirements control each project, not the booklet alone.
The ANSI TPI standards framework includes ANSI/TPI 1-2022, the National Design Standard for Metal Plate Connected Wood Truss Construction. Follow the edition identified in the project documents.
BCSI-B3 addresses top-chord, bottom-chord, and web-plane restraint. The approved truss design drawings and building plans specify the required members, locations, diagonal bracing, and restraint details. Long runs of lateral restraint may require diagonal bracing or another approved system to prevent out-of-plane buckling.
Before loading roof materials or allowing trades onto the framing, verify that:
- Temporary bracing is installed during erection and remains until the structure is stable.
- Permanent bracing, lateral restraint, and diagonal bracing follow the approved truss design drawings and building plans.
- Truss spacing stays consistent with the layout.
- Web bracing is present where the truss drawings require it.
- No crew removes bracing to make room for ductwork, storage, or access without written direction from the responsible design professional.
- The roof live load shown in approved documents doesn't automatically authorize material storage, worker loading, or staging beyond the engineer's direction.
Protect Trusses During Delivery and Storage
Damage can begin during truss delivery and storage, before the first truss is set. Poor access, standing water, scattered materials, or no staging plan can lead to broken members and bent plates.
Follow BCSI handling guidance and the truss supplier's instructions for unloading, storage, lifting, erection, restraint, and bracing. Plan the crane or forklift route before delivery so trusses aren't dragged, twisted, or moved repeatedly.
Keep trusses dry, supported, and identifiable
Store trusses on stable, level supports that keep them out of mud and pooled water. Cover them to limit weather exposure while allowing ventilation. Tight covers can trap humid air and create another moisture problem.
Inspect the bundle after delivery and before installation. Look for cracked lumber, split chords, damaged plates, warping, missing tags, or discrepancies from the approved truss layout. Set questionable pieces aside and contact the truss supplier or design professional for written direction.
Never repair a damaged truss with a site-made scab, added plate, or extra lumber unless the truss design professional or supplier provides written direction.
Prepare for the Roof Framing Inspection
A roof framing inspection goes more smoothly when the work is open, organized, and consistent with the approved documents. Don't bury connectors behind soffit framing, insulation, or finishes before the required inspection.
The roof truss tie-down checklist should be reviewed one more time after truss installation, permanent bracing, and connector work are complete. A superintendent's final walk-through can serve as a practical rough framing checklist, supplementing, but not replacing, the jurisdiction's required inspection process. It often catches missing fasteners and mismatched hardware before they become expensive rework.
Bring the approved plans, truss layout, engineering sheets, connector information, and any approved repair letters to the site. Keep labels visible when practical. Photos can document concealed work, but they don't replace a required inspection. Any structural shearwall inspection or related wall-bracing review must be confirmed with the applicable City of Bonita Springs or Lee County authority and checked against the approved structural plans.
If an inspector raises a concern, pause work in the affected area. Get written clarification from the engineer of record, truss supplier, or licensed building professional. Complete the correction and coordinate any reinspection through the proper jurisdiction. Verify the applicable requirements against current Lee County or Bonita Springs procedures. Anyone accessing open framing should follow applicable fall protection guidelines.
Frequently Asked Questions
When should the roof truss tie-down checklist be reviewed?
Review it before trusses arrive, during installation, and again after permanent bracing and connector work are complete. Early review helps resolve design and material conflicts before framing conceals required connections.
Does a hurricane tie create a complete roof load path?
No. A hurricane tie is only one part of the load path from the roof to the foundation. The review must also include trusses, walls, anchors, hold-downs, bearing supports, and foundation connections shown in the approved plans.
Can damaged trusses be repaired in the field?
Do not repair a damaged truss with a site-made scab, added plate, or extra lumber without written direction. Contact the truss supplier or responsible truss design professional for an approved repair or replacement detail.
Can roofing nails or common nails replace the specified connector fasteners?
No. Roofing nails, common nails, screws, and straps are not interchangeable substitutions. Use the fastener type, quantity, orientation, and installation method specified by the approved detail and connector manufacturer.
What should be available for the roof framing inspection?
Keep the approved structural plans, truss layout, engineering documents, connector information, and approved repair letters at the site. Keep required hardware visible when practical, and coordinate any corrections or reinspection with the applicable jurisdiction.
A Strong Roof Starts With Verified Connections
Bonita Springs homes need roof systems designed for their exact site, not a one-size-fits-all strap pattern. The approved roof truss design must align with the permit wind criteria and structural plans.
The completed roof system must reflect the loads and criteria established for the actual project, including the roof live load. A careful roof truss tie-down checklist confirms the plans, hardware, permanent bracing, and connectors before concealment.
Final decisions must be checked against the current Florida Building Code and applicable Lee County or City of Bonita Springs requirements. Confirm them against approved structural plans, manufacturer instructions, and the project engineer or licensed building professional.