Fort Myers Kitchen Remodel: Set Up Before Demolition
Explore Our Services
Contact Us Today!
(239) 322-9295
A Fort Myers kitchen remodel can make daily life uncomfortable before the first cabinet comes out. Once the sink, refrigerator, and cooking area are unavailable, simple tasks can become frustrating quickly.
A temporary kitchen gives your household a clean place to prepare meals, store food, wash dishes, and charge small appliances. Set it up before demolition begins, then protect it from dust, moisture, children, pets, and construction traffic.
How to Prepare for a Fort Myers Kitchen Remodel
The temporary kitchen should be ready before workers disconnect the existing appliances. Choose the location first, then test the outlets, check water access, and move the food and equipment you plan to use.
Your setup doesn't need to look like a full kitchen. It needs to support the routines your household can't skip, including breakfast, school lunches, coffee, medication storage, and dinner.
Choose the location around water and refrigeration
A good location has a nearby sink and a safe electrical outlet. Common choices include a laundry room, dining area, pantry, enclosed lanai, or clean section of the garage.
Keep the refrigerator close enough to reach without crossing the demolition zone. If you place the temporary kitchen in the garage, remember that Southwest Florida heat and humidity can affect food, medicine, chocolate, and other temperature-sensitive items.
A laundry room often works well because it may provide water, drainage, and a durable floor. However, keep appliances away from washing machine hoses, standing water, and areas where condensation can collect.
Set up before the work area closes
Move the temporary supplies before the contractor seals the kitchen entrance. During a Fort Myers kitchen remodel, the work zone may become inaccessible during demolition or rough-in work.
Place frequently used items at waist height. Store backup supplies in sealed bins nearby, but leave a clear walkway. Test every appliance before the kitchen shuts down, especially the refrigerator, microwave, coffee maker, and induction burner.
Select a Temporary Kitchen Location That Works
The best location depends on your floor plan, household size, and project scope. A small kitchen may work beside the dining room, while a larger family may need a dedicated garage or laundry-room setup.
Use this quick comparison before you move equipment.
| Location | Main advantage | Watch for |
|---|---|---|
| Laundry room | Nearby water and drainage | Moisture, hoses, and limited counter space |
| Dining area | Easy indoor access | Floor protection, dust, and family traffic |
| Garage | More room for storage | Heat, humidity, pests, and long walks to water |
| Enclosed lanai | Extra separation from construction | Outdoor temperatures and weather exposure |
| Pantry or butler's area | Convenient food storage | Limited ventilation and electrical capacity |
The temporary kitchen should stay outside the contractor's path. Don't place it beside a doorway workers will use to carry cabinets, drywall, flooring, or debris.
Create separate zones
Give the setup four simple zones: food storage, food preparation, cooking, and cleanup. Even a folding table can provide enough counter space when each item has a set location.
Keep knives and sharp utensils in a closed container. Store paper goods and dry food in plastic bins with lids, especially in a garage or lanai where insects and moisture are more likely.
Leave room around hot appliances. A microwave, toaster oven, or induction burner should sit on a stable, heat-resistant surface with ventilation around the sides. Keep curtains, towels, cardboard, and plastic storage bins away from heat.
Gather the Essentials for Cooking and Cleanup
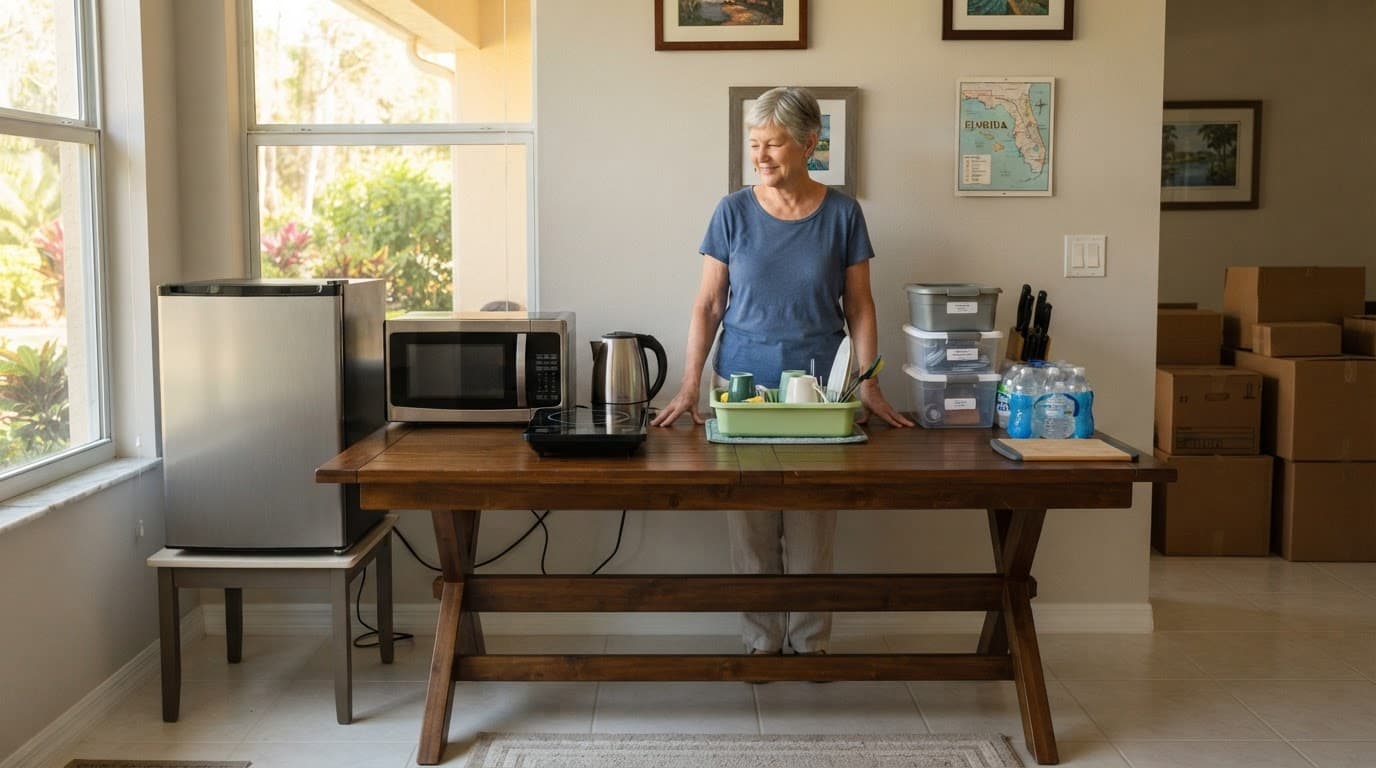
A temporary kitchen works best when you pack for your actual habits. If your household drinks coffee every morning, prioritize the coffee maker. If you rely on packed lunches, leave room for containers, cold storage, and easy cleanup.
Start with the equipment you will use most often:
- A compact refrigerator or a clean full-size refrigerator provides dependable cold storage.
- A countertop microwave handles reheating, oatmeal, vegetables, and frozen meals.
- An electric kettle helps with coffee, tea, instant oatmeal, and hot water.
- A single induction burner supports stovetop meals without an open flame.
- A toaster oven can replace an oven for smaller meals, if the outlet and counter space support it.
- A cutting board, chef's knife, can opener, measuring cup, and two or three cooking utensils cover basic preparation.
- A dish tub, dish soap, drying mat, paper towels, and disinfecting wipes simplify cleanup.
Don't run several high-wattage appliances from one power strip. Use a properly grounded outlet, keep cords away from walkways, and ask a qualified electrician to review the setup if the outlet location or circuit capacity is uncertain.
Keep the dish collection small
Use only the plates, bowls, cups, mugs, and utensils your household needs for a few days. A smaller collection reduces washing and keeps the temporary kitchen orderly.
Store the remaining kitchenware in sealed containers outside the construction area. Wrap fragile items individually, label the containers, and place them where workers won't need to move them.
Disposable plates can reduce cleanup during the messiest demolition days. Reusable dishes create less waste over a longer project, so many households use both options based on the daily work schedule.
Build a practical food shelf
Choose food that stores safely and requires little preparation. Shelf-stable staples can include rice cups, pasta, canned soup, nut butter, cereal, crackers, tortillas, and boxed meals.
Keep snacks and dry goods in sealed containers. A garage pantry can attract pests if packages remain open, while heat can damage some foods. Store medication and temperature-sensitive products inside the climate-controlled part of the home.
Plan meals around the equipment you have. Microwave rice with pre-cooked chicken and vegetables takes little cleanup, while sandwiches, salads, rotisserie chicken, and slow-cooker meals can reduce demand for the temporary burner.
Maintain Access to Water and Refrigeration
Water and cold storage are the two services that make a temporary kitchen practical. Before demolition, ask your contractor when the kitchen supply lines will be shut off and how long the interruption should last.
Don't disconnect plumbing or reroute water lines yourself. A temporary connection can leak behind cabinets, damage flooring, or create a sanitation problem.
Make a water plan
If the laundry sink is available, keep a dish tub and cleaning supplies nearby. Wash dishes at the sink rather than in a bathtub, where food residue and grease can create another cleaning issue.
When the water supply must be off, keep drinking water in sealed containers and use hand sanitizer for short periods. Ask your contractor whether the bathroom or laundry water will remain active, and plan around any scheduled shutoff.
Keep water containers on a stable surface away from electrical appliances. A leaking jug can reach cords or outlets before anyone notices.
Protect refrigerator access
Keep at least one refrigerator available throughout the remodel. If the existing refrigerator must move, measure doorways first and place it on a level surface with space for ventilation.
Don't put a refrigerator inside the sealed demolition zone. Dust can enter vents and coils, and workers may need to move it again. The appliance should also have a dedicated, safe power source that doesn't depend on a crowded extension cord.
Use a cooler only as a short-term backup. In Fort Myers heat, food warms quickly, so replace ice often and discard perishables that haven't stayed cold.
Contain Dust and Protect Nearby Rooms
Kitchen demolition creates fine dust, sharp fragments, and heavy debris. Proper protection starts before the first cabinet or countertop is removed.
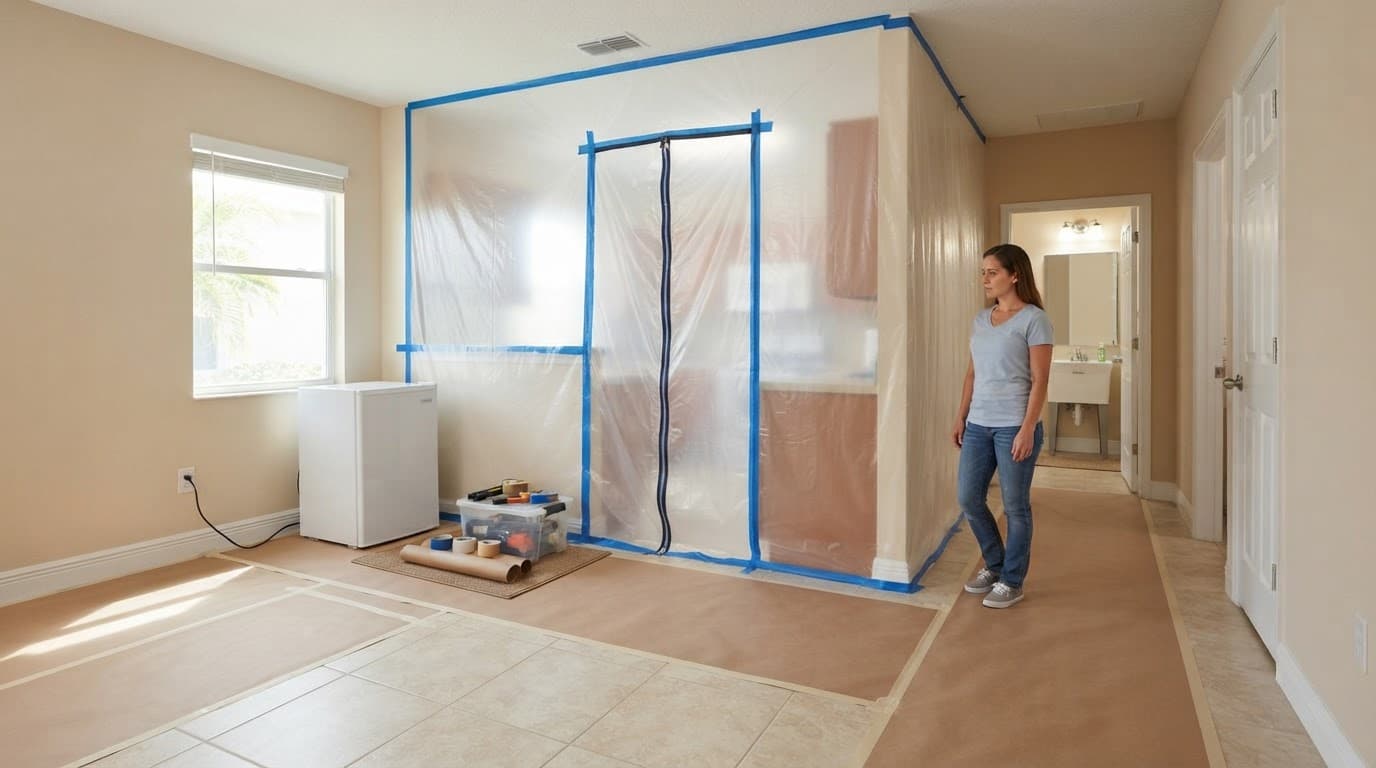
Ask the remodeling team how they plan to separate the kitchen from living areas. Their plan may include plastic barriers, zipper access, floor covering, and a designated path for carrying debris outside.
Protect floors and nearby rooms
Use heavy floor protection along the path between the kitchen and the exterior door. Protective paper or plastic can help, but it must stay flat and secure so it doesn't become a tripping hazard.
Cover flooring in the temporary kitchen if workers will pass through that area. Move rugs, artwork, lamps, and decorative items away from the route. Fine dust can settle far beyond the demolition space, especially when doors open and close repeatedly.
Close doors to bedrooms and other rooms when possible. Protect nearby furniture with proper coverings, but don't cover electrical equipment in a way that traps heat.
HVAC systems can spread airborne dust through the home. Ask the contractor whether vents need protection or whether an air scrubber should run during demolition. Don't block return-air grilles or shut down the system without professional guidance.
Keep debris out of the temporary kitchen
Set a boundary that separates construction traffic from food preparation. Workers should never carry debris over an open food container, clean dish, or exposed appliance.
Store food in lidded containers and cover appliances when they aren't in use. Clean counters with a damp cloth instead of dry dusting, which can push particles into the air.
Place trash and demolition debris in the contractor's designated container. Don't allow loose nails, broken tile, or wood scraps to collect near the temporary kitchen, even for a few hours.
Protect Children, Pets, and Daily Routines
A temporary kitchen adds unfamiliar heat sources, cords, sharp tools, and construction noise to the home. Children and pets need a clear boundary around both the kitchen setup and the demolition area.
Use a child gate or closed door to limit access. Keep portable burners, knives, cleaning products, and matches in locked storage. Place cords against a wall and secure them so nobody can pull an appliance from the counter.
Pets may react to loud demolition, open doors, and unfamiliar workers. Keep them in a quiet room away from the work path, or arrange care outside the home on demolition days. Confirm that gates and exterior doors remain closed before workers begin carrying materials.
Plan meals around the work schedule
Prepare a few meals before demolition starts and freeze them if you have safe freezer space. Then plan meals that require one appliance and little cleanup.
Breakfast can rely on cereal, fruit, yogurt, oatmeal, or toast. Lunches may include wraps, cold chicken, prepared salads, and leftovers. For dinner, rotate microwave meals, sandwiches, slow-cooker recipes, and simple skillet dishes.
Use a cooler bag for school or work lunches, but don't leave it in a hot vehicle. Keep a short grocery list and shop more often rather than storing a large amount of food in a temporary space.
Use This Pre-Demolition Checklist
Complete these steps before the existing kitchen becomes unavailable:
- Choose a temporary kitchen location outside the demolition and material-carrying path.
- Confirm access to a sink, drinking water, refrigeration, and safe electrical outlets.
- Test each appliance in its planned location before the remodel begins.
- Move dishes, cookware, food, medication, and fragile items out of the kitchen.
- Store backup supplies in sealed, labeled containers.
- Set up floor protection between the kitchen, temporary setup, and exterior exit.
- Ask how the contractor will install dust barriers and protect HVAC openings.
- Create a child and pet boundary around the temporary kitchen and work zone.
- Prepare several low-cleanup meals and a grocery plan for the first week.
- Confirm the dates for water shutoffs, appliance removal, demolition, inspections, and major deliveries.
A written project plan helps prevent last-minute changes. Your contractor should explain which areas will lose access and when each service will return. For related planning guidance, review these steps for a successful home remodel.
Leave technical work to qualified professionals
Electrical, plumbing, gas, and structural work require qualified professionals. That includes moving outlets, adding circuits, disconnecting gas appliances, changing water lines, removing walls, and opening areas that may contain hidden wiring or pipes.
Homeowners can usually organize storage and meals, but demolition decisions should follow the contractor's plan. Ask who handles utility shutoffs, permit requirements, inspections, debris removal, and temporary protection.
If your plans include a new island, relocated sink, gas range, or wall changes, confirm the scope before demolition starts. Changes after rough-in work may require revised plans, additional labor, or new inspections.
Conclusion
A successful Fort Myers kitchen remodel begins with a temporary kitchen that protects your household's basic routines. Choose a safe location, keep water and refrigeration available, store food securely, and separate daily life from dust and construction traffic.
The setup doesn't need to be elaborate. It needs reliable appliances, clear paths, protected floors, sensible meal planning, and firm boundaries for children and pets. When qualified professionals handle the electrical, plumbing, gas, and structural work, your temporary kitchen can carry your household through demolition with fewer disruptions.