Punta Gorda Pool Equipment Pad Planning for Easy Maintenance
Explore Our Services
Contact Us Today!
(239) 322-9295
Poor equipment layout can turn a beautiful pool into a weekly maintenance headache. A well-planned pool equipment pad gives you room to inspect components, clean filters, adjust valves, and handle repairs without dismantling landscaping or deck sections.
Punta Gorda homeowners also need to account for intense sun, heavy rain, humidity, salt air, and storm exposure. Good planning protects expensive equipment while keeping service access practical. Start with the pad location, then build the layout around drainage, airflow, plumbing, electrical work, and future replacement needs.
Plan the pool equipment pad before excavation
The equipment area should appear on the pool plan before excavation begins. Gunite pools offer flexible shapes, but the pool, deck, screened enclosure, house, property lines, easements, and utility routes still compete for space.
Place the pad close enough to the pool to keep plumbing runs practical, but avoid positioning it directly beside a bedroom, outdoor seating area, or screened porch. Pumps and heaters produce sound, vibration, and heat. A location that looks convenient on a drawing may feel disruptive once the system operates every day.
Leave a clear service path
A technician should be able to reach every component without stepping over pipes or squeezing between a wall and the equipment. Use about 3 feet of open working space as a planning target, then follow the greater clearance required by each manufacturer.
The pad should also have a practical route from the driveway or gate. Filters, heaters, and pumps eventually need service or replacement. If a large component cannot leave the backyard without removing a fence panel or cutting through finished construction, future labor costs can rise.
Keep the area separate from landscaping
Plants can soften the appearance of the pad, but roots, falling leaves, and irrigation spray create maintenance problems. Keep shrubs away from control panels, air intakes, heater exhaust, and removable equipment covers.
Avoid roof valleys and downspouts that dump water near the slab. Also check where the pool deck, cage posts, outdoor kitchen, and future additions may go. The equipment pad should remain accessible after the entire backyard project is complete.
Size the pool equipment pad around real service needs
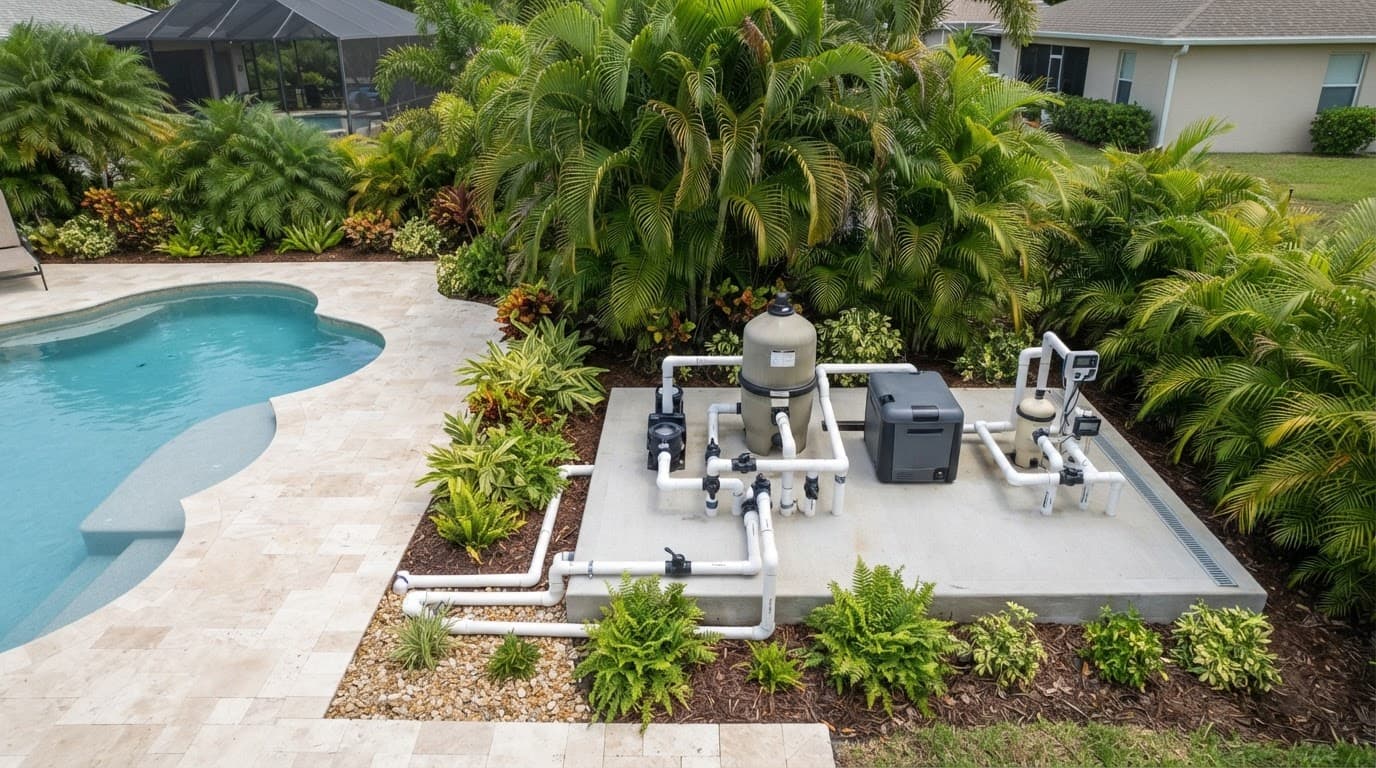
The slab should fit the equipment footprint plus the space needed to open, remove, and replace each part. A tight arrangement may save a small amount of concrete today, but it can add hours to future repairs.
A typical system may include the following equipment:
| Equipment | Space to plan for |
|---|---|
| Variable-speed pump | Basket access, lid removal, plumbing unions, and control access |
| Filter | Tank or cartridge removal, pressure gauge viewing, and drain access |
| Heater or heat pump | Manufacturer clearances, airflow, and service panels |
| Salt chlorine system | Cell removal, control access, and inspection space |
| Automation panel | Dry access, readable controls, and electrical service space |
The final layout depends on the selected equipment. Your pool contractor should draw actual product dimensions and manufacturer clearances into the plan instead of using a generic rectangle.
Put the largest service points first
Start with the filter and heater because they often need the most clearance. A filter cartridge may need to come straight out of the tank, while a heater technician may need to remove side panels.
Next, position the pump, salt cell, valves, and automation controls around those access points. Keep plumbing organized, but don't create a maze of rigid pipe that blocks a service panel.
Reserve room for future changes
Homeowners often add a heater, salt system, automation equipment, water feature, or booster pump after the pool is finished. Leaving a small expansion area can prevent an expensive pad extension later.
A future heat pump also needs clear airflow and electrical planning. Ask your contractor to show where a new component could go, even if you won't install it during the initial project.
Create drainage that handles Punta Gorda rain
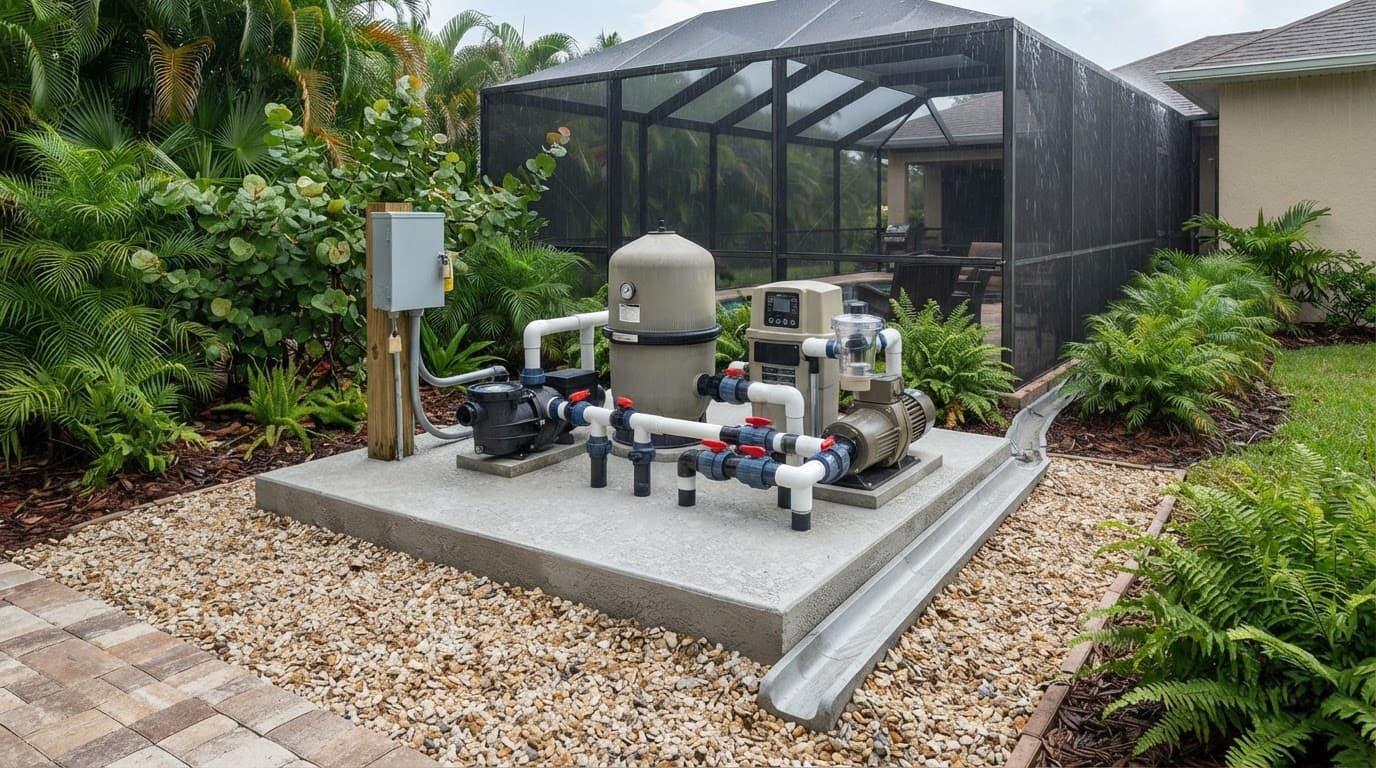
Southwest Florida rain can overwhelm a flat backyard quickly. Water that sits around the equipment base can reach motors, corrode fasteners, damage electrical components, and wash soil away from plumbing.
The pad should sit on a stable, level base with surrounding grades that move water away. A raised concrete slab often provides a better starting point than equipment placed directly on soil or low pavers, but the slab alone won't solve poor site drainage.
Raise the base and control runoff
The finished elevation should account for existing grade, pool deck slope, roof drainage, irrigation, and expected stormwater flow. Depending on the site, the design may need a swale, drain, channel, or other approved method to move water away from the equipment.
Don't aim a downspout, deck drain, or sump discharge toward the pad. Also avoid creating a low pocket between the slab and the pool deck. Your contractor should review the entire backyard grading plan rather than treating the pad as an isolated feature.
Plan waste and backwash discharge
Some pool systems discharge water during filter cleaning or maintenance. If your design includes a backwash or waste line, decide where that water will go before the plumbing is installed.
The discharge path should not erode the yard, flood a neighboring property, or undermine the slab. Local site conditions and applicable rules may affect the approved solution, so have a licensed pool professional confirm the plumbing and drainage plan.
Separate plumbing, electrical, and heat sources
An organized pad keeps water movement easy to understand and electrical service safely away from unnecessary splash or leak exposure. It also makes troubleshooting faster when the pump loses prime, a valve fails, or the heater stops operating.
Short plumbing runs can reduce material use, but the shortest route isn't always the best route. A slightly longer layout may provide better access, cleaner valve placement, and less risk of accidental damage during service.
Use valves and unions where service requires them
Install shutoff valves where a technician can reach them without removing other components. Unions allow pumps, filters, heaters, and salt cells to come out without cutting permanent pipe.
The installer should also leave enough room to turn valve handles and read gauges. Clearly identified plumbing lines can save time when several return lines, water features, or vacuum connections share the same pad.
Coordinate electrical work with the equipment layout
A licensed electrician should handle bonding, grounding, disconnects, conduit, outlets, and other electrical requirements under the current applicable rules. The location of the panel and disconnect should match the equipment layout and remain accessible after landscaping or enclosure work.
Heaters require their own planning. Gas models need proper fuel service, combustion air, and exhaust clearances. Electric heat pumps need airflow and electrical capacity. Follow the manufacturer's installation instructions and have qualified professionals coordinate the final design.
A clean plumbing layout can still fail as a project plan if a technician can't reach the electrical disconnect or remove a heater panel.
Protect equipment from sun, humidity, salt air, and storms
Punta Gorda's outdoor conditions are hard on pool equipment. Direct sunlight heats control enclosures, humidity affects electrical connections, and salt-laden air can corrode exposed hardware, especially near the coast or canals.
The answer isn't to build a sealed box around every component. Pumps and heaters need airflow, and enclosed equipment can trap heat or exhaust. Any shade structure, screen wall, or protective cover must follow equipment clearances and ventilation requirements.
Reduce corrosion and heat exposure
A partial shade solution can reduce direct sun on control panels, but it should not block heater airflow or make the service area difficult to reach. Use exterior-rated components and corrosion-resistant fasteners suited to the installation environment.
Keep irrigation heads from spraying the pad. Avoid storing pool chemicals beside pumps, heaters, or electrical equipment. Chemical containers should remain in a dry, ventilated location that follows the product instructions.
Salt chlorine systems still require care. Salt can reduce the need for daily chemical additions, but the cell, plumbing connections, and nearby metal parts still need regular inspection.
Prepare for tropical weather
Storm planning begins with location. Don't place sensitive controls where floodwater naturally collects, and ask how the equipment base, panels, and protective structures will handle strong wind and rain.
Your contractor can identify components that may need temporary protection before a major storm. The plan may include removable panels, secure covers, accessible disconnects, and a clear procedure for shutting down equipment. Never improvise around gas, electrical, or pressurized plumbing systems during severe weather.
Make maintenance access part of the budget
Easy maintenance starts with simple daily and weekly tasks. You should be able to open the pump basket, check the filter pressure, inspect the salt cell, and reach the automation controls without moving furniture or garden tools.
Keep the area free of permanent obstacles. A decorative wall or dense hedge may look attractive at pool completion, yet it can block a service technician within a few years of growth.
Build a realistic maintenance routine
A practical pad layout should support these common tasks:
- The pump lid opens without hitting a wall, fence, or overhead obstruction.
- The filter gauge remains visible during normal operation.
- Valves can be turned without reaching behind hot equipment.
- The salt cell or chlorination equipment can be removed for inspection.
- Electrical controls stay dry and remain accessible to qualified technicians.
Leave a firm walking surface around the slab. Gravel may shift underfoot, while loose mulch can wash onto the pad during heavy rain. A properly graded hardscape surface is easier to sweep and less likely to bury low plumbing connections.
Review the plan before approving the price
Ask for a drawing that shows equipment dimensions, clearances, plumbing routes, drains, electrical locations, and the service path. Confirm who handles the slab, utility coordination, permits, inspections, and final startup.
The pad cost can include more than concrete. Budget for excavation, grading, drainage, plumbing, electrical work, heater installation, screens or shade, and future access improvements. For broader planning, review these Southwest Florida pool construction costs before choosing equipment upgrades.
Punta Gorda properties can fall under different jurisdictions and site conditions. City limits, unincorporated areas, flood zones, easements, lot lines, and utility locations may affect the final plan. A licensed contractor should verify the applicable permitting and site requirements instead of relying on a layout from another property.
Final Thoughts
A reliable pool equipment pad gives every component room to work and every technician room to work on it. In Punta Gorda, the plan also needs to move rainwater away, reduce salt-air exposure, withstand outdoor heat, and account for storm preparation.
Start with access, then confirm drainage, equipment clearances, plumbing, electrical coordination, and future replacement paths. Final structural, plumbing, electrical, setback, and permitting decisions should come from qualified licensed professionals. The best time to prevent difficult pool repairs is before the gunite shell and backyard finishes are installed.