Cape Coral Bathroom Waterproofing Checklist Before Tile
Explore Our Services
Contact Us Today!
(239) 322-9295
Tile can look finished while water is already moving behind it. A careful Cape Coral bathroom waterproofing plan protects the framing, subfloor, insulation, and rooms below before tile covers the work.
Homeowners often focus on tile color and grout first. However, the barrier beneath the tile matters more than the surface finish. Use this checklist to review permits, materials, seams, drains, cure times, and flood-test records before installation begins.
Cape Coral bathroom waterproofing starts with the right barrier
Tile, grout, and cement board can handle moisture, but they don't automatically stop water. Shower walls and floors need a continuous waterproofing system that directs water toward the drain instead of allowing it into the structure.
A water-resistant material slows moisture. A waterproof membrane or liner creates a planned barrier against water intrusion. That difference matters because showers receive repeated exposure, not occasional splashes.
Waterproof is different from water-resistant
Standard cement backer board is stable in wet areas, but many cement boards are not waterproof by themselves. They still need a compatible membrane, sheet system, or approved liquid-applied coating at the face or behind the board.
Paint, ordinary drywall, and unsealed wood aren't suitable substitutes. Even moisture-resistant drywall has limits and shouldn't replace a shower waterproofing system where the specifications call for one.
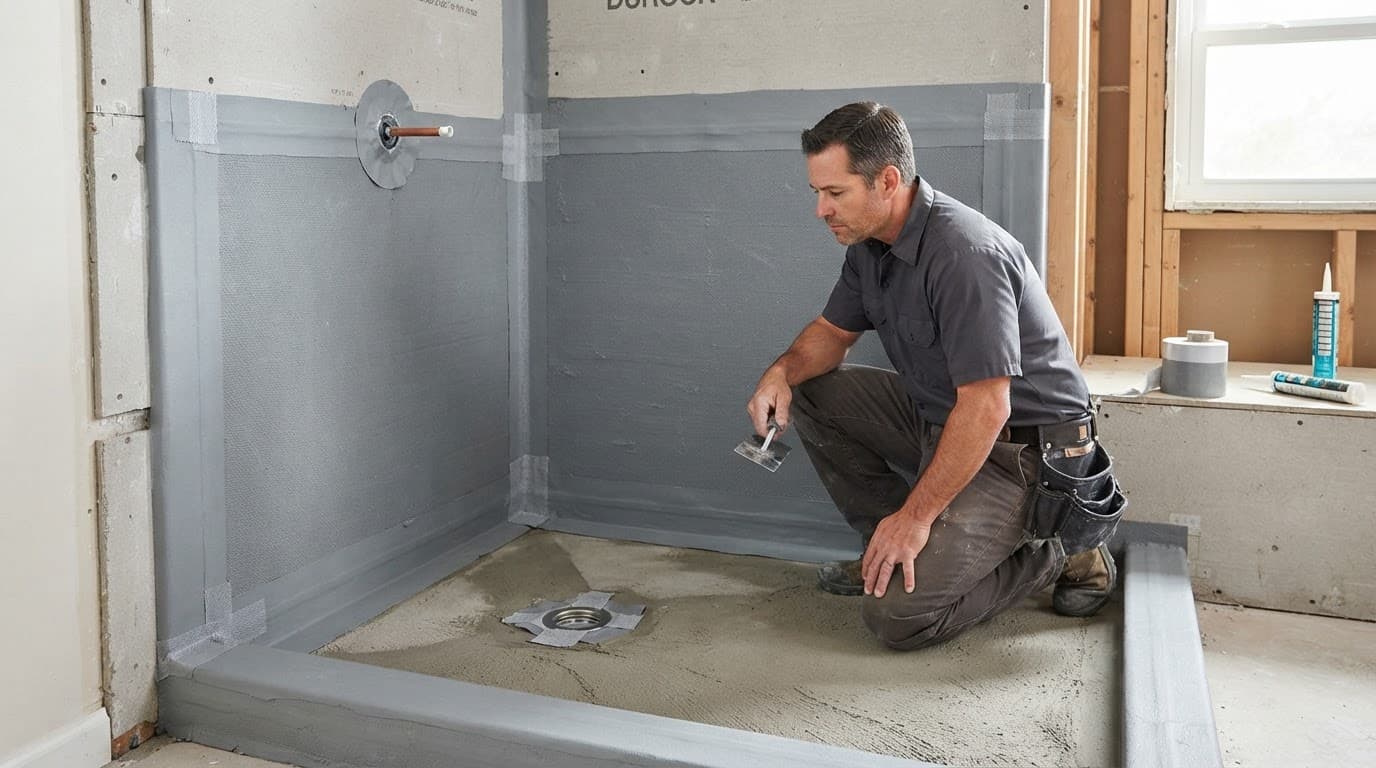
The waterproof layer must connect across the entire wet area. Gaps at corners, fasteners, benches, curbs, niches, and plumbing openings can give water a path behind the tile.
Southwest Florida conditions make details matter
Cape Coral bathrooms face high humidity, frequent air-conditioning cycles, and strong moisture exposure during daily use. Those conditions don't replace proper installation, but they make shortcuts harder to live with.
A small opening may allow moisture into framing for months before staining appears. By then, repairs can include removing tile, drywall, flooring, cabinets, or damaged wood.
Confirm permits and inspection points before work starts
Waterproofing a shower can involve plumbing, structural surfaces, and wet-area construction. Before demolition, ask which parts of the project need permits and when the inspector must see the work.
The City of Cape Coral Building Division and Permitting Services Division control local permit questions. Cape Coral's residential remodel process uses the "Residential Remodel" application through the CSS portal .
The city's HB 803 guidance also excludes shower pans, shower receptors, and wet-area waterproofing systems from its listed minor-work examples. Therefore, don't assume shower waterproofing is only a cosmetic tile update.
For a broader planning reference, review this guide to permits for bathroom renovations in Cape Coral before work begins.
Ask what the permit covers
Have the contractor identify the permit scope in writing. The scope may include plumbing relocation, shower-pan construction, wall repairs, electrical work, ventilation, or structural changes.
Also ask whether the project requires a rough plumbing inspection, waterproofing inspection, or another inspection before tile installation. Inspection timing can affect the schedule because the membrane and pan may need to remain visible.
Cape Coral currently lists 239-574-0546 for permitting and 855-636-2824 for automated inspection scheduling. Confirm current contact details and project requirements with the city before relying on older advice.
Check flood-zone information when applicable
Cape Coral directs property owners and contractors to its Forerunner Property Lookup to check whether a property is in a Special Flood Hazard Area. That check may affect broader renovation requirements, even though it doesn't replace shower waterproofing rules.
No checklist guarantees compliance with every project condition. Confirm current requirements with the appropriate local building authority or a qualified licensed contractor.
Inspect the substrate, corners, and openings
Waterproofing performs only as well as the surface beneath it. Before the membrane goes on, inspect the shower enclosure for movement, damage, contamination, and poor transitions.
Check walls and floors for movement
The shower floor should be solid, properly supported, and shaped for drainage. Wall panels should sit securely without loose sections, broken edges, or excessive flex.
The installer should remove dust, oil, loose material, and construction debris before applying a liquid membrane or bonding a sheet membrane. Some products also require a dry or dampened surface, so the product instructions control the preparation method.
Look for properly treated board joints and fastener locations. A visible gap or untreated seam can remain hidden behind tile and grout.
The floor-to-wall connection deserves close attention. The waterproofing should turn into the floor system or connect to the pan in a way that leaves no open path at the joint.
Inspect corners, niches, benches, and pipes
Inside corners need the correct fabric, band, preformed piece, sealant, or membrane detail required by the selected system. The same applies to outside corners, curbs, benches, and recessed niches.
Plumbing penetrations need compatible seals around the shower valve, shower arm, body sprays, and other openings. Fasteners should not puncture the waterproof layer without an approved seal or detail.
A homeowner should be able to ask the installer to point out every transition. If someone can't explain how water moves from a wall, bench, or curb into the drain system, the work needs another review before tile covers it.
Check the shower pan, drain, and slope
The shower pan collects water beneath the tile surface, so its construction deserves the same attention as the walls. Tile and grout should never be expected to compensate for a defective pan.
Review the pan and drain connection
Confirm that the pan matches the chosen waterproofing system. A sheet membrane, liquid-applied membrane, traditional liner, and prefabricated receptor each use different drain connections and sealing methods.
The drain must connect securely to the waterproof layer. Where the drain design includes weep holes, they must remain open so water beneath the tile can escape.
Check the drain height before tile is installed. The grate should finish at the right level for the planned tile thickness and mortar bed. A drain that sits too high or too low can leave standing water or create an awkward transition.
Verify slope and threshold details
The shower floor should slope consistently toward the drain. Many systems use a slope near 1/4 inch per foot, but the approved system instructions and project plans control the actual requirement.
Look for low spots, reverse slopes, and areas where water could sit beside the wall. A level placed across several sections can reveal uneven preparation, although the installer should use the appropriate measuring method.
The curb or curbless entry also needs a continuous waterproof connection. Door openings and thresholds receive heavy splash exposure, so the membrane should extend through those transitions rather than stop at the visible edge.
Follow the manufacturer's installation instructions
A reliable product can fail when the installer uses the wrong primer, thickness, sealant, fabric, fastener, or substrate preparation. Each waterproofing system has its own installation requirements.
Homeowners should ask for the product name, technical data sheet, and installation instructions before work starts. This information helps everyone agree on compatible components and required testing steps.
For help comparing materials, review this guide to waterproof materials for Cape Coral bathrooms.
Use one compatible system
Avoid mixing products based only on appearance or convenience. A liquid membrane from one manufacturer may not approve a random fabric, sealant, drain flange, or adhesive from another manufacturer.
Some systems require reinforcing fabric at changes of plane. Others use preformed corners or specialized pipe seals. Follow the written instructions instead of assuming every membrane installs the same way.
The installer should also apply liquid products at the specified thickness. A thin coat may look complete while failing to provide the required coverage.
Respect cure times before testing and tiling
A membrane can feel dry on the surface before it has cured through its full thickness. Cure time depends on the product, coat thickness, temperature, humidity, airflow, and substrate.
Never flood-test or tile over the system before the manufacturer allows it. Sealants, bonding agents, mortar beds, and liquid membranes may each have separate waiting periods.
In a humid bathroom, rushing the next step can trap moisture or weaken the bond. The written product instructions should control the schedule, not a general promise that the surface is "dry enough."
Complete and document the flood test
A flood test checks whether the shower receptor holds water before tile hides the pan. It should happen after the waterproofing system reaches the required cure time and before final tile installation.
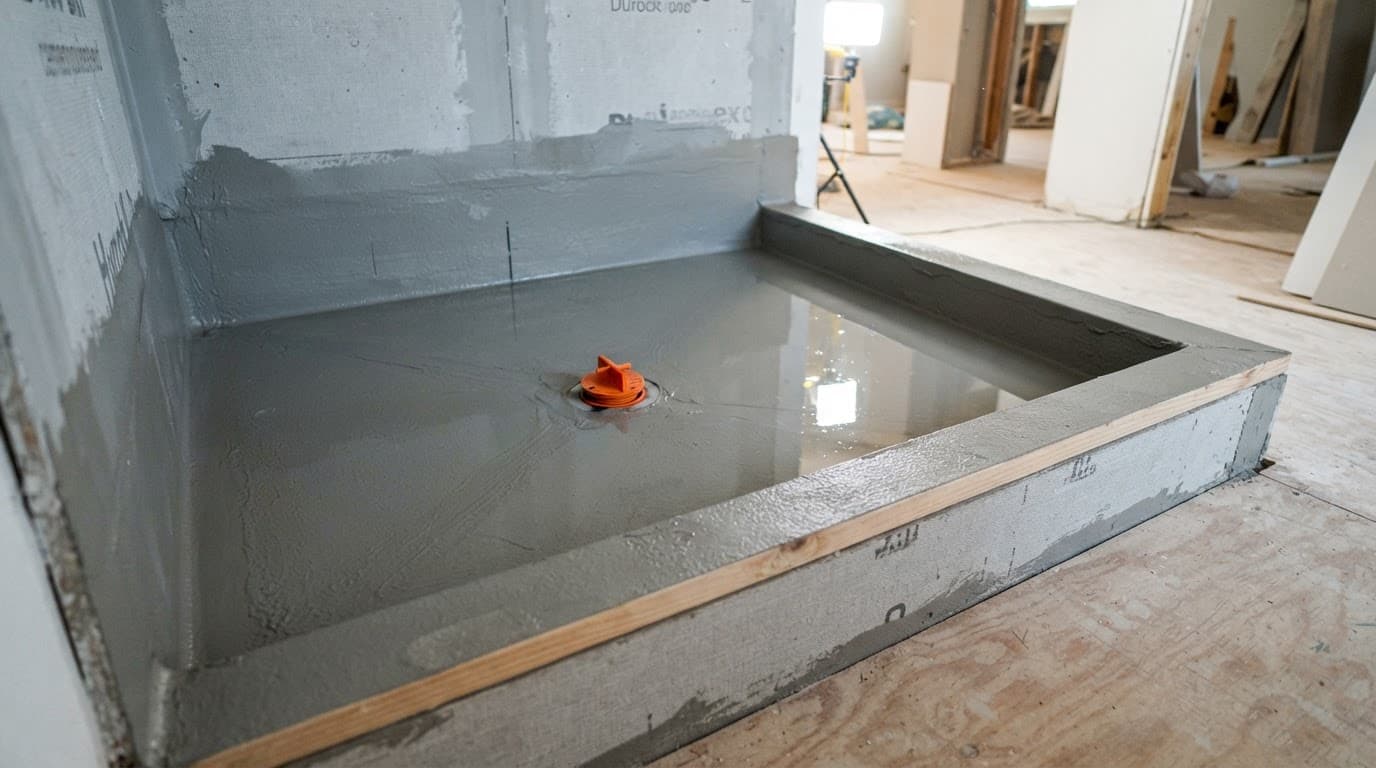
The 2023 Florida Building Code, Plumbing, includes shower-receptor testing language that calls for plugging the shower drain pipe watertight, filling the floor or receptor with potable water to at least 2 inches at the threshold, and retaining the water for at least 15 minutes with no evidence of leakage.
Confirm the current code edition, permit conditions, and inspection requirements with Cape Coral officials or your licensed contractor. A particular membrane manufacturer or approved plan may require additional testing or a longer test period.
Follow an orderly test process
- Wait until the membrane, sealants, mortar, and other materials meet their stated cure requirements.
- Plug the drain with a test plug that seals the pipe below the receptor connection. A loose surface cover doesn't test the actual drain assembly.
- Fill the shower receptor with potable water to the required depth. Keep water away from unprotected wall areas outside the intended test zone.
- Mark the starting waterline or photograph it with the test date and time. This creates a clear record of the test conditions.
- Retain the water for the required period. Don't drain the pan early because the surface appears stable.
- Inspect nearby floors, ceilings, walls, and accessible framing for moisture. Look for a falling water level as well as visible leakage.
- Drain the receptor only after the test is complete. If the level drops or moisture appears, stop the tile work and locate the defect.
Keep a record and correct defects
Document the test date, start and finish times, water depth, drain-plug method, waterline photos, inspection notes, and names of the people present. Keep the product information with the renovation records.
If the test fails, the installer should identify the cause, make the repair, allow the repaired area to cure, and repeat the test. Don't accept tile installation over a patched area without confirming that the repair belongs to the approved waterproofing system.
A successful flood test doesn't prove every wall detail is perfect. It primarily tests the shower receptor and drain area, so wall seams, penetrations, niches, and transitions still need a visual inspection.
Complete this pre-tile checklist
Walk through the shower with the contractor before tile boxes enter the room. Ask for an explanation of any item you can't see or understand.
- The permit path and required inspection points have been confirmed with Cape Coral.
- The substrate is firm, clean, properly prepared, and free from loose or damaged sections.
- The waterproof layer covers the planned wet areas and connects continuously at corners.
- The shower pan slopes toward the drain without low spots or reverse slopes.
- The drain connection is sealed, correctly positioned, and free of blocked weep holes where applicable.
- Pipe openings, niches, benches, curbs, thresholds, and fasteners have approved waterproofing details.
- The installer has followed the selected manufacturer's instructions for preparation, thickness, seams, and compatible components.
- Required cure times have passed before the flood test and before tile installation.
- The flood-test water level and results have been photographed and recorded.
- Every leak, gap, wrinkle, pinhole, or damaged section has been repaired and retested before tile covers the work.
Tile installation should begin only after these items receive clear answers. If the waterproofing will soon disappear behind tile, now is the easiest and least expensive time to correct it.
Conclusion
Good Cape Coral bathroom waterproofing creates a continuous path that keeps shower water inside the wet area and moving toward the drain. The strongest checklist covers permits, substrate preparation, sealed transitions, product instructions, cure times, and a documented flood test.
Tile can hide workmanship, but it can't repair a broken waterproof barrier. Review the work while every seam and penetration remains visible, then correct defects before the first tile is set.