Estero Gunite Pool Lighting: Layout and Niche Placement
Explore Our Services
Contact Us Today!
(239) 322-9295
A beautiful pool can still feel uncomfortable at night when fixtures shine toward the lanai. A successful gunite pool lighting plan starts with the views from your home, then accounts for pool shape, depth, finish, steps, benches, and water features.
In Estero, niche placement also has to fit the gunite shell, waterproofing, plaster, bonding, transformer, and inspection plan. The best layout provides clear visibility without turning the water into a wall of glare. Start with the viewing plan before choosing the fixture count.
How gunite pool lighting should follow the view
Pool lights are part of the pool's visual design. Their position affects how the water looks from the living room, screened lanai, outdoor kitchen, spa, and seating areas.
Map the primary viewing locations
Mark the places where your family and guests will spend time after sunset. In many Estero homes, the main view runs from the living room or lanai toward the pool, so the brightest fixture lenses shouldn't face those areas.
When the fixture design allows it, placing lights on the wall nearest the house and aiming the beam across the pool can reduce direct glare. However, the pool's shape and the manufacturer's beam pattern still control the final arrangement.
A good plan also considers views from the deep end, spa, deck, and yard. A layout that looks balanced from the lanai may leave an entry step or side bench too dark.
Match fixtures to the pool's geometry
A long rectangular pool may need a different arrangement than a freeform pool with curves and alcoves. L-shaped pools often need separate coverage for each leg because one fixture may not reach around the corner.
Depth changes matter too. A shallow entry, sloped floor, and deep end can create different shadow patterns. Pool length alone can't determine fixture count or spacing. Beam angle, lumen output, niche location, interior finish, and the specific light listing all affect coverage.
There is no universal spacing rule that fits every LED fixture. Your builder and electrician should review the manufacturer's photometric information and installation instructions with the actual pool plan.
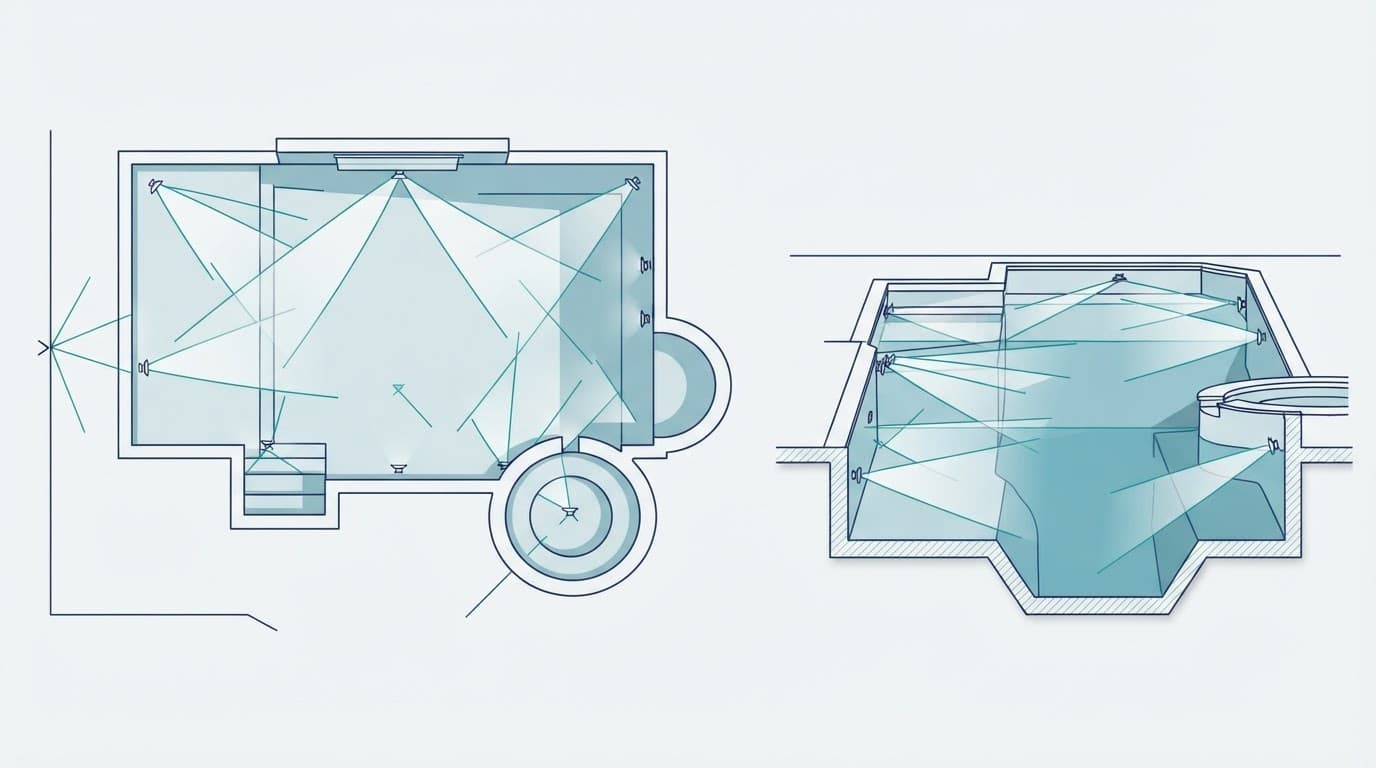
A larger fixture count can still create poor visibility if every lens faces the lanai. Beam direction matters as much as the number of lights.
Place niches around features, not a generic grid
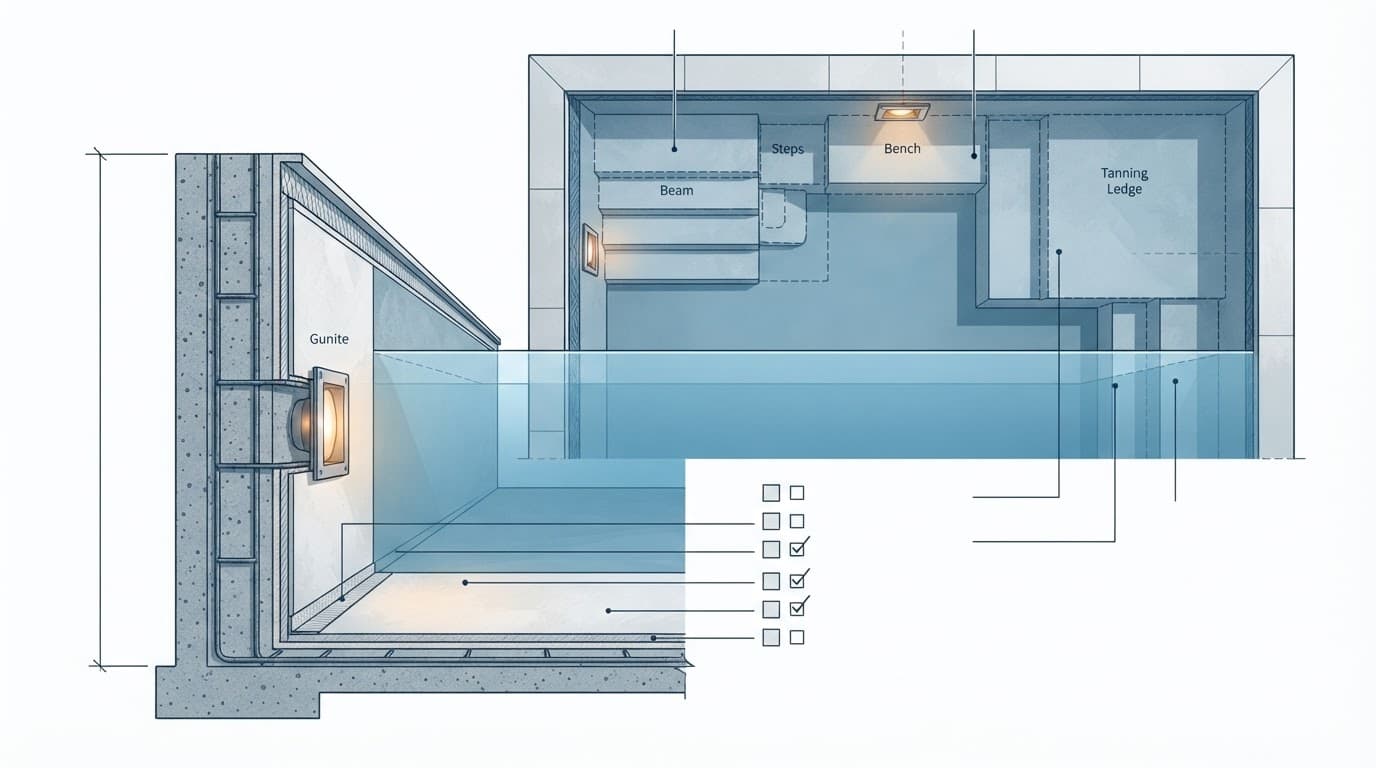
A niche should support the area it lights. Before the gunite shell is finished, review each location in both plan view and section view. That review catches conflicts that are hard to correct after plaster.
Plan for walls, depth changes, and finishes
Niche elevation must coordinate with the final waterline, interior finish, wall shape, and fixture instructions. The niche shouldn't interfere with a return fitting, suction outlet, structural steel, plumbing, or a nearby water feature.
Dark pebble finishes usually absorb more light than white or light-colored interiors. Highly reflective finishes can make the pool appear brighter but may also increase glare. A light that looks comfortable in a white interior might feel harsh in a dark, glossy, or glass-enhanced finish.
Ask to review finish samples under the planned LED color before construction. White light, blue light, and color-changing systems can look very different after the finish changes the way light reflects through the water.
Coordinate steps, benches, ledges, and water features
Steps need enough light to show their edges and changes in elevation. Avoid placing a fixture where its strongest beam points directly at someone using the stairs. Benches can create dark pockets beneath seats or along raised walls, so the beam should reach those surfaces without shining into the eyes of people sitting nearby.
Tanning ledges need their own review because they sit in shallow water. A low-profile or nicheless light may work better in some designs, but the fixture must be listed for that installation and approved by the project electrician.
Bubblers, sheer descents, deck jets, and other water features can scatter and reflect light. Separate lighting may improve the effect, while a niche aimed straight at a moving water sheet can produce distracting glare. Coordinate water-feature plumbing, lighting, and controls before the shell work begins.
Choose the LED system before the shell is shot
Fixture selection should happen before niche forms, conduit routes, and electrical plans are finalized. Changing the light model later can change the niche type, cord length, transformer size, and wall opening.
Compare beam spread, output, and color
LED pool lights don't all distribute light in the same way. A narrow beam can create a strong highlight, while a wider beam may provide softer coverage across a broad wall. The right choice depends on the pool dimensions, finish, depth, and viewing direction.
Color-changing lights add scene options, but they still need a thoughtful layout. Several fixtures that are out of sync can create uneven color across the pool. Ask how the controls handle synchronization and whether the system uses one compatible control platform.
A product such as an FX Luminaire pool-rated fixture must be evaluated by its listing and installation guide, not by appearance alone. Confirm the rated application, beam pattern, operating voltage, niche requirements, and replacement method before approval.
Confirm wet niches, dry niches, and transformers
Some LED fixtures use wet niches, while others use dry niches or nicheless assemblies. Each system has different requirements for conduit, cord storage, sealing, niche depth, and access for future service.
A low-voltage system still needs a listed transformer or power supply suitable for pool and spa use. The electrician should also check conductor length and voltage drop, especially when the equipment pad sits far from the pool.
Line-voltage underwater luminaires operating above the applicable low-voltage threshold require GFCI protection under NEC Article 680. A low-voltage design may have different grounding requirements, but the fixture listing must support that installation.
Budget the lighting, controls, niches, and transformer with the rest of the project. These costs belong in the early pool estimate, along with the deck, screen enclosure, equipment pad, and outdoor electrical work. Reviewing a Southwest Florida pool construction costs guide can help you allow for those connected expenses.
Estero electrical and permitting details belong in the layout
As of August 2026, Florida's residential code baseline is the 2023 Florida Building Code, 8th Edition , including the 2023 Florida Electrical Code. That edition took effect on December 31, 2023, although amendments and local review requirements still apply.
Treat Article 680 as part of the design
NEC Article 680 covers pool and spa luminaires, bonding, grounding, GFCI protection, and related equipment. The electrical plan should show how the lights connect to the approved power source and how conductive components near the pool enter the equipotential bonding system.
Bonding and grounding are different tasks. Bonding connects conductive parts so they remain at a similar electrical potential, while grounding provides a path for fault current where the system requires it. Many Article 680 references identify 8 AWG copper as a minimum bonding conductor in common pool applications, but your licensed electrician must confirm the exact requirement for the project.
The fixture, niche, cord seal, junction box, transformer, conduit, and circuit protection all need to work as one listed system. Never substitute a general outdoor transformer or an unlisted light because it looks similar.
Confirm the reviewing authority and site conditions
The Lee County Division of Community Development pool guide was updated on August 18, 2026. It emphasizes clear site-plan information for pool-related electrical sources when applicable. Your contractor should identify the correct reviewing authority for the Estero parcel and confirm the drawings, permit documents, and inspection sequence before work begins.
Southwest Florida conditions also affect material selection. Heat, humidity, UV exposure, coastal air, saltwater systems, and storm conditions can affect metal housings, fasteners, seals, junction points, and transformer locations. Choose listed, corrosion-resistant components and place service equipment in a protected location that remains accessible after landscaping and enclosure work.
A qualified Southwest Florida pool contractor can coordinate the shell, niche placement, deck, equipment area, and permit process. The licensed electrician still needs to verify the electrical design and complete the work within their scope.
Use this pre-plaster checklist
A final review before plaster gives you the best chance to correct a poor niche location. Put the approved layout on paper and compare it with the actual shell before the finish crew arrives.
Confirm these items before plaster
- The plan identifies the exact fixture model, operating voltage, listing, niche type, beam pattern, and intended control system.
- The plan shows the primary viewing side, fixture centerlines, pool sections, depth changes, steps, benches, tanning ledges, spa walls, and water features.
- Each niche sits at the elevation required by the fixture instructions and coordinates with the final waterline and interior finish thickness.
- Conduit, cords, junction boxes, and the transformer route match the manufacturer's instructions and leave practical access for future replacement.
- The electrician has confirmed the bonding, grounding, GFCI, circuit, and transformer requirements under the current Florida code and local review.
- The niche locations don't conflict with rebar, returns, drains, skimmers, suction fittings, plumbing, waterproofing, or water-feature equipment.
- The builder records niche locations with marked-up drawings and photographs before plaster covers the shell.
Ask the builder and electrician these questions
- Which exact light and niche combination is approved for this pool?
- Which direction will each fixture face when viewed from the lanai and main seating areas?
- How does the layout light the shallow entry, deep end, benches, and tanning ledge?
- What changes because the finish is dark, light, reflective, or glass-enhanced?
- Is the system low-voltage or line-voltage, and where will the listed transformer sit?
- How will the team handle bonding, grounding, GFCI protection, and required inspections?
- Can the transformer, junction boxes, and controls be reached without removing finished construction?
- What happens if a light fails after plaster, and can the fixture be replaced without damaging the pool finish?
Written answers prevent a last-minute change from becoming a permanent glare problem.
Common mistakes that create glare or dark spots
Counting fixtures by pool size is one of the most common errors. Two pools with the same surface area can need different layouts because one has a deep-end wall, a curved bench, a tanning ledge, or a dark interior finish.
Another mistake is placing every light on the most convenient wall. Convenience can put multiple lenses in the direct view of the lanai. It can also leave the opposite wall, stairs, or a freeform curve in shadow.
Some homeowners approve the light layout before selecting the finish and water features. That order creates avoidable revisions. The niche plan should follow the final pool shape, finish, features, and fixture model.
Finally, don't treat service access as an afterthought. A transformer hidden behind a completed screen enclosure or landscaping can turn a routine repair into a construction problem. Review the plan at night after startup, then ask the builder to correct aiming, controls, or defective equipment through the proper service process.
Final thoughts on an Estero pool lighting plan
The strongest gunite pool lighting layout starts with people, sightlines, and movement through the pool. It then accounts for depth, finish, steps, seating, ledges, water features, and the exact listed fixture.
Before plaster, confirm every niche, conduit route, transformer location, bonding connection, and inspection requirement with qualified professionals. A bright light in the wrong place is difficult to fix, while a carefully coordinated layout can make the pool safer, more comfortable, and easier to enjoy after sunset.