Heated Bathroom Floors for Bonita Springs Tile Remodels
Explore Our Services
Contact Us Today!
(239) 322-9295
A new tile floor can look beautiful and still feel cold under bare feet. Heated bathroom floors add a gentle, even warmth beneath replacement tile, making early mornings and post-shower routines more comfortable.
For Bonita Springs homeowners, this upgrade works best when it is planned with the full bathroom renovation. The heating mat must sit beneath the new tile, so replacing the floor is the right time to add it.
Why radiant heat works well in a tiled bathroom
Electric radiant heat warms the tile itself rather than blasting hot air into the room. Once the floor reaches the thermostat setting, tile holds and releases warmth evenly across the walking surface.
Unlike a space heater, the system stays hidden. You don't lose wall space, and there are no vents to clean around a vanity or toilet.
Comfort where you feel it most
Bathrooms are often the first rooms you enter barefoot. A heated floor takes the chill out of porcelain or ceramic tile, particularly after air conditioning has been running overnight.
The warmth is most noticeable in open walking areas: in front of the vanity, beside a tub, and along the path to the shower. It pairs well with walk-in shower updates and large-format floor tile.
It supplements room heat, not every home's primary system
A radiant floor system can make a small bathroom feel more comfortable, but it may not replace the room's existing HVAC supply or exhaust needs. Its purpose is warm flooring, not fast whole-room heating.
System output, bathroom size, insulation below the floor, tile type, and thermostat settings all affect performance. A contractor can help determine whether the planned heated area fits the room's layout and electrical capacity.
The best time to add radiant heat is after old tile comes out and before the new tile goes in. Installing it later usually means removing the finished floor again.
Start with the floor beneath the old tile
Tile replacement begins with demolition, but the important work starts after the old finish is gone. Thinset residue, loose material, damaged backer board, and cracks can interfere with a new tile assembly.
In many Southwest Florida homes, the bathroom floor sits on a concrete slab. Other homes have wood-framed subfloors. Each base needs a different preparation plan, yet both must be clean, sound, and flat before a heating mat goes down.
Repair cracks, dips, and weak areas first
A heating mat isn't a fix for movement or unevenness below it. The installation team should inspect the exposed surface and address cracks, hollow spots, rot, or low areas before setting the mat.
On a slab, preparation may include grinding high points, patching small defects, or using an approved leveling material. On a wood subfloor, the crew checks stiffness, fasteners, and any areas affected by moisture.
Tile needs a stable base because even a small movement can crack grout or tile. Heating cables also need a protected, well-supported surface.
Account for the new floor height
Radiant mats are thin, but they still add height when combined with mortar, tile, and any required underlayment. That added thickness can affect door clearance, transitions to adjacent rooms, the toilet flange, and the bottom edge of a vanity.
Measure these details before materials arrive. A bathroom floor should feel intentional at the doorway, not like a step that appeared after the renovation.
How heated bathroom floors fit under replacement tile
The proper assembly places the heating system between the prepared base and the finished tile. Tile should never sit directly on loose wires, and a heating mat should never be installed on top of finished tile.
Manufacturers provide system-specific instructions for their mats, cables, membranes, mortars, and sensors. Those instructions matter because the components must work together as one assembly.
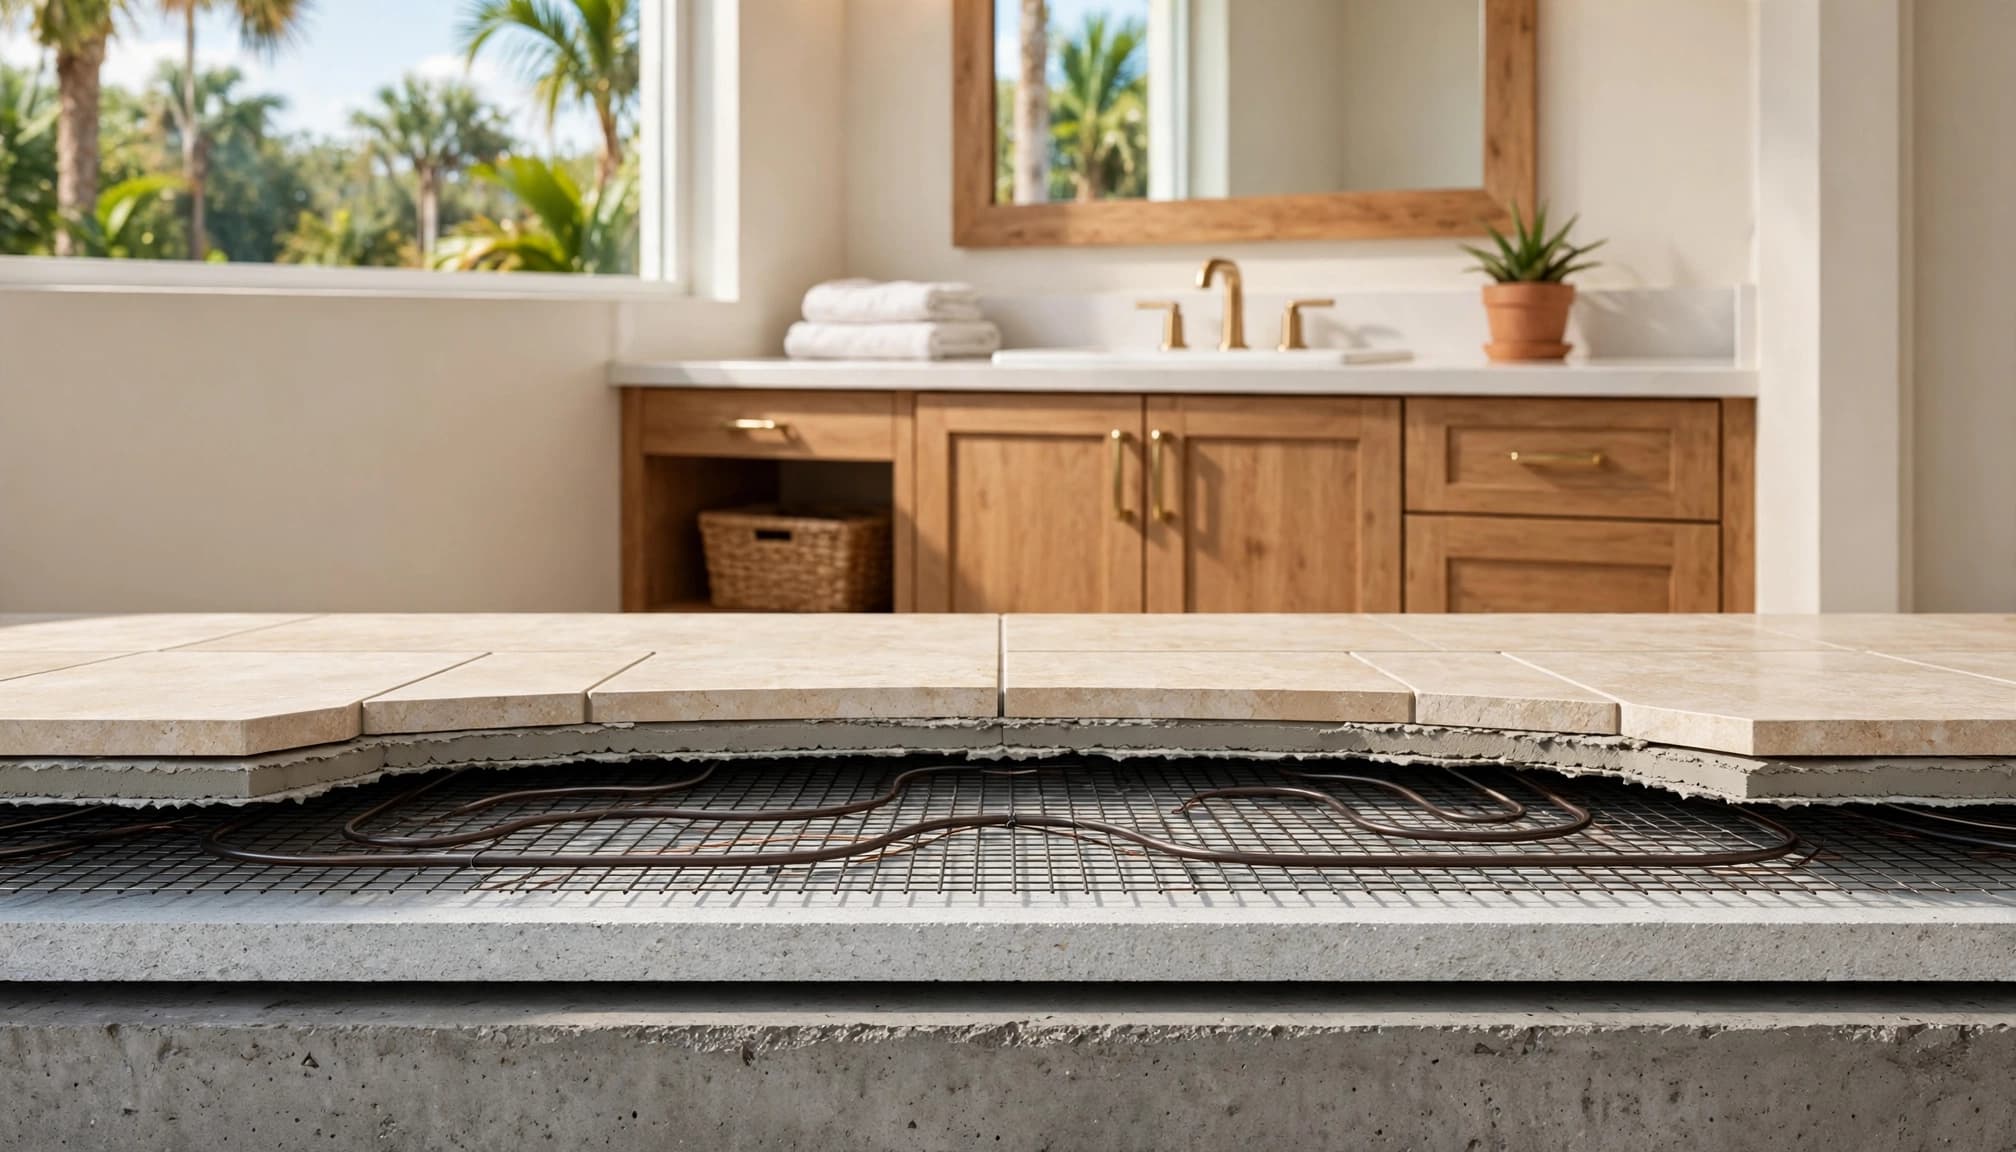
A typical floor layer sequence
The exact order changes with the product and existing floor, but a common installation includes:
- A prepared concrete slab or sound subfloor creates the base.
- An approved underlayment, crack-isolation membrane, or other specified layer may go above it.
- The electric heating mat is secured in the planned open-floor area.
- Compatible thinset mortar embeds or covers the mat, as the manufacturer requires.
- Replacement tile is set in mortar, then grouted after the mortar cures.
The goal is to fully support the tile while protecting the heating elements. Installers avoid cutting, crossing, or shortening heating cables unless the product instructions expressly allow a particular adjustment.
Keep mats out from beneath fixed fixtures
Heating mats typically stay out from under permanent cabinets, vanities without open clearance, toilets, and other fixed fixtures. Those areas don't need foot comfort, and covering them can limit heat release.
A layout should also account for floor registers, shower details, curbs, and the thermostat sensor. Some systems have products rated for wet areas, while others do not. The selected system must be approved for the exact installation area.
Choose tile and setting materials that work together
Porcelain and ceramic tile are popular over radiant floor heat because they conduct warmth well and handle bathroom moisture. Natural stone can also work, although it may need different preparation and care.
Tile choice affects the final look and the amount of heat that reaches the surface. A thick stone tile usually takes longer to warm than a thinner porcelain tile. Neither choice is wrong, but the system design should match the finish.
Use mortars approved for heated floors
The installer should use thinset mortar and grout compatible with the heating system, tile type, and substrate. A generic product choice can create bonding problems or may not meet the heating manufacturer's requirements.
For example, large-format porcelain often needs mortar selected for the tile's size and the flatness of the floor. The crew may also use a crack-isolation membrane where the substrate and tile assembly call for one.
For broader guidance on choosing bathroom tile and remodeling materials, compare durability, water resistance, texture, and cleaning needs along with appearance.
Don't overlook waterproofing at wet areas
A heated floor doesn't replace bathroom waterproofing. Shower pans, shower entrances, wall-to-floor transitions, and other wet-area details need their own properly installed water-management system.
If the new tile extends into a shower, coordinate the heated bathroom floors with the shower waterproofing plan before demolition starts. That early discussion prevents conflicting layers and last-minute layout changes.
Electrical planning and safety come first
Every radiant floor system needs a correctly sized electrical connection, a thermostat, and a floor sensor. The thermostat reads the sensor beneath the tile and cycles the system to the selected temperature.
Electrical work is not a do-it-yourself shortcut. A qualified electrical professional should make the power connections, confirm the circuit requirements, and handle the thermostat installation according to the system specifications.
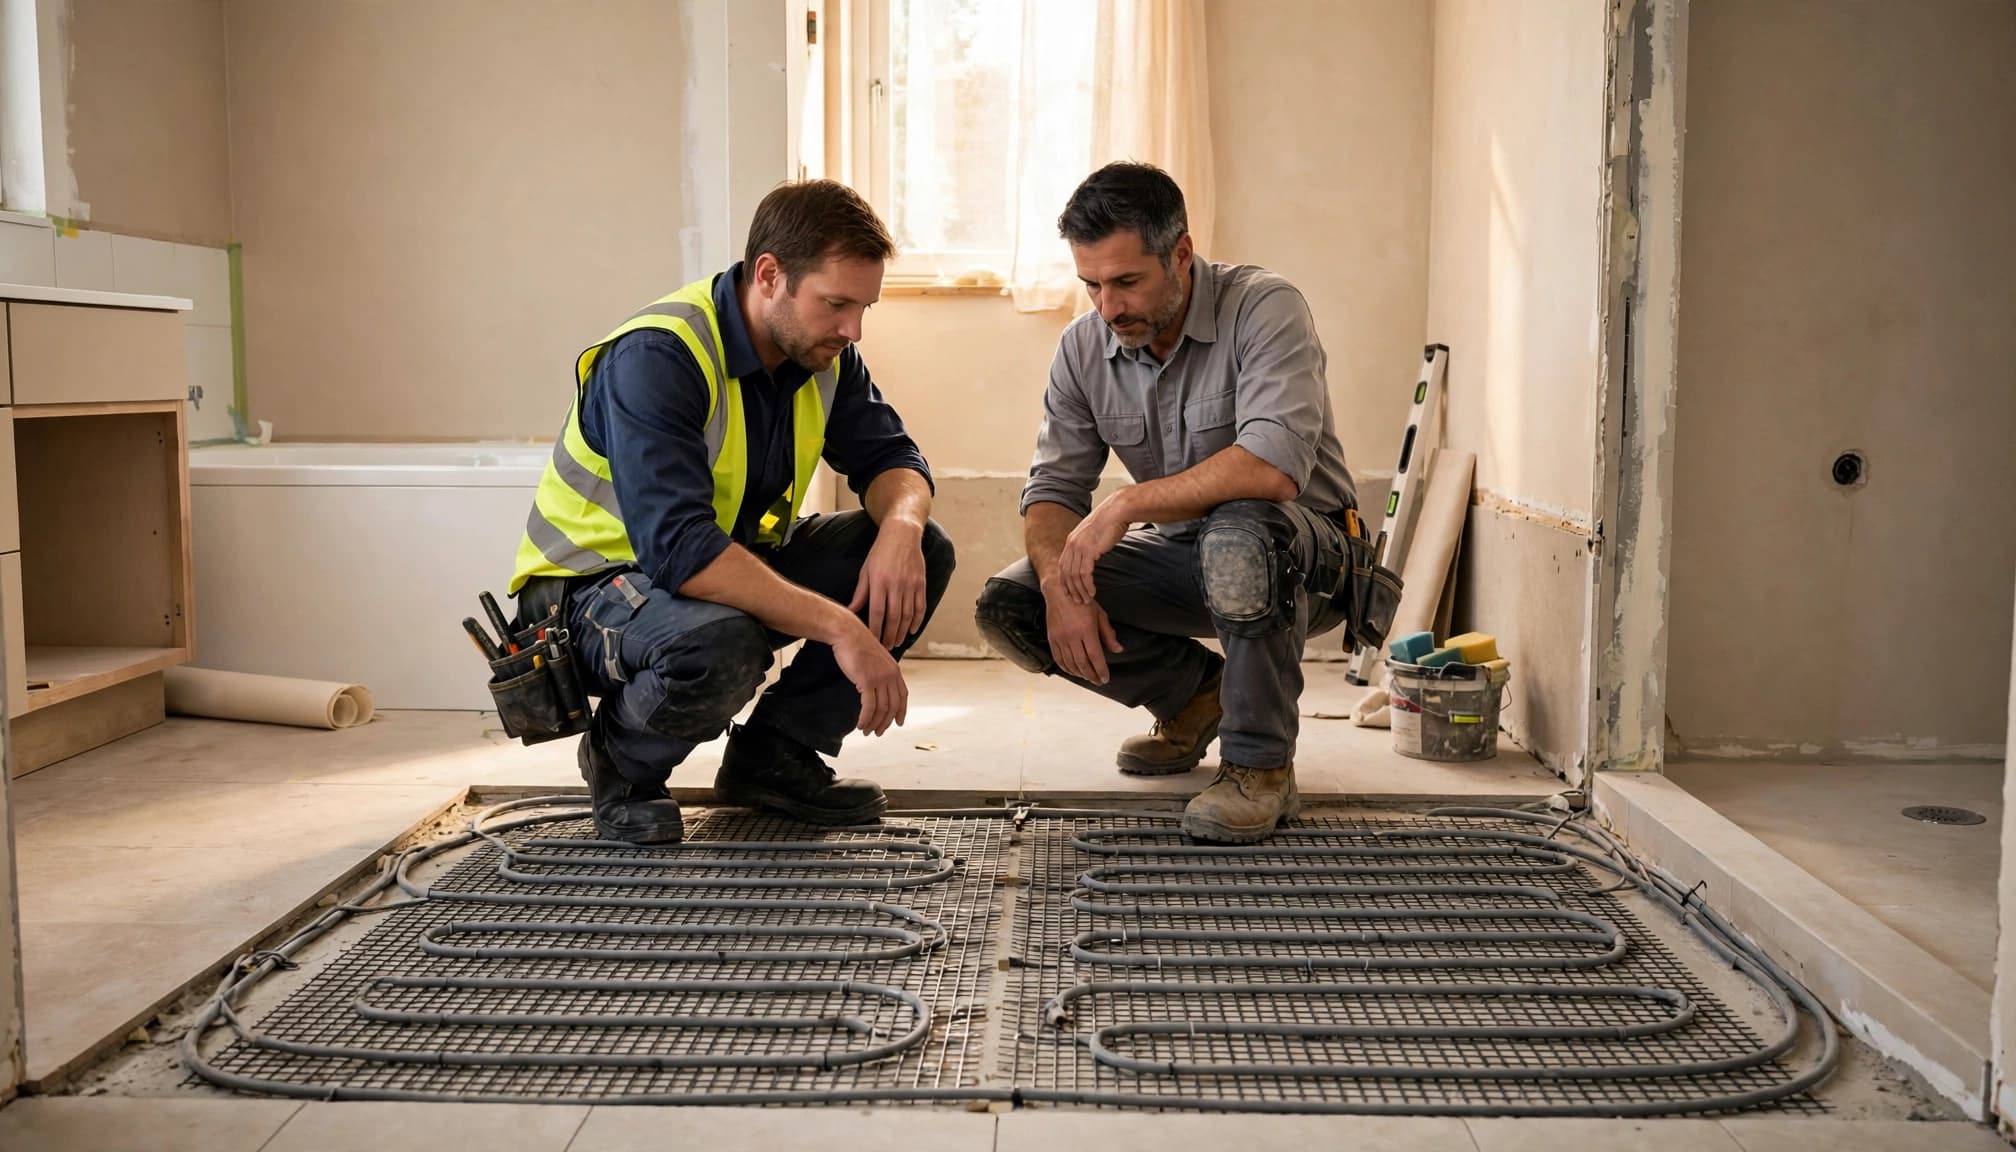
Plan the circuit before tile work begins
The electrician calculates the system load using the manufacturer's information and the heated square footage. That review determines the circuit and protection the system needs.
The electrical rough-in should happen before the tile installer covers the mat with mortar. Waiting until the tile is complete can mean opening a wall or disturbing finished work to reach the thermostat location.
Test the mat at every stage
A professional installer checks the heating mat or cable before installation, after it is secured, and again before tile placement is complete. Those readings help confirm that the product wasn't damaged during the work.
Keep the product documentation, test records, thermostat information, and photos of the mat layout. If a future bathroom update requires drilling or changes near the floor, that record helps prevent damage.
Coordinate the work in the right order
A bathroom remodel has many connected parts: plumbing, electrical, waterproofing, tile, cabinetry, and fixtures. Radiant heat adds one more layer, so the work needs a clear sequence.
First, finalize the room plan and select the heating system. Next, remove the old floor, repair the base, complete needed rough-in work, and prepare the surface. The heating mat goes down only after the floor is ready.
Decide on the layout before ordering materials
Measure the open walking area, not the entire bathroom footprint. Subtract the space under fixed cabinets, the toilet, and other permanent items that will cover the floor.
A detailed layout also helps place the thermostat where it is easy to reach without disrupting tile or wall finishes. If you are updating the shower, vanity, or tub at the same time, a Bonita Springs bathroom remodeling project can bring the tile and trade work into one coordinated plan.
Budget for the complete assembly
The heating mat is only one part of the cost. Demolition, floor repair, electrical labor, underlayment, mortar, tile installation, thermostat selection, and fixture adjustments can all affect the final price.
A smaller heated zone can reduce material costs while still warming the places you use most. However, don't reduce preparation work to save money. A strong, flat base protects both the tile and the system below it.
Use and care for a radiant tile floor
After installation, allow the mortar and grout to cure for the time required by their manufacturers before turning on the heat. Raising the temperature too soon can affect a fresh tile installation.
Once the system is ready, start at a moderate setting and adjust gradually. A programmable thermostat can warm the floor before your normal morning routine without running at the same temperature all day.
Protect the floor during future updates
Avoid drilling into the floor without knowing the heating mat layout. This matters when adding a doorstop, changing a vanity, or securing a partition.
Use normal tile-cleaning practices and avoid aggressive tools that could damage grout or tile. The heating system itself has no exposed moving parts, but the floor above it still needs routine care.
A Comfortable Upgrade That Starts Below the Tile
Heated bathroom floors bring comfort to a tile replacement, but their success depends on preparation, compatible materials, and careful electrical planning. The mat belongs beneath the replacement tile, protected within a complete floor assembly.
When the old tile comes out, take the opportunity to inspect the base, confirm the room layout, and coordinate qualified trades. A properly installed heated tile floor feels simple every day because the complex work is safely hidden below.