How to Inspect a Gunite Pool Shell Before Resurfacing in Fort Myers
Explore Our Services
Contact Us Today!
(239) 322-9295
A fresh pool finish can hide a problem that should have been repaired first. If you're planning a renovation, a gunite pool shell inspection helps you separate worn plaster from damage that needs a closer look. You don't need to diagnose the shell yourself, but you should know what to document and when to pause the project.
In Fort Myers, drainage plans also matter because groundwater conditions vary by property. Start with a safe way to expose the surface, then work through the pool in a consistent order.
Know what you're inspecting
Gunite is the concrete structure beneath the pool's interior finish. Plaster or pebble finish covers it, while tile, coping, fittings, and plumbing meet it at different points. When homeowners say a pool has a "crack," they may be describing a mark in the finish rather than damage to the concrete shell.
That distinction shapes the renovation. A sound shell with a worn finish may need surface preparation and a new coating. Loose material, exposed reinforcing steel, or signs of movement call for further evaluation before those areas are covered.
Cutting Edge Homes & Renovations begins its pool renovations in Fort Myers with an assessment of the existing pool and the homeowner's goals. Ask your contractor to identify what they can see, what remains uncertain, and which repairs belong in the resurfacing scope.
Step 1: Arrange safe drainage and get a clear view
A meaningful inspection requires a clean, visible interior. It also requires a drainage plan suited to the property.
Have a pool professional plan the drain
Don't empty a Fort Myers pool on your own to check its finish. Groundwater levels can vary, and an empty pool may face uplift pressure when surrounding water is high. A qualified pool professional should assess site conditions, weather, drainage, and any hydrostatic relief provisions before pumping begins.
Ask where discharged water will go. It shouldn't undermine the deck, flow toward the house, or create a problem for a neighboring property. If conditions aren't suitable, let the professional set the inspection timing.
Clean the surface and record its condition
Once the pool is safely drained, remove loose debris and let the contractor clean the interior enough to reveal cracks, stains, and damaged finish. Avoid chipping or aggressive cleaning yourself; disturbing a defect can make its original shape harder to assess.
Take wide photos of each wall and the floor, then close-ups that show each concern in context. Note its location at the shallow end, deep end, steps, or waterline. Include something for scale in close-ups without blocking the defect.
Step 2: Map cracks without diagnosing them by sight
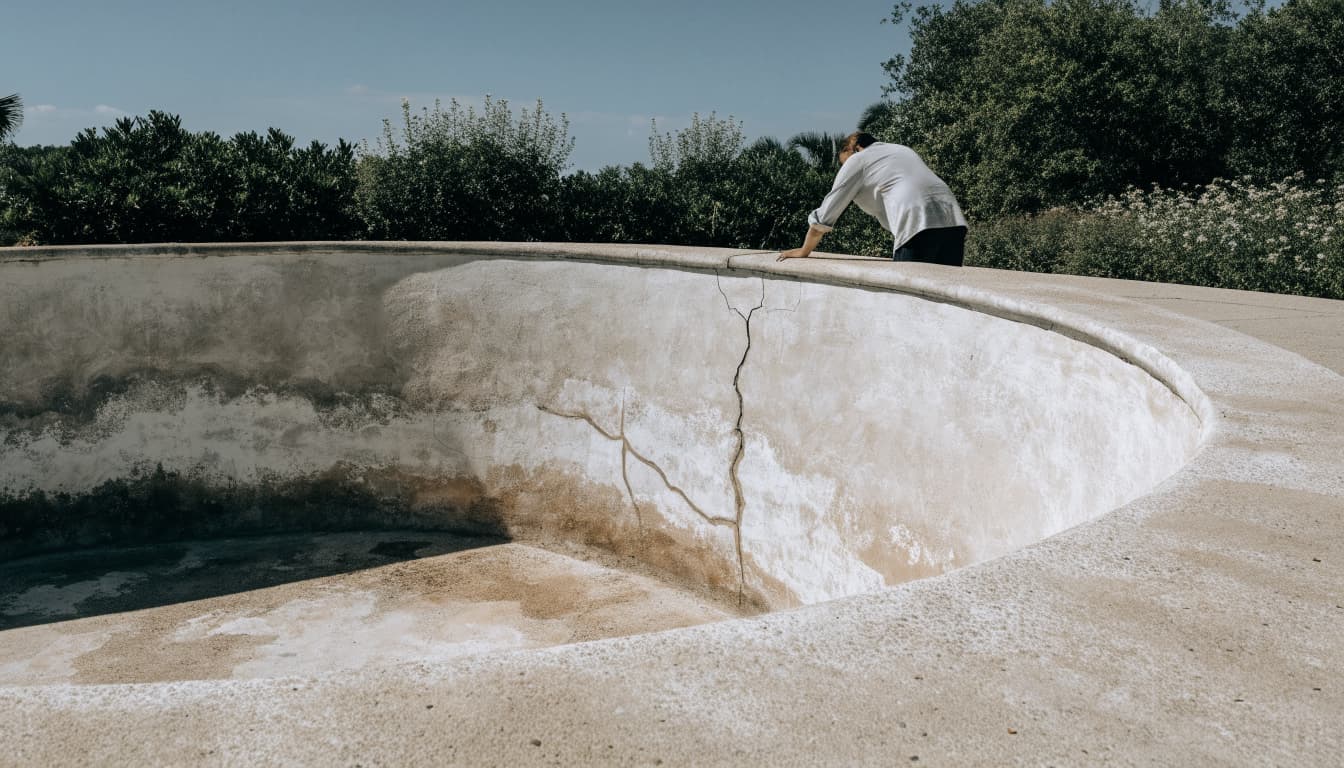
Work around the entire pool in one direction. Look at walls, floor, corners, steps, benches, and any attached spa. Record where each line starts and ends rather than photographing only its widest point.
Separate finish wear from warning signs
Fine surface lines, discoloration, and rough plaster can be cosmetic. Their appearance alone, however, doesn't establish how deep they run. An older finish can also hide the full extent of a defect until removal begins.
Give a contractor closer concerns such as a crack that crosses multiple surfaces, a visible offset between its sides, or cracking that reappeared after an earlier repair. Report a history of unexplained water loss, too. None of these observations proves the shell is structurally damaged, but each deserves an explanation before resurfacing.
Crack width alone can't tell you whether the mark stops in the finish or continues into the gunite.
Follow the crack into nearby features
Pay attention where a line reaches a step, a wall-to-floor transition, a skimmer, or the tile band. Photograph the adjoining area so the contractor can see whether other materials have shifted or separated.
Then compare your photos with any older repair records. A past patch, leak investigation, or recurring crack gives a pool professional useful context. Avoid filling suspicious lines with a surface product before their cause is evaluated.
Step 3: Identify loose finish and hollow-sounding areas
The bond between an old finish and the material beneath it matters as much as the finish's appearance. A new surface needs a sound, properly prepared base.
Note flaking, blisters, and exposed patches
Look for peeling plaster, raised areas, chips, or sections where the finish has broken away. Mark their locations in your photos. A worn patch may call for removal and preparation; it doesn't automatically mean the gunite shell has failed.
If a contractor identifies hollow-sounding spots, ask what layer appears loose. The finish, a previous repair, or material beneath it may need different treatment. Sound alone isn't a diagnosis, so request a clear explanation of how the repair team will confirm the extent of the affected area.
Check whether defects cluster
Several loose spots around a past patch tell a different story than an isolated chip near the waterline. Record patterns, especially where hollow areas sit beside cracks or visible concrete damage.
Don't assume a new finish will bond over questionable material. Ask which areas will be removed, how the remaining substrate will be assessed, and how the chosen finish manufacturer's preparation requirements will be met.
Step 4: Look closely at steel, fittings, and edges
Shell concerns aren't confined to the broad wall and floor surfaces. Transitions and penetrations deserve their own pass.
Treat exposed steel as a stop-and-evaluate finding
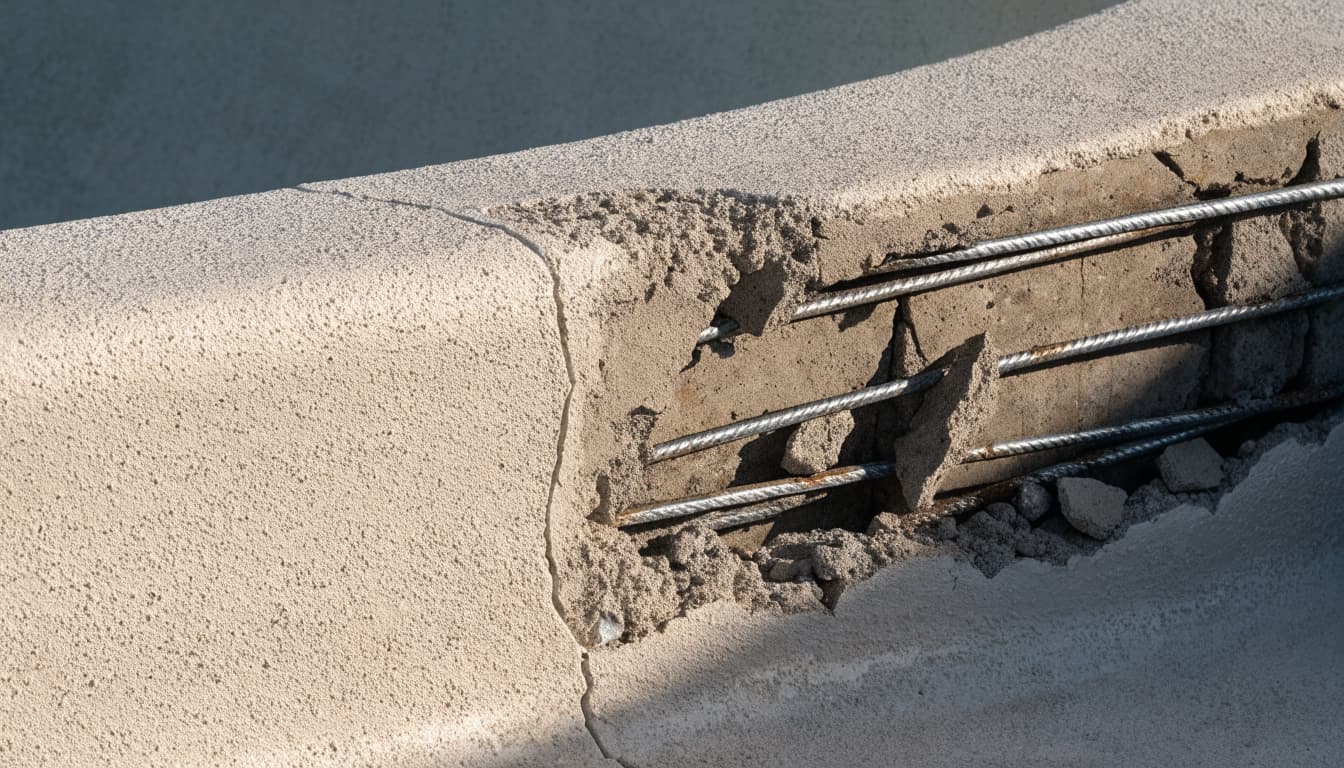
Reinforcing steel belongs within the concrete shell. If you can see steel through a damaged area, or concrete appears broken away around it, have a qualified pool professional assess the condition before finish work continues. Don't cover it with plaster and assume the issue is resolved.
Rust-colored staining is worth photographing, but a stain alone doesn't prove steel is exposed. The professional needs to determine what material has deteriorated and whether repair details require structural input.
Gunite construction places concrete around reinforcing steel before the interior finish goes on. That sequence helps explain why a resurfacing crew can't assess hidden steel simply by looking at an intact surface. The new gunite pool construction process also shows how steel, gunite, tile, and equipment fit into a larger project.
Inspect where other materials meet the shell
Check around return fittings, lights, drains, skimmers, steps, waterline tile, and coping. Note missing tile, separated edges, old patches, and damp-looking areas. These observations help the contractor decide which trades or repairs the job may need.
Keep hands away from electrical fixtures and drain components. A licensed professional should handle questions involving pool wiring, fittings, or plumbing.
Step 5: Check the deck and drainage for context
Walk the pool perimeter after inspecting the interior. Photograph settled deck sections, separation near the coping, damaged expansion joints, and places where rainwater runs toward the pool or house. These features aren't the same as shell damage, but they may help explain recurring problems.
Also tell the contractor about recent drainage work, deck repairs, storm damage, or changes you've noticed in the pool's water level. Fort Myers properties differ in soil, elevation, and groundwater conditions. A nearby pool's repair plan may not suit yours.
If the deck has moved while the shell shows cracking, request an assessment of both. Resurfacing the interior won't correct movement or poor drainage outside it. Keep your photos and repair history together so the professional can consider the whole site.
Step 6: Agree on repairs before choosing the new finish
A condition assessment should lead to a written scope, not an immediate choice of plaster color. Ask the contractor to separate confirmed finish work from areas that need further investigation.
Match the proposed work to the finding
For ordinary finish wear, the scope should describe removal or preparation of the old surface and the new finish system. Loose patches, damaged concrete, exposed steel, and suspect cracks need their own stated repair approach.
When the cause or extent remains unclear, ask whether a qualified pool professional or structural engineer should evaluate the shell. An engineer's input may be appropriate when movement or significant concrete damage is suspected. The contractor should explain that decision for your pool rather than treating every crack as structural.
Keep discoveries visible in the estimate
Finish removal can expose conditions that weren't visible during the first walk-through. Ask how the contractor will document newly uncovered damage, price additional repairs, and obtain your approval before proceeding.
Request the finish product name, surface-preparation plan, and startup instructions in writing. A Cape Coral gunite pool resurfacing cost overview gives a broad $5,000 to $15,000 range, depending on finish choice. It isn't a Fort Myers quote, and shell repairs can change the scope.
Confirm the Fort Myers project requirements
Before scheduling, have the contractor confirm whether your address falls under the City of Fort Myers or unincorporated Lee County. Ask which permits or inspections apply to the actual renovation scope , particularly if work extends beyond replacing the finish. Requirements for new pool construction shouldn't be assumed to apply unchanged to resurfacing.
Coordinate the shell review before new material covers the interior. If the project also involves tile, coping, equipment, or deck work, identify who is responsible for each item and how the work will be sequenced. That conversation reduces the chance that a concern disappears beneath a new finish without being resolved.
Key Takeaways
- Arrange drainage through a qualified pool professional, then photograph the clean shell before repairs begin.
- Record cracks, loose finish, hollow-sounding areas, exposed steel, and conditions around fittings without assuming what caused them.
- Ask for professional evaluation when damage may extend into the shell. Get the repair scope in writing before resurfacing covers it.
Frequently Asked Questions
Is every crack in a gunite pool structural?
No. A visible line may be limited to the finish, but appearance alone can't confirm its depth. Document the crack and have a qualified pool professional assess it, especially if it recurs, crosses surfaces, or appears with other damage.
Can a pool be resurfaced over hollow spots?
The contractor should determine what material is loose before specifying preparation or repair. Covering an unsound area without addressing it risks leaving the underlying problem in place.
Should I drain my pool to inspect it myself?
No. Ask a pool professional to plan and manage draining. Groundwater and discharge conditions matter in Southwest Florida, and an empty pool requires careful handling.
Conclusion
That new finish will only be as dependable as the condition beneath it. A documented shell assessment helps you distinguish routine wear from findings that call for repair or further evaluation.
If a crack, hollow area, or exposed steel remains unexplained, settle that question before the surface disappears under fresh material.