Add Under-Cabinet Lighting After a Cape Coral Remodel
Explore Our Services
Contact Us Today!
(239) 322-9295
You can add under-cabinet lighting after a kitchen remodel without replacing your cabinets or tearing out the backsplash. Plug-in fixtures, battery-powered lights, and professionally installed hardwired systems each offer a way to brighten the counters.
The right choice depends on your available power , cabinet layout, and how much visible wiring you're willing to accept. Start by looking at the areas where your finished kitchen needs more light.
Why Add Lighting to a Finished Kitchen?
Upper cabinets can cast shadows over the counter, even when ceiling lights make the rest of the room look bright. A light beneath the cabinet puts illumination closer to the cutting board, coffee station, or other work surface.
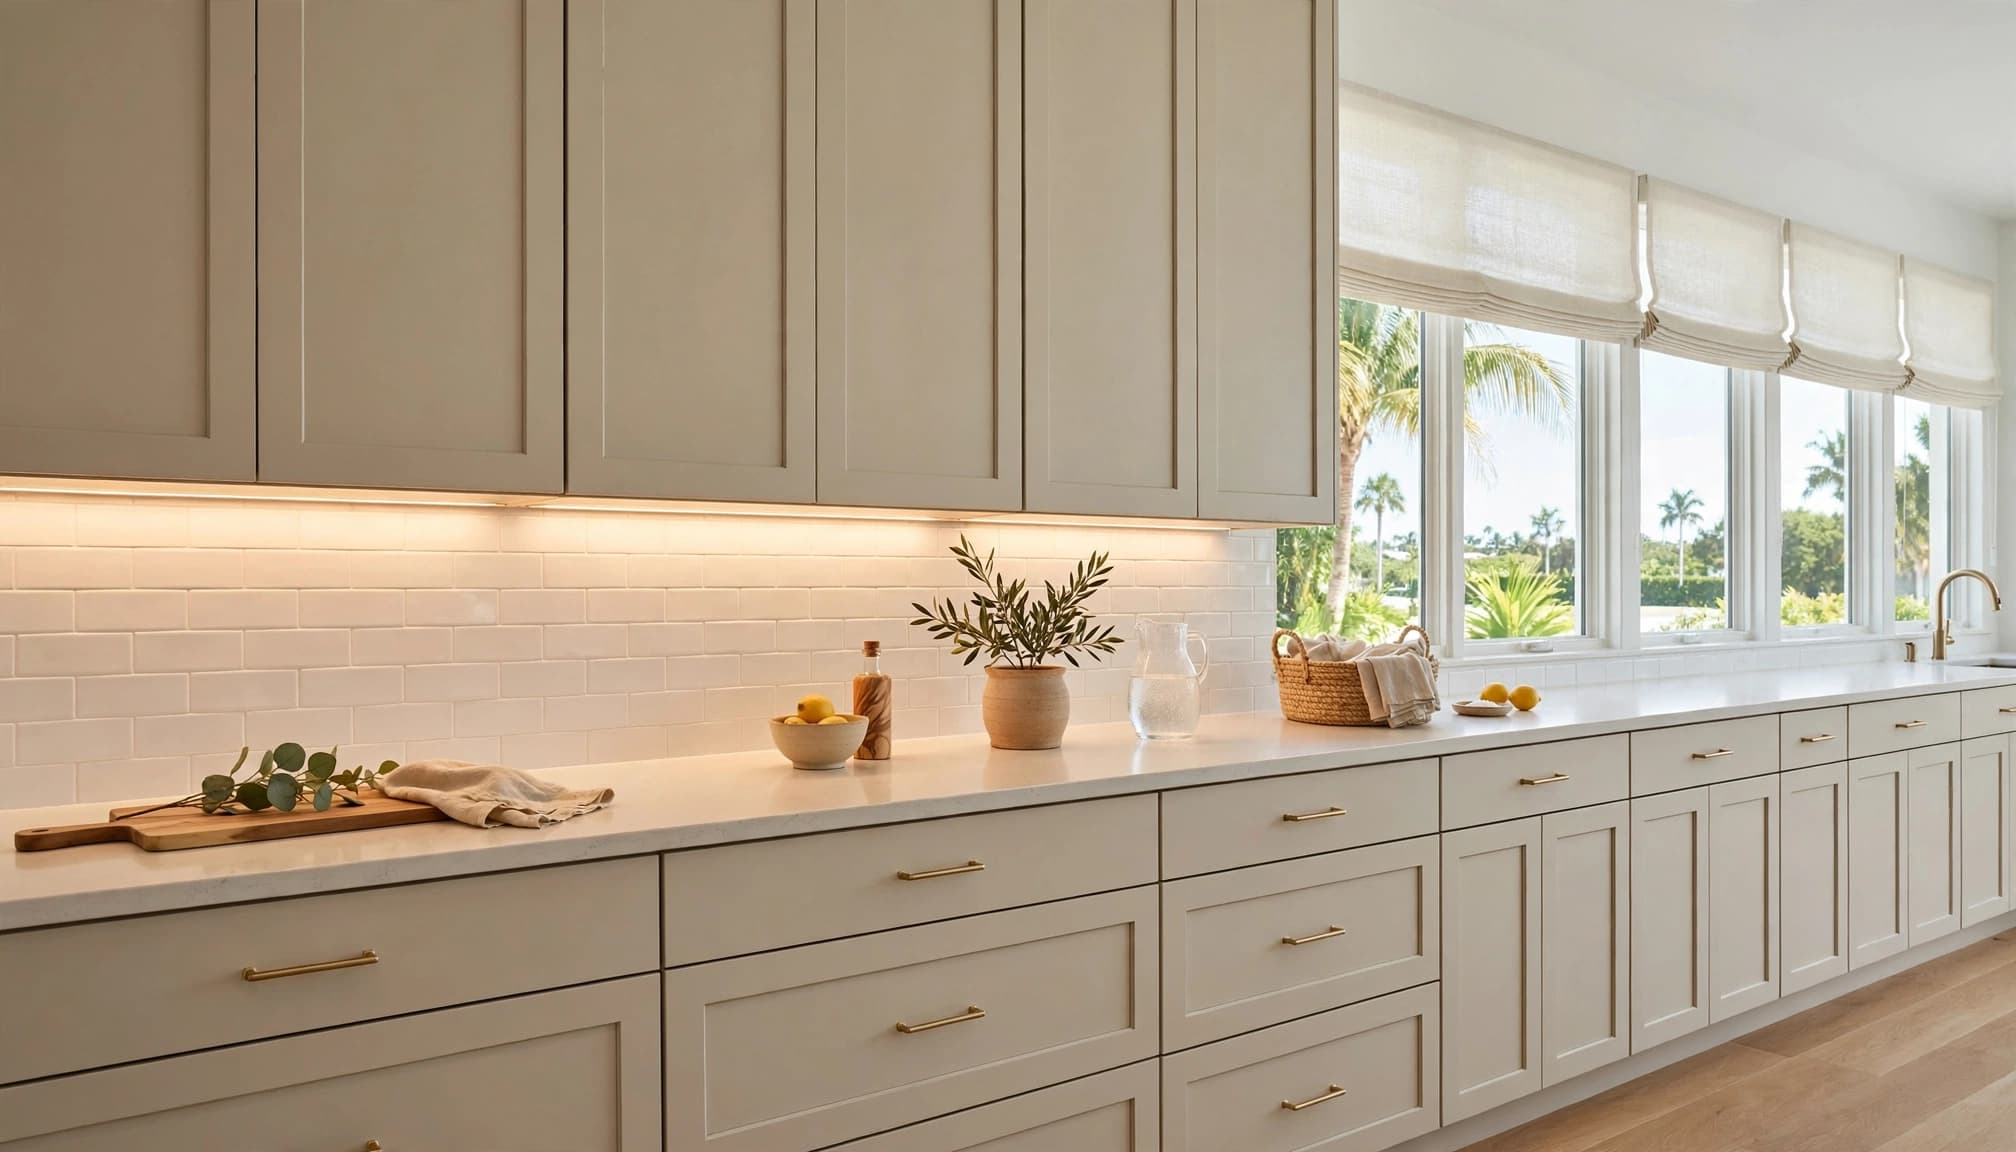
Daylight also changes throughout the day. In a Cape Coral kitchen, windows may provide plenty of light in the morning while leaving a shaded prep area later on.
Ideally, lighting wiring is planned before cabinets go up. Once the kitchen is finished, the design has to work around existing tile, cabinet sides, outlets, and trim. That makes a careful retrofit plan especially useful.
Choose a Retrofit Power Source
The power source affects how much work the installation needs and how the finished lights operate.
Plug-in lights
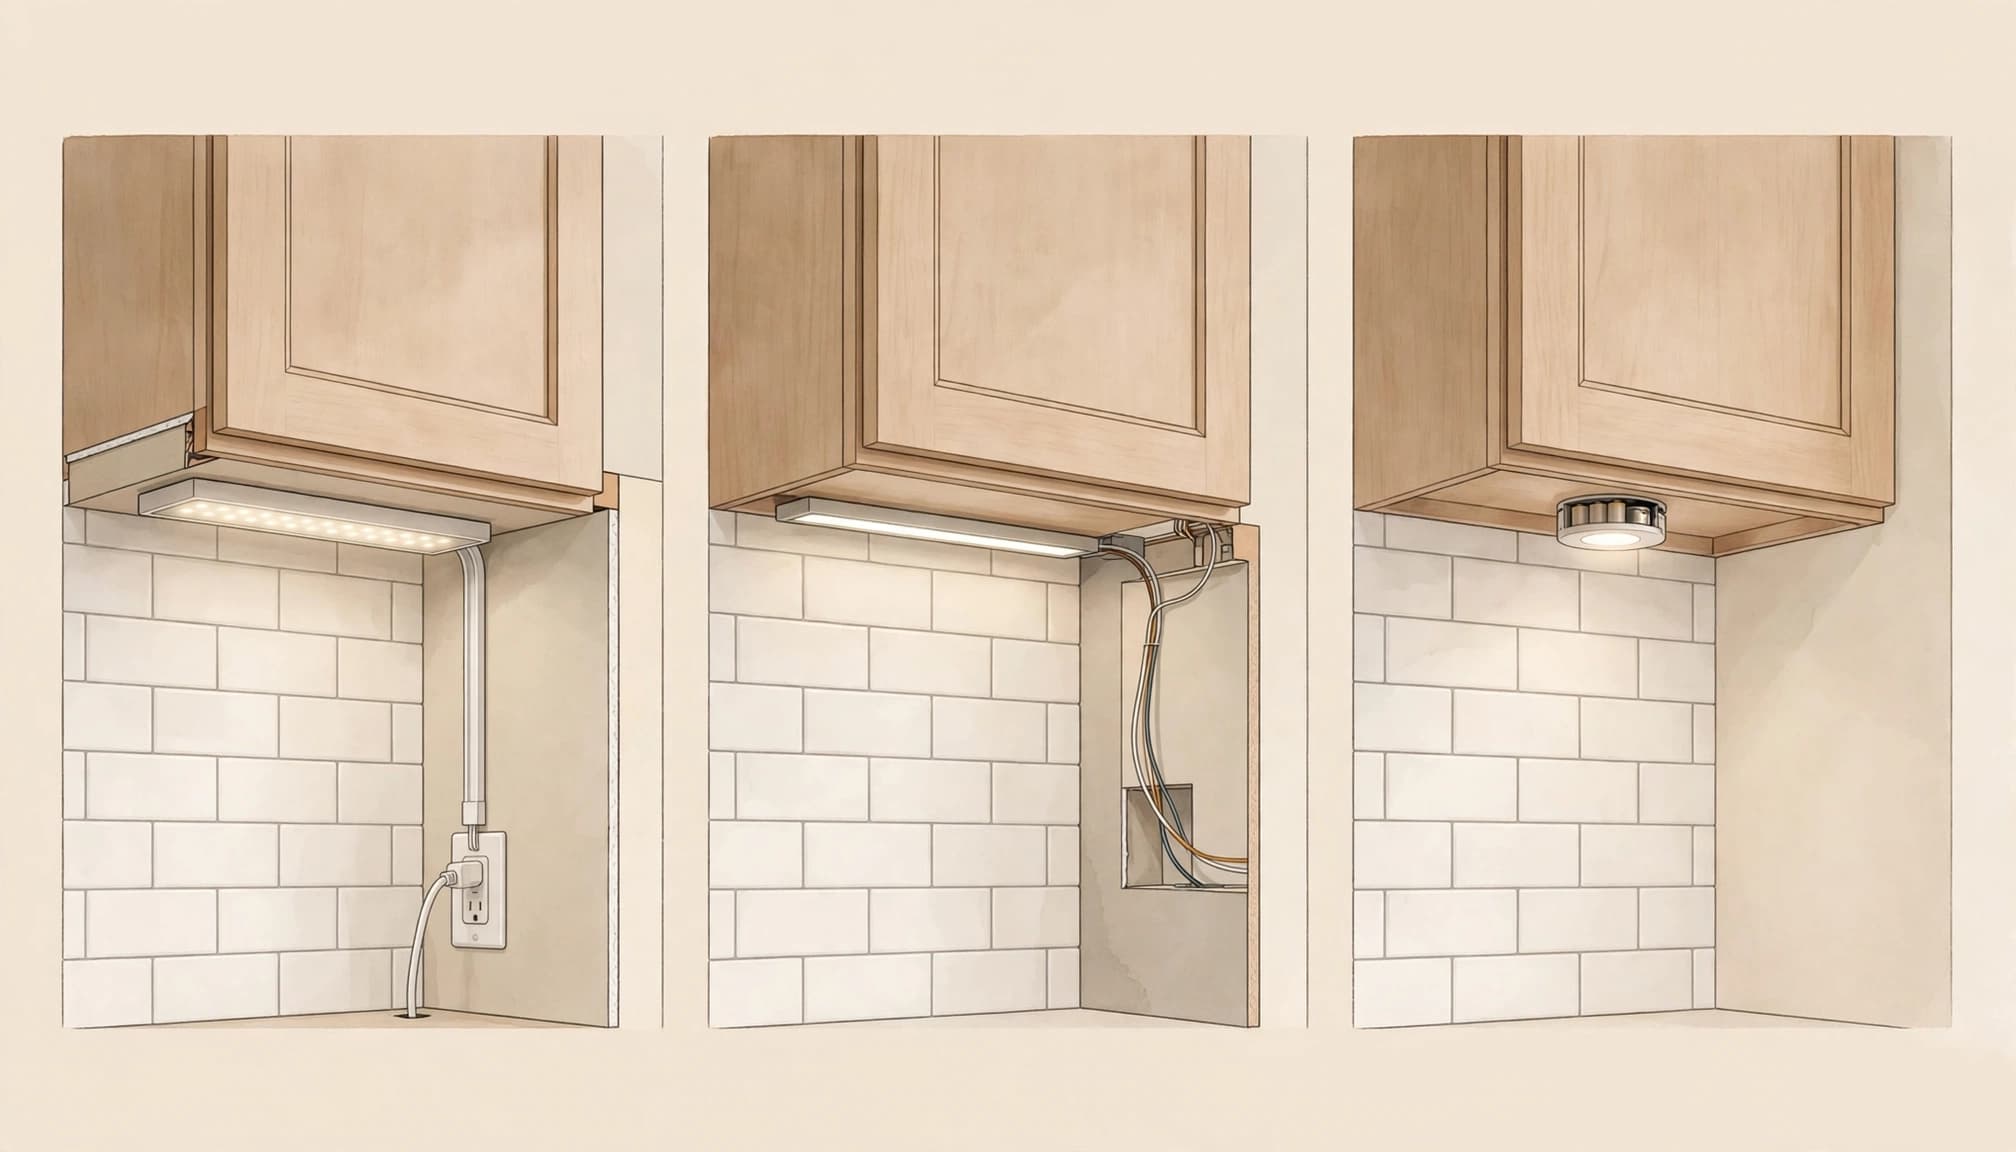
Plug-in fixtures work well when there's a convenient existing outlet near the cabinets. Many light bars and LED strip kits have a cord that connects to a power supply and plugs into a receptacle.
This approach can avoid opening walls, but you'll need a route for the cord. Also consider whether the light will occupy an outlet you normally use for a toaster or coffee maker. A visible cord crossing the backsplash may be a poor fit for a kitchen with a carefully finished tile design.
Hardwired lights
A hardwired system connects to the home's electrical wiring rather than relying on an exposed plug. It can offer a cleaner appearance and convenient wall-switch control.
The trade-off is access. An electrician may need to route wiring through walls or cabinets, and a completed backsplash can limit the available paths. Hardwiring is worth considering when you want several cabinet runs controlled together or don't have a suitable outlet nearby.
Battery-powered lights
Battery-powered lights avoid cords and house wiring. They can be useful beneath a short cabinet run or in a spot where you need occasional light, such as a beverage station.
Their main limitation is maintenance. Batteries need replacement or recharging, and frequent use can make that inconvenient. Some rechargeable fixtures detach from a magnetic mount, which makes them easier to remove without disturbing the cabinet.
Pick a Fixture Style for Your Counter
The shape of the fixture affects how evenly light reaches the work surface and how visible the hardware is.
Light bars and LED strips
Slim light bars provide a straight line of light and come in lengths suited to different cabinet widths. They can work well over a long prep counter, although gaps between bars may create darker spots.
LED tape offers more flexibility along a continuous run. Placing it inside an aluminum channel with a diffuser protects the strip and softens the appearance of individual light points. The channel also gives the installation a more finished look when the underside of the cabinet is visible.
Puck lights
Puck lights are small, round fixtures that create separate pools of light. They can suit a short counter or a display area where you want distinct accents.
For food preparation, spacing matters. Pucks set too far apart can leave shadows between them. If you want a more continuous wash of light across a long counter, a bar or diffused strip is often the better fit.
Place Lights Where You Work
Start with the counter areas you use most. A run beside the range may need more consistent task light than a narrow counter used mainly for decoration.
Use the front of the cabinet
Under-cabinet fixtures often work best toward the front portion of the cabinet underside. That position directs light onto the work surface rather than concentrating it against the backsplash.
Keep the fixture far enough behind the front edge that a seated person or someone across the room doesn't stare directly at the light source. A cabinet's front lip or an existing light rail can help conceal it. If the cabinet underside is flat and exposed, a slim fixture or diffused channel may look cleaner.
Account for breaks and reflections
Windows, range hoods, open shelves, and tall pantry cabinets interrupt a lighting run. Plan each section on its own, then decide how the sections will connect or operate together.
Polished quartz or glossy stone can reflect bright points of light. Before settling on a position, look at the counter from your usual standing and seated viewpoints. A diffuser or a small adjustment in placement can reduce distracting reflections.
The same considerations apply when coordinating cabinet layouts and lighting around windows and doors.
Choose Comfortable Color and Brightness
For many coastal-style kitchens, warm white light works well with wood cabinets, light counters, and neutral walls. A cooler white can give a crisper appearance, but it may look noticeably different beside warm ceiling lights.
Compare the color with your existing kitchen lighting before choosing fixtures for every cabinet. Consistent light color can make separate fixtures feel like part of the same room.
Brightness matters, too. A prep surface needs enough light to see ingredients clearly, while a serving counter may benefit from a softer glow. Choose a system that offers the level of light you need in the areas where you cook.
A frosted diffuser can make the light more comfortable to look at, especially when the fixture is visible from a dining area. Test the effect during daylight and after dark, when reflections and glare are easier to notice.
Hide Wires Without Hiding Service Parts
A retrofit can look tidy without removing the backsplash. The available path depends on your cabinets and where the power source sits.
Use cabinet edges and trim
A small surface raceway can conceal a plug-in cord along a cabinet edge or another unobtrusive route. Choose a finish that blends with the surrounding surface, and keep the cord clear of heat, water, and moving doors.
Existing cabinet trim may also provide a place to conceal part of the fixture. Don't assume every cabinet has enough clearance, though. Decorative edges and finished end panels can affect where a light or channel fits.
Avoid running a cord across a cooking surface or placing it where appliances can pinch it. A kitchen near a lanai may also experience more humid air, so keep lighting and connections away from direct splashes and steam.
Leave drivers and connections accessible
Some LED systems use a separate driver or power supply. Plan a serviceable location for it, such as an accessible cabinet area, rather than burying it behind a fixed cabinet or finished wall.
Junction boxes and service connections need access , too. Concealing a wire path should never mean making a future repair depend on removing cabinetry or tile.
Fit the Lights to Existing Cabinets
Before attaching a fixture, measure each cabinet section and account for the space taken by hinges, trim, and finished side panels. A light that fits one run may be too long for the next.
Hold the fixture in its intended position and look at it from across the room. The light should cover the counter without projecting beyond the cabinet edge or interfering with a door.
Plug-in and battery fixtures may use mounting hardware, adhesive, or removable magnetic mounts, depending on the product. Follow the manufacturer's installation directions and use the mounting method intended for the cabinet surface. Avoid placing fasteners where they could damage concealed wiring.
Once the lights are in place, look for dark gaps between fixtures and unwanted reflections on the counter. It's easier to adjust placement before treating the project as finished.
Know When to Hire an Electrician
Bring in a Florida-licensed electrician for new wiring, circuit changes, junction-box connections, or a hardwired lighting system. A professional can also determine a suitable route when power needs to reach several separate cabinet runs.
Opening a finished wall may lead to drywall repairs, painting, or backsplash work. An existing outlet or wiring route can affect the scope, so discuss the finished appearance as well as the electrical work before installation begins.
For a broader look at the work involved, our guide to kitchen electrical upgrades covers circuit planning and potential repair costs.
An electrician can also coordinate the electrical work with the rest of the project. That matters when a light rail, cabinet panel, or new backsplash might otherwise cover a component that needs future access.
Plan the Scope Around Your Cape Coral Kitchen
A single battery light over a small counter is a different project from hardwiring every cabinet run. Start with the surfaces that need better light, then decide whether the improvement should be limited to one area or extend around the room.
For a larger upgrade, include the fixtures, mounting materials, electrical labor, and any finish repairs in the project scope. If the kitchen has uneven cabinet depths or a detailed tile backsplash, those features may affect the route and placement.
We offer kitchen remodeling in Cape Coral for homeowners planning changes to an existing kitchen. A coordinated plan can keep the lighting consistent with the cabinets and finishes you already enjoy.
A Brighter Counter Without Replacing Cabinets
Adding light after a remodel is practical when the fixture and power source fit the finished kitchen. Plug-in and battery options can limit disruption, while hardwired lighting can provide a cleaner look across multiple work areas.
Focus on useful counter light and accessible equipment. That gives you a kitchen that's easier to work in without sacrificing the finish you chose.