Dryer Vent Planning Before Framing in Southwest Florida
Explore Our Services
Contact Us Today!
(239) 322-9295
A dryer vent is easy to overlook while choosing cabinets, windows, and finishes. However, dryer vent planning affects the laundry location, framing, mechanical layout, exterior wall, and future maintenance of a new Southwest Florida home.
The best time to settle the route is before framing and masonry openings are complete. Confirm the dryer model, duct path, framing penetrations, exterior hood, and inspection steps before insulation, stucco, or drywall hide the work.
Why dryer vent planning starts before framing
Set the laundry location first
Begin with the approved floor plan and the appliance schedule. The builder, designer, HVAC contractor, electrician, and homeowner should agree on whether the dryer will sit in a utility room, hallway closet, garage, or another location.
The dryer position determines where the exhaust connection begins. The exterior wall then influences the route, number of bends, penetration locations, and termination point.
A laundry room placed near an exterior wall usually allows a shorter route. A central laundry closet may require a longer path through framing or a ceiling chase. That layout can work, but the team needs to verify the total developed length and appliance instructions before construction starts.
For homeowners planning new home construction in Fort Myers, the dryer route should appear in the coordination discussion with other concealed systems. HVAC ducts, plumbing, electrical wiring, blocking, cabinets, and structural members may compete for the same space.
Keep the route short and accessible
A straight route with few turns generally supports better airflow and simpler cleaning. Every bend takes space and may reduce the allowable duct length under the applicable code table.
Avoid sending the duct through a sealed chase that no one can inspect or service. If a chase is necessary, document its location and confirm how a future cleaning contractor will reach the full route.
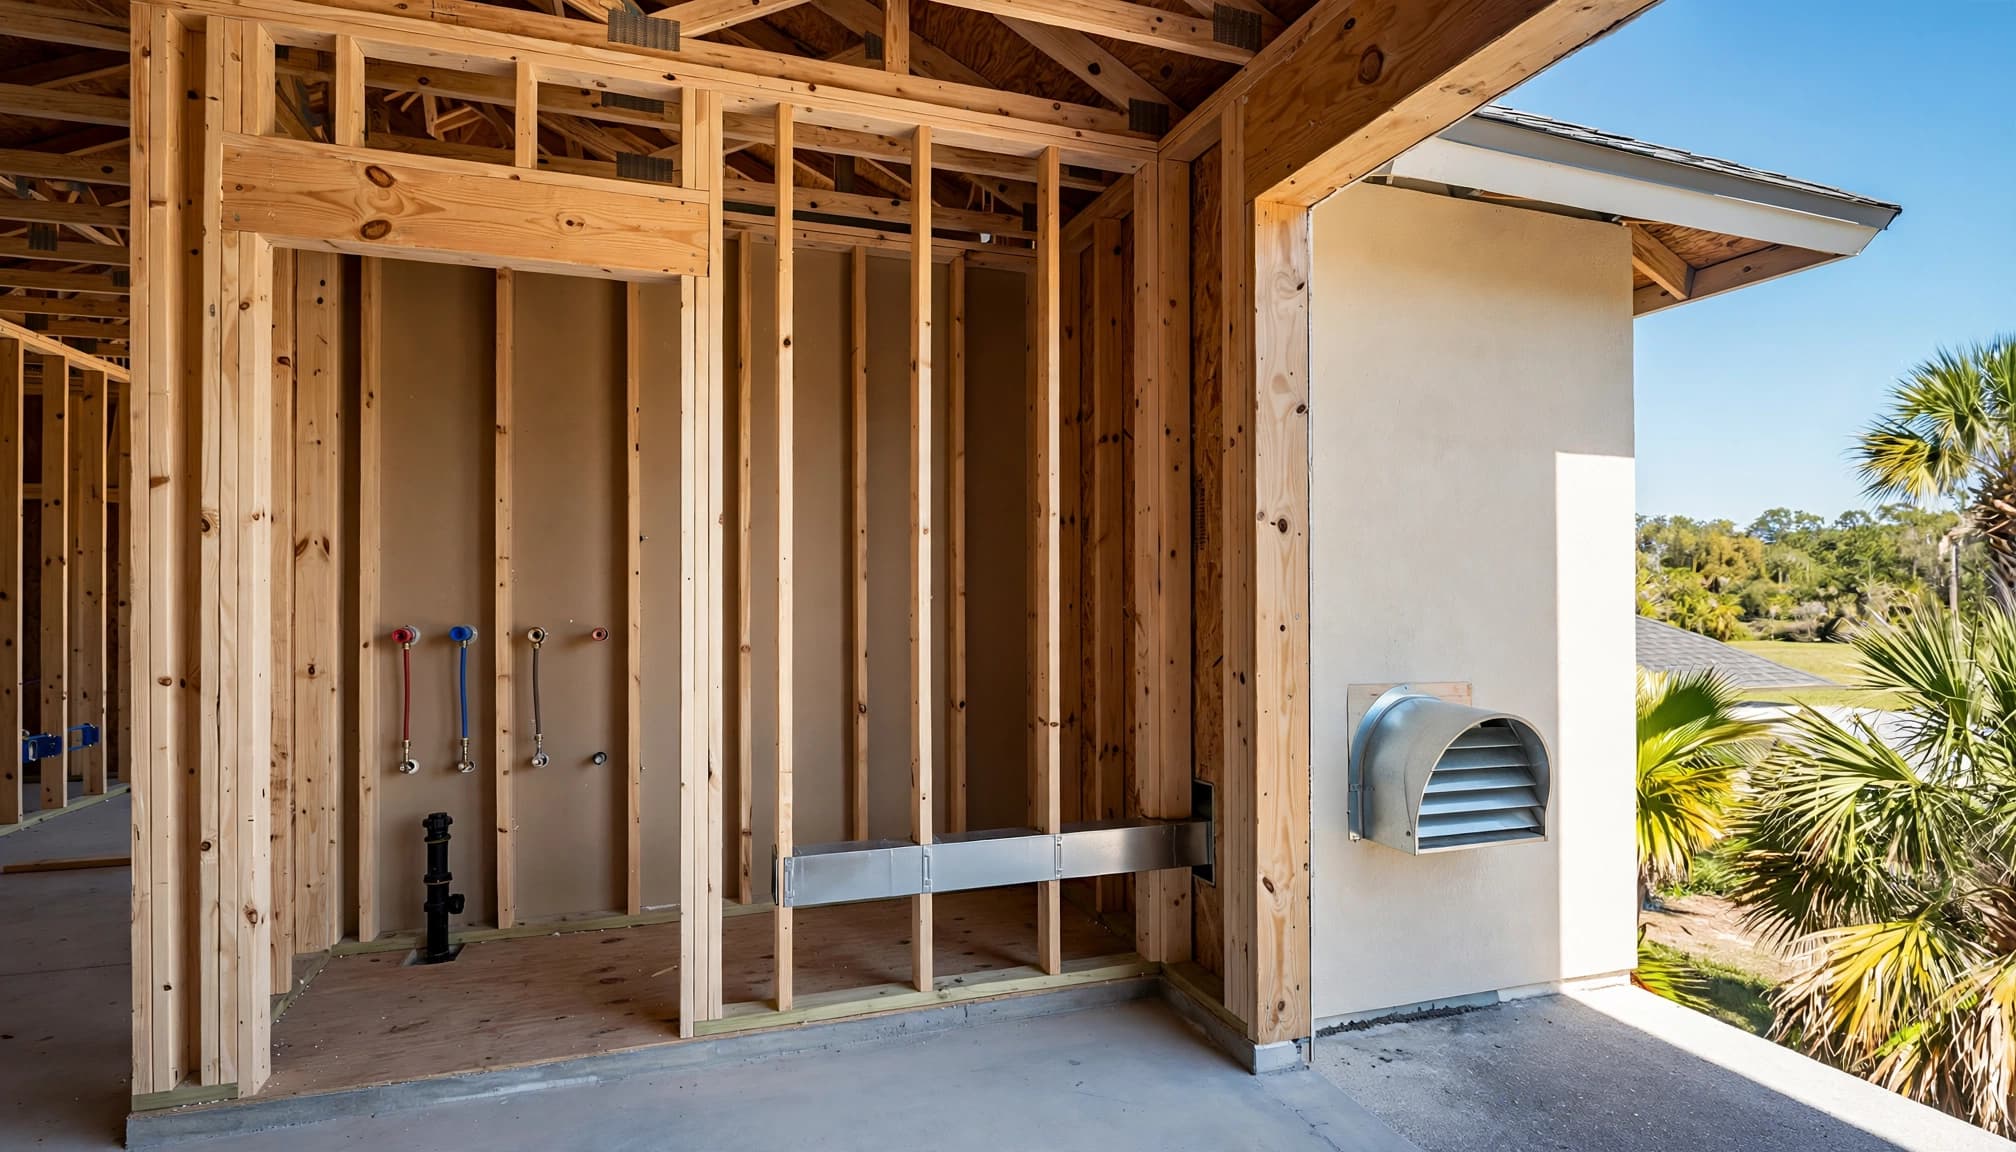
The laundry location, duct path, and exterior termination should be coordinated while framing remains visible.
Florida dryer exhaust rules to design around
Confirm the code edition for your permit
As of September 2026, the Florida Building Code, Residential, 8th Edition (2023), and the Florida Building Code, Mechanical, 8th Edition (2023), provide the statewide baseline. That edition took effect on December 31, 2023.
The Florida Building Commission has scheduled the 9th Edition (2026) to take effect on December 31, 2026. A permit submitted under one edition should not be planned around requirements that are not yet effective for that project.
Local amendments, plan-review comments, the building official, and the approved construction documents also matter. Your builder and licensed contractors should confirm the requirements for the project's jurisdiction, whether it is in Fort Myers, Cape Coral, Lee County, or Collier County.
Plan for the duct, length, and termination
Florida mechanical requirements generally call for an independent dryer exhaust that discharges outdoors. The duct is generally 4 inches in nominal diameter, has a smooth interior, and uses metal meeting the applicable thickness requirement. The mechanical code text identifies metal at least 0.016 inch thick.
The maximum exhaust duct length is generally 35 feet, measured from the dryer transition-duct connection to the outlet terminal. Elbows and other fittings can require reductions under the applicable table. A dryer manufacturer's instructions may also set a shorter limit.
The termination needs a backdraft damper. Screens are prohibited because lint can collect against them and restrict airflow. Do not substitute a screened pest cover for the approved termination design.
Fasteners must not project into the airflow. The duct also must not connect to another vent, chimney, plenum, or unrelated duct system.
If the manufacturer does not specify the termination location, the termination generally needs to be at least 3 feet from building openings, including ventilated soffits. The builder should verify the exact location against the current code, plans, product instructions, and site conditions.
Appliance instructions can change the design
Choose the dryer before rough-in
A gas dryer and an electric dryer can have different installation needs. The appliance schedule should identify the actual model, fuel type, electrical requirements, transition connection, and any manufacturer limits on duct length or configuration.
Do not assume that every dryer can use the full 35-foot code allowance. That number is a code limit, not a guarantee that a particular appliance will perform well at that length.
Keep the installation manual with the construction documents. If the homeowner changes the appliance after rough-in, the new model may require a different connection, clearance, outlet location, or makeup-air arrangement.
Verify closet and makeup-air provisions
A dryer installed in a closet may have additional clearance, louver, door, or ventilation requirements. Those provisions depend on the appliance, the room configuration, and the effective code edition.
A 2026 code-change analysis discusses a proposed or new rule for dryers exhausting over 200 cubic feet per minute, along with closet provisions and a possible 100-square-inch opening. Those figures should not be treated as current statewide requirements without confirming the permit's effective code edition and the local interpretation.
Ask the builder to record the dryer model and installation requirements before framing closes. This step prevents a later appliance substitution from creating a hidden airflow or clearance problem.
Southwest Florida conditions need early attention
Protect the wall from rain and humidity
Southwest Florida homes face high humidity, intense rain, and wind-driven water during storms. The dryer penetration should be coordinated with the wall's water-resistive barrier, flashing approach, stucco or cladding system, and exterior sealant.
A hole through the wall is not complete simply because the duct fits. The opening needs an approved detail that keeps water on the exterior side of the wall assembly. The exterior finish should not cover an unfinished or poorly sealed penetration.
Before stucco or siding begins, inspect the hood location, surrounding wall surface, sealant, drainage details, and connection to the duct. Take photographs while the penetration remains visible.
Select materials for the site's exposure
Salt-laden air can affect metal accessories, fasteners, sealants, and coatings, especially near the coast or open water. Ask the builder and product supplier whether the proposed hood and attachment materials suit the home's exposure and the approved assembly.
Avoid choosing a vent cap only by appearance. The product needs a properly operating damper, a secure connection, weather resistance, and compatibility with the exterior finish.
The correct solution is not automatically the most expensive material. It is the product that matches the appliance instructions, code requirements, wall system, and local exposure.
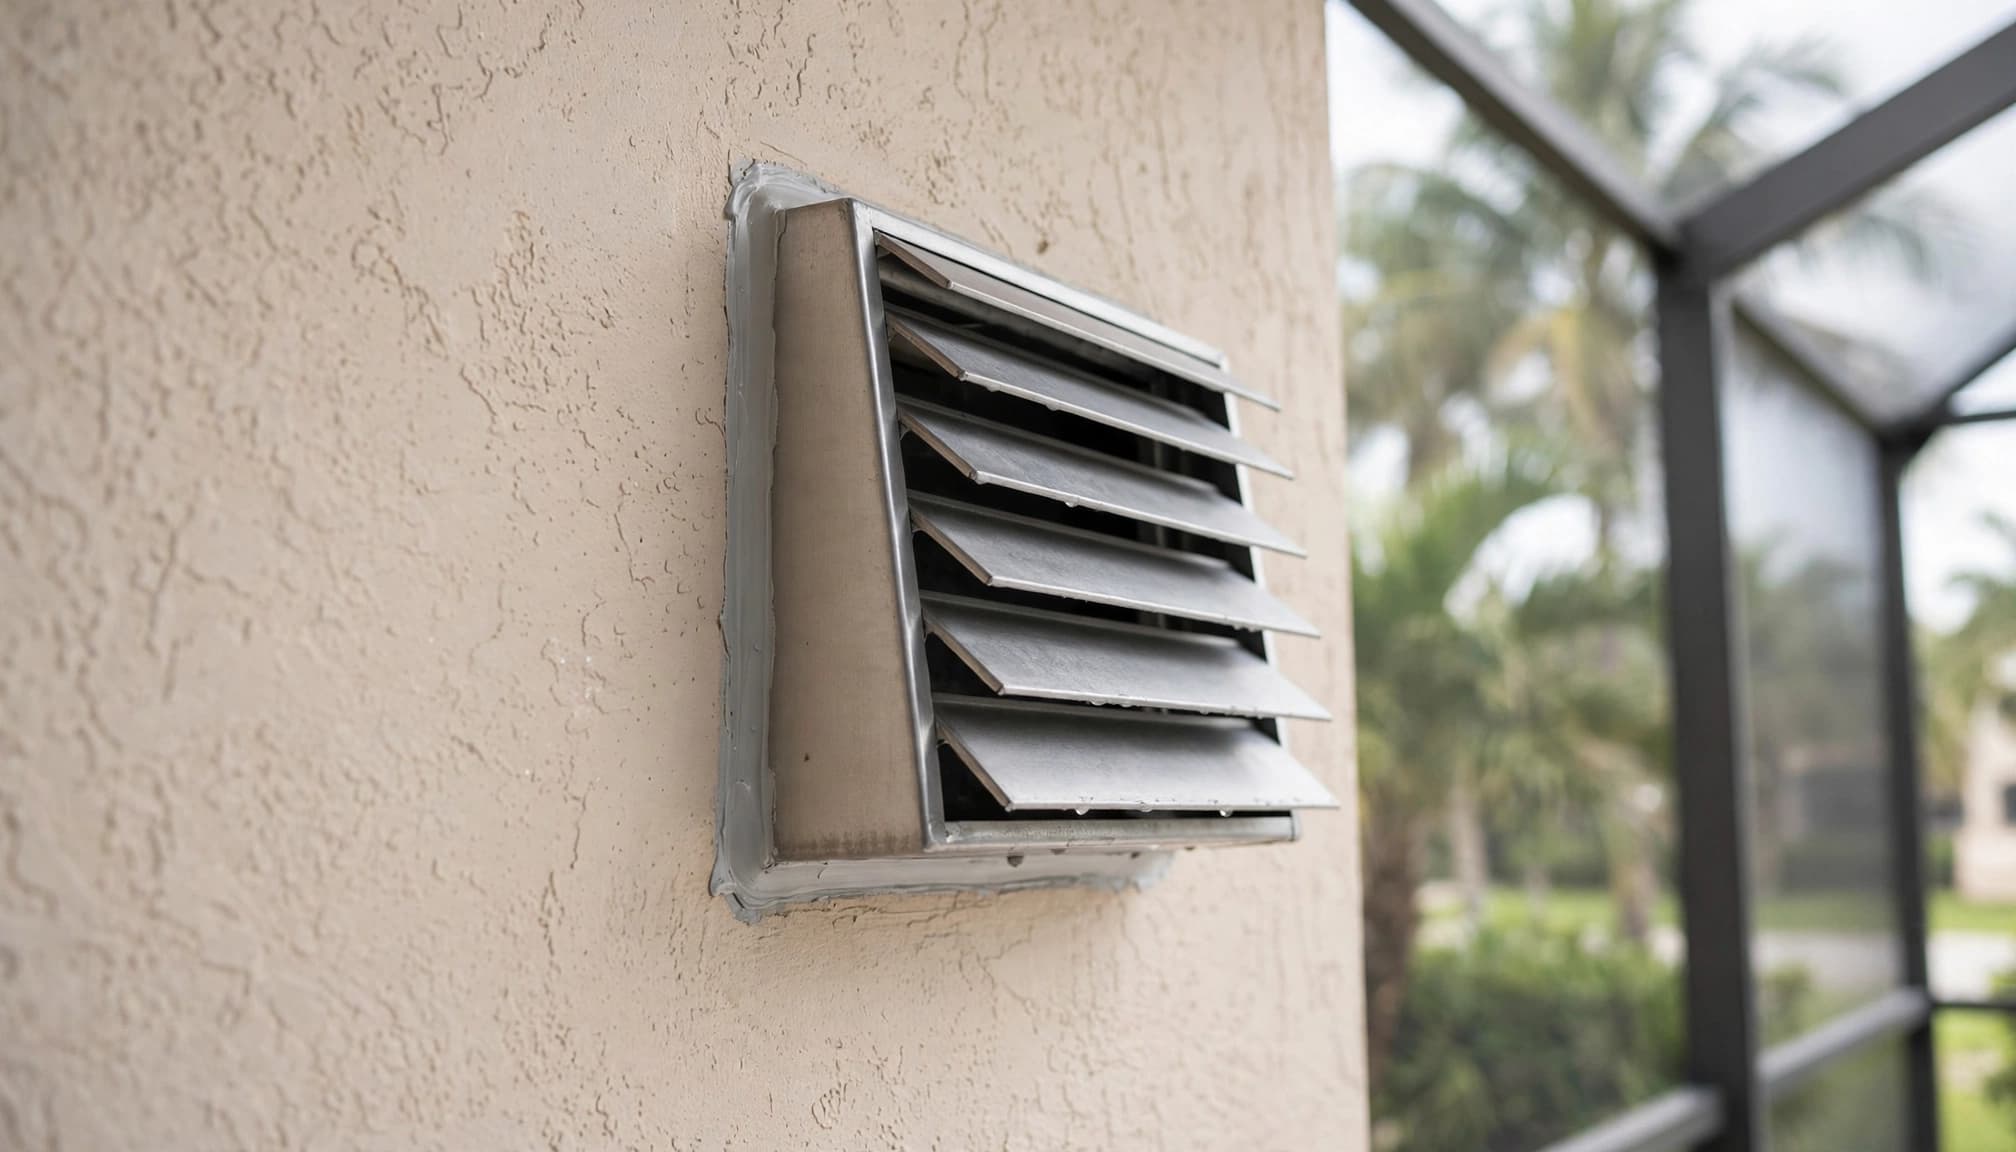
The exterior hood should be selected and coordinated before stucco covers the wall penetration.
Make cleaning, pests, and future repairs part of the plan
Lint safety depends on adequate airflow and regular cleaning. A long, kinked, crushed, or poorly joined duct can collect lint and make the dryer work harder. Whirlpool installation guidance recommends a direct route, limited 90-degree turns, sealed clamp connections, and no tape or screws extending into the duct.
The exterior damper should close when the dryer is off. That helps limit weather and pest entry without adding a prohibited screen. A damaged flap, loose hood, or gap around the penetration deserves repair.
Before drywall, ask these questions:
- Can the entire duct route be traced from the dryer connection to the exterior hood?
- Are the joints secure without screws or fasteners blocking the interior?
- Is the duct free of crushing, kinks, and unnecessary bends?
- Can a future service professional inspect and clean the route?
- Does the exterior damper move freely and close properly?
- Are the hood, sealant, fasteners, and wall materials compatible?
- Has the builder photographed the concealed work?
Do not place storage, cabinets, plumbing, or HVAC equipment where they will block future access to the dryer connection. A neat laundry room still needs enough room to remove the appliance and inspect the transition duct.
Use a pre-framing coordination checklist
A written checklist helps prevent verbal decisions from disappearing between the floor-plan meeting and rough inspection. The builder should coordinate these items with the mechanical contractor and homeowner:
- Mark the dryer location on the approved floor plan and at the job site.
- Record the selected dryer model, fuel type, and installation instructions.
- Draw the duct route, including every elbow and wall or ceiling penetration.
- Confirm the allowable length after fitting reductions and manufacturer limits.
- Identify the exterior termination location before stucco, siding, or roofing work.
- Confirm the dampered, screen-free termination product and compatible materials.
- Coordinate the penetration with framing, blocking, wiring, plumbing, HVAC, and cabinets.
- Confirm how the water-resistive barrier and exterior finish will seal around the opening.
- Photograph the duct, joints, framing penetrations, and exterior termination before concealment.
- Add the route and termination to the project's closeout or homeowner maintenance records.
Permit schedules can affect this coordination. The Fort Myers new home permit timeline may differ from the process in Cape Coral, unincorporated Lee County, or Collier County. Include mechanical reviews, rough inspections, and any required corrections in the construction schedule.
The same discipline applies to costs. A change after framing may involve multiple trades, not only the dryer installer. Reviewing Southwest Florida new home permit fees and trade scopes early can help identify whether mechanical revisions, inspections, or exterior repairs are included.
Key takeaways for Southwest Florida homeowners
- Decide the laundry location and dryer model before framing.
- Keep the duct as straight and short as practical.
- Verify the current code edition, local requirements, and manufacturer's instructions.
- Use an independent, smooth metal exhaust duct that discharges outdoors.
- Confirm the 35-foot limit only after accounting for fittings and appliance restrictions.
- Use a dampered termination without a screen.
- Coordinate the opening with the water-resistive barrier and exterior finish.
- Select hood, sealant, and fastener materials for the home's exposure.
- Photograph concealed work before insulation, drywall, or stucco.
- Confirm future cleaning and service access before walls close.
Dryer vent planning FAQ
Can the dryer vent run through the attic?
It may be possible in some designs, but the route must comply with the current code, approved plans, and appliance instructions. The builder also needs to account for access, bends, condensation concerns, framing conflicts, and the exterior termination.
A shorter wall route is often easier to inspect and maintain. Your licensed contractor should approve the final path before framing begins.
Can I add a screen to keep insects out?
The Florida mechanical requirements identify screens as prohibited at dryer exhaust terminations. Use an approved dampered hood instead, and make sure the flap closes properly when the dryer is off.
If insects enter through a damaged or poorly fitted termination, repair the assembly rather than adding an airflow-blocking mesh screen.
What should I do if I have not chosen the dryer yet?
Tell the builder before rough-in. The team can reserve a practical location, but the final route should be checked against the selected appliance's connection and installation instructions before the duct is closed in.
Avoid approving a permanent route based only on a generic dryer size. A later model change can affect clearances, electrical work, gas connections, or ventilation provisions.
Who should approve the final route?
The builder should coordinate the work with the licensed mechanical contractor, framing crew, appliance specifications, approved plans, and building official requirements. The homeowner should receive the final route, product information, and photographs for future maintenance.
Conclusion
A dryer vent rarely causes problems because homeowners forgot to buy a vent hood. Problems usually begin when the laundry location, appliance, duct route, framing, and exterior wall are handled as separate decisions.
Make dryer vent planning part of the pre-framing meeting. A documented route, approved termination, weather-aware penetration, and accessible duct give the finished home a safer and more maintainable laundry system.