Fort Myers Kitchen Lighting That Works Day and Night
Explore Our Services
Contact Us Today!
(239) 322-9295
A kitchen can feel bright at noon and uncomfortable after sunset if it relies on one ceiling fixture. A successful Fort Myers kitchen lighting plan uses several controlled layers so the room supports cooking, cleaning, dining, and relaxing at different times.
The best design starts before cabinets, countertops, and electrical work are installed. It considers natural light, island placement, ceiling height, cabinet depth, appliance locations, and the way your family uses the kitchen. These principles fit both a focused kitchen renovation and a larger Fort Myers kitchen remodeling project.
Why Fort Myers kitchen lighting needs several layers
Layered lighting prevents the common problems caused by one bright source. Recessed lights alone can leave counters shaded by your head or upper cabinets. Decorative pendants may look attractive but fail to illuminate a sink or food preparation area. Under-cabinet lights help with work, yet they cannot light the entire room.
Ambient lighting covers the room
Ambient lighting provides the general brightness you need to move through the kitchen. Recessed LED fixtures are common for this layer, especially in kitchens with open sightlines into dining or living areas.
Place ceiling fixtures so light reaches the main walking paths, cabinet aisles, and open floor area. Avoid arranging every fixture in a rigid grid without considering the island, range, refrigerator, and pantry. A well-planned layout puts light where people stand and move.
Large windows can provide strong daytime illumination, but sunlight changes throughout the day. Window glare can also make polished quartz, granite, or solid surface countertops uncomfortable to view. Use adjustable shades or curtains where needed, then let dimmable ceiling fixtures handle the transition after sunset.
Task lighting supports real kitchen work
Task lighting focuses on surfaces where you chop, measure, wash, read recipes, and use small appliances. Under-cabinet fixtures are often the most useful addition because they place light directly on the counter instead of behind the person working.
The sink, range, island, and main preparation counters each deserve attention. A person standing at an island can block light from a distant ceiling fixture, so combine overhead lighting with properly positioned pendants or recessed fixtures.
Accent lighting adds depth and comfort
Accent lighting highlights cabinet details, backsplash materials, open shelving, or architectural features. It also helps the room feel less stark when you no longer need full cooking brightness.
Inside-glass cabinet lights, toe-kick strips, and low-level pantry lighting can create a softer evening setting. These fixtures should support the room, not compete with task lighting or create bright spots in your eyes.
Build the three layers into one lighting plan
A good plan makes each layer useful on its own and comfortable in combination. During the day, natural light may carry much of the ambient load while task lights remain available for shaded counters. At night, ambient and task lighting can work together without requiring every fixture to operate at full output.
Coordinate ceilings, islands, and cabinets
Use recessed fixtures or another broad ceiling source for general illumination. Keep them positioned to light circulation areas and work zones without placing them directly behind the person using a counter.
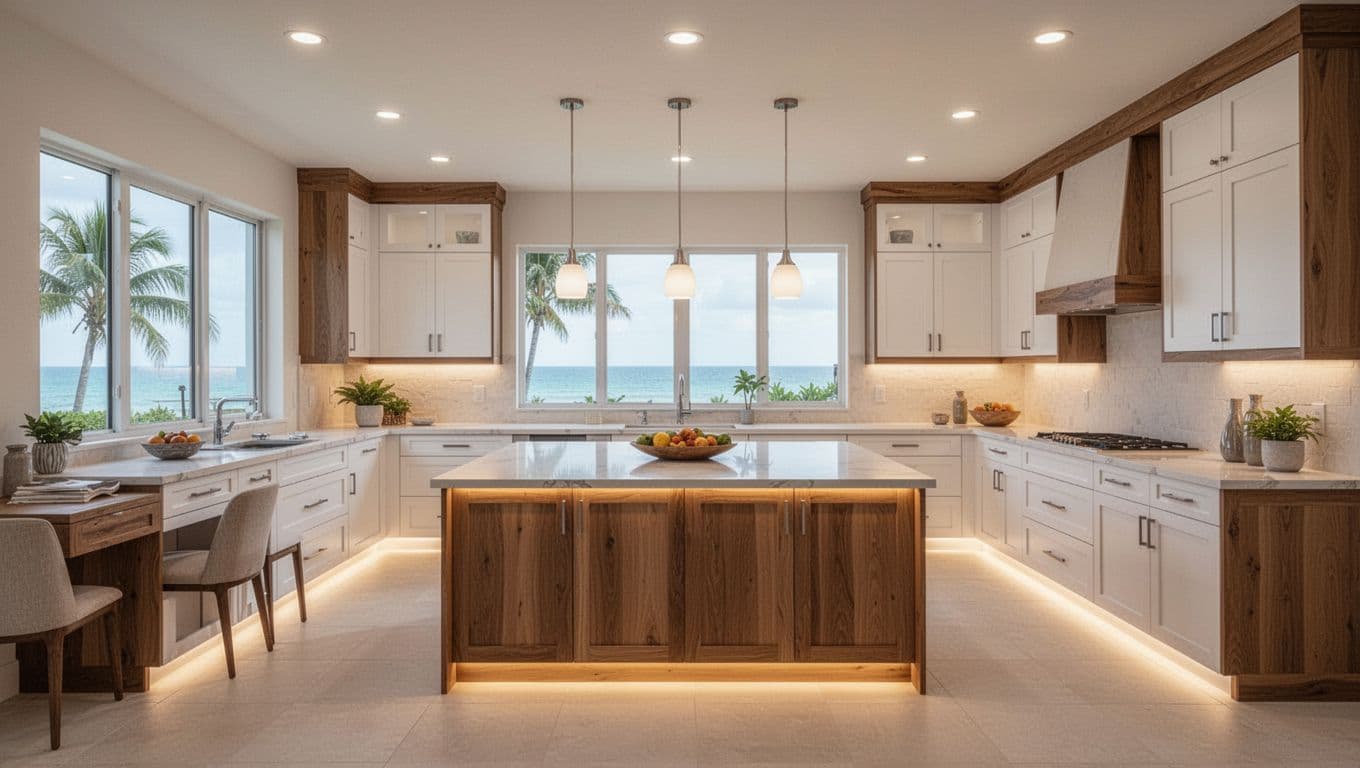
Island pendants can provide both task and decorative value. Their size and number should match the island rather than overwhelm it. Three statement pendants may increase a lighting budget, especially when the design also includes under-cabinet fixtures and several dimmer zones. A smaller island may need fewer fixtures or a compact linear fixture.
Under-cabinet lighting should sit toward the front of the cabinet underside, where it can wash the counter evenly. A continuous LED channel usually produces a more consistent result than widely spaced individual lights. Conceal wiring where possible so the finished backsplash remains clean.
Give each layer its own control
Separate controls let you change the room without over-lighting it. One switch might control ceiling fixtures, another the island pendants, and another the under-cabinet lights. Accent or toe-kick lights can use a separate low-level zone.
Dimmers make the plan more flexible. Use dimmers rated for the selected LED fixtures, and confirm that the lamps and controls work together without flicker. A bright cooking setting, a moderate entertaining setting, and a low evening setting can all come from the same installation.
For a larger kitchen, place controls at the main entry and near the transition to the dining or living area. Smart controls can add convenience, but simple, clearly labeled wall controls remain reliable for daily use.
Place task lighting where work happens
Task lighting should follow the kitchen's actual workflow. Before choosing fixtures, mark the areas where someone will stand for several minutes at a time. That includes the sink, primary preparation counter, cooktop, island, coffee station, and pantry.
Light countertops and sinks without glare
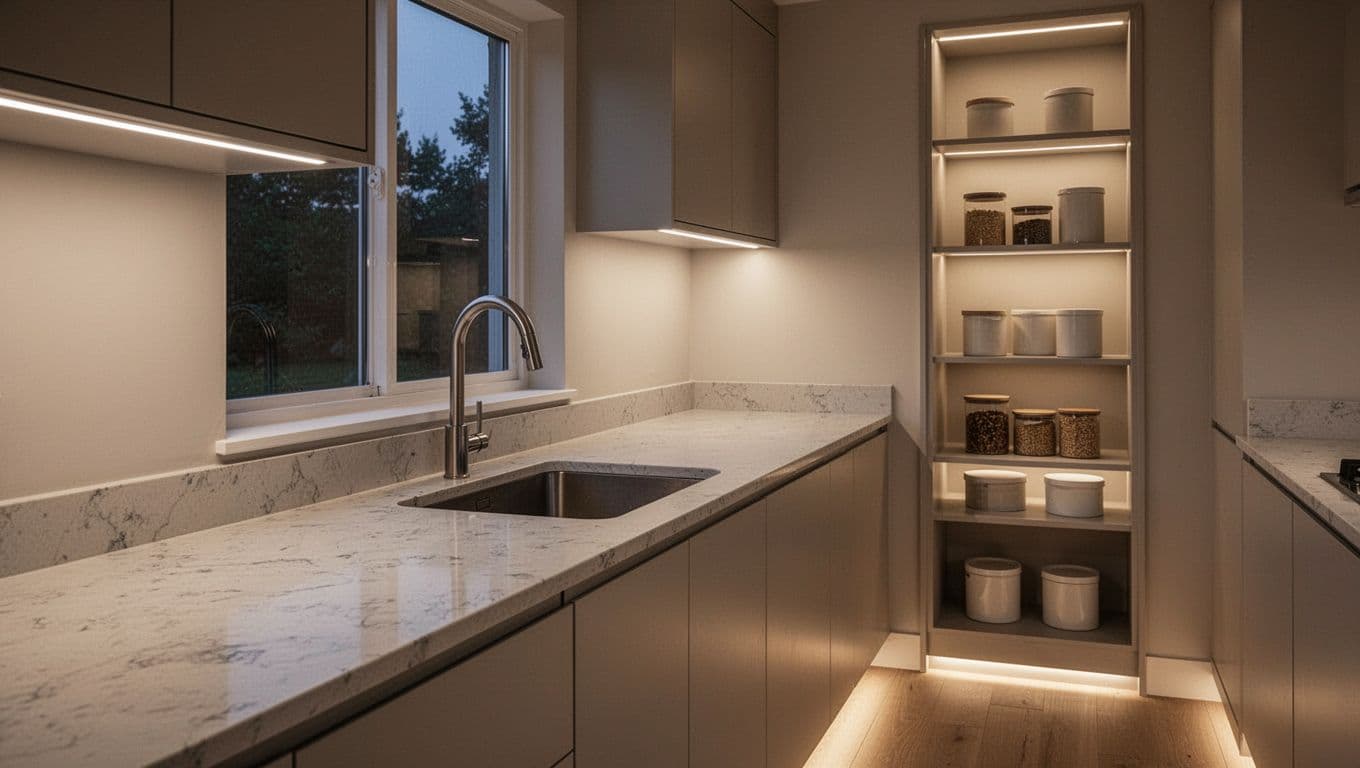
Under-cabinet fixtures should illuminate the full depth of the countertop. A fixture mounted too far back can leave the front edge dim. One mounted too close to the cabinet face may create glare on glossy backsplash tile or polished stone.
Diffusers help soften individual LED points. Choose a fixture with even output and place it so the light reaches the counter without shining directly into the user's eyes. If upper cabinets stop before a corner, consider how the adjacent wall or open shelf will affect shadows.
Sinks need their own check. A ceiling fixture may be blocked by the person washing dishes, especially when the sink sits beneath a cabinet or window. Under-cabinet lighting, a carefully positioned recessed fixture, or a suitable damp-location fixture can improve visibility. Follow the product listing and local requirements for locations exposed to moisture.
The range and cooktop also need clear illumination. Avoid placing a pendant where it could interfere with a hood or create a reflective hotspot on the cooking surface.
Include the pantry and walkways
A pantry can be difficult to use when the door or shelves block a nearby ceiling fixture. Vertical LED lighting, shelf lighting, or a fixture placed at the pantry ceiling can help reveal contents without forcing you to search in shadow.
Walkways need less light than work surfaces, particularly at night. Low-level toe-kick lighting can guide movement between the kitchen, hallway, and living area without activating every ceiling fixture. Use a separate control or occupancy feature if it suits your household.
Keep walkway fixtures shielded and dimmable. Bright lights near the floor can feel harsh after your eyes adjust to a darker room.
Choose LED color, quality, and moisture ratings carefully
The fixture's appearance matters, but its light quality affects how food, finishes, and skin tones look every day. LEDs offer many choices, so decide on color and rendering before ordering fixtures.
Select a comfortable color temperature
Color temperature is measured in Kelvin. Lower numbers produce warmer light, while higher numbers look cooler and bluer.
For many residential kitchens, 2700K to 3000K creates a warm, comfortable evening appearance. Some homeowners prefer 3000K to 3500K for task lighting because it feels clearer during food preparation. The best choice depends on the cabinets, flooring, countertops, wall color, and adjacent rooms.
Try to keep connected fixtures reasonably consistent. A warm pendant beside a noticeably cooler under-cabinet strip can make the kitchen look mismatched. If you want different settings, choose fixtures designed to coordinate rather than combining random lamp types.
High color rendering index, or CRI, helps surfaces and food appear more natural. Look for LEDs with a CRI of 90 or higher when accurate color matters, especially above preparation counters and islands.
Reduce glare, shadows, and moisture concerns
Glare often comes from exposed LED points, shiny surfaces, or fixtures aimed directly at the user's line of sight. Frosted lenses, recessed trims, indirect lighting, and careful placement can reduce discomfort.
Shadows usually come from placing light behind the person working. Add front-facing under-cabinet illumination and avoid relying on a single central fixture for every task.
Use fixtures with an appropriate damp-location rating where humidity or occasional moisture is part of the environment. A sink area, beverage station, or kitchen opening near an outdoor space may need extra attention. The rating must match the fixture location and installation instructions. Your electrician should confirm the selection before installation.
Coordinate lighting with cabinets and appliances
Lighting works best when it is part of the kitchen layout instead of an afterthought. Cabinet depth, crown molding, open shelving, hood placement, and appliance doors can all affect where fixtures fit.
Plan before upper cabinets are installed
Under-cabinet lighting, pendant boxes, switches, and outlets should be reviewed before upper cabinets go in. The cabinet plan should show where the fixture sits, how wiring reaches it, and whether the light will be visible from normal standing positions.
Share the final lighting plan with the cabinet installer, electrician, countertop fabricator, and appliance supplier. This coordination helps prevent a pendant from landing over a cabinet edge or an under-cabinet fixture from being blocked by trim.
The same review should include pantry shelves, appliance garages, a microwave drawer, and any glass-front cabinets. A small change during planning is easier than opening finished walls later. For more detail on timing, review this guide to kitchen electrical and lighting planning.
Match electrical work to the appliance schedule
Lighting circuits are only one part of the electrical plan. Induction cooktops, wall ovens, range hoods, refrigerators, microwave drawers, and dishwashers may have different circuit, voltage, and outlet needs.
Finalize appliance locations before rough-in work. Confirm whether the island needs outlets, whether the hood requires a dedicated connection, and where switches will sit in relation to doors and walkways.
Electrical, plumbing, and structural changes may require permits, depending on the project and applicable local requirements. Final electrical work should follow the applicable Fort Myers and Florida code requirements and must be completed by a qualified professional. Ask who will handle permit applications, inspections, and any required corrections.
Key takeaways for a day-to-night kitchen
- Use ambient lighting for general visibility, task lighting for counters and sinks, and accent lighting for cabinets and low-level evening use.
- Plan recessed fixtures, pendants, and under-cabinet lights around the island, appliances, cabinet depths, and walking paths.
- Choose dimmable LEDs with coordinated color temperature and high CRI, preferably 90 or higher where accurate color matters.
- Reduce glare with diffusers, careful aiming, concealed light sources, and even under-cabinet placement.
- Include the pantry, toe-kicks, and walkways instead of treating them as leftover areas.
- Review lighting before cabinet installation and coordinate it with appliance circuits and outlet locations.
- Budget for controls, wiring, rough-in changes, and inspections, not only the visible fixtures.
FAQ about Fort Myers kitchen lighting
How many lighting layers does a kitchen need?
Most kitchens benefit from three layers: ambient, task, and accent lighting. Ambient fixtures provide general room brightness. Task fixtures illuminate work surfaces. Accent fixtures add visual interest and support lower light levels at night.
The layers don't need to run together at full brightness. Separate switches and dimmers let you use only the light the room needs at a particular time.
What color temperature works best in a remodeled kitchen?
Warm white LEDs around 2700K to 3000K often create a comfortable residential setting. Some homeowners choose 3000K to 3500K for clearer task lighting. Keep the final selection consistent with the finishes and nearby rooms.
A lighting sample or showroom test can reveal differences that are hard to judge from a product listing alone.
Should under-cabinet lighting be planned before cabinets?
Yes. The locations of wiring, switches, drivers, outlets, cabinet trim, and fixture channels should be reviewed before upper cabinets are installed. Early coordination also helps the lighting reach the front of the counter rather than stopping in a shadowed area.
Does adding kitchen lighting require a permit?
The answer depends on the scope of work and applicable local requirements. Electrical changes, along with related plumbing or structural work, may require permits and inspections. A qualified professional should verify the requirements for your Fort Myers project before work begins.
Conclusion
A kitchen that works at noon may still fail at 9 p.m. if every fixture is bright, exposed, and controlled by one switch. Fort Myers kitchen lighting should combine broad ambient illumination, focused task light, and softer accent zones that respond to cooking, entertaining, and nighttime movement.
Plan the layers with the cabinet and appliance layout, choose compatible dimmable LEDs, control glare, and address moisture ratings where needed. With the electrical work coordinated before installation, your remodel can look polished while remaining comfortable and practical after the sun goes down.