Outdoor AC Unit Placement for Quieter Bedrooms
Explore Our Services
Contact Us Today!
(239) 322-9295
Outdoor AC unit placement can make a bedroom quieter by putting distance and a solid wall between the equipment and the sleeping area. The location also needs open airflow and service access so the system can cool the home effectively.
In Southwest Florida, the decision is easier to make before a new home or addition takes shape. For an existing home, there are ways to reduce noise without necessarily moving the unit. Start by looking at how sound reaches the bedroom.
Put Distance Between the Unit and Bedroom Windows
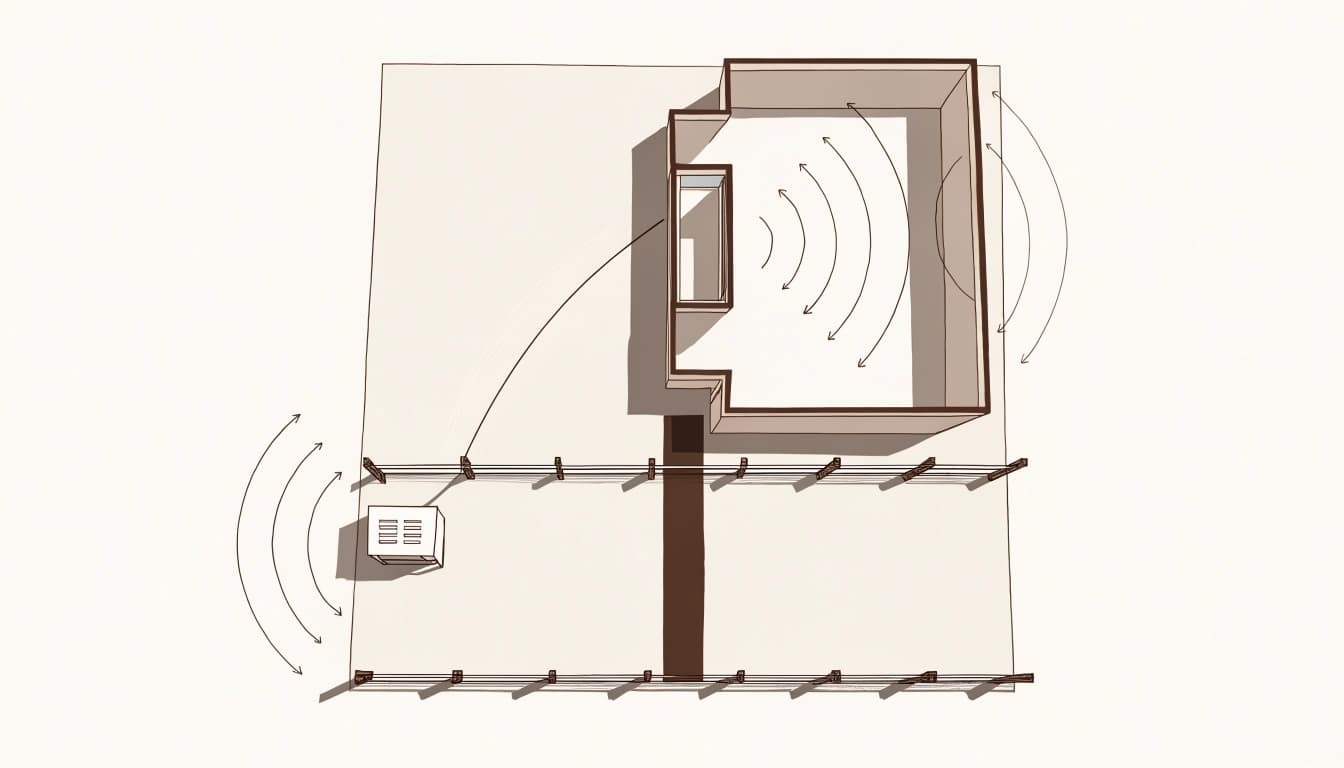
The outdoor unit contains a compressor and fan, both of which make sound while the system runs. A unit directly outside a bedroom window has a short path into the room, especially when the window is open.
Look Beyond the Nearest Wall
When the layout allows, place the unit along a wall away from bedroom windows. A location closer to a garage, laundry room, or other less noise-sensitive space may be a better fit.
Distance helps, but it isn't the only factor. A unit farther away could still be disruptive if it faces a bedroom across a narrow courtyard. Meanwhile, a closer unit around a building corner may have a less direct sound path.
Consider your neighbors' bedrooms, too. Moving the condenser away from your window and toward theirs may solve one problem while creating another.
Pay Attention to Openings and Orientation
A closed exterior wall generally blocks more sound than an open window. Place the unit where the house itself can interrupt the direct path to the bedroom, while leaving the equipment in an open, usable area.
The unit's design matters as well. Fan discharge direction and the positions of the coil and service panel vary by model. The HVAC design should account for those features rather than assuming every unit can face the same way.
Leave Room for Airflow and Service
An outdoor AC unit releases heat collected inside the home. Its fan needs a steady supply of outdoor air, and that warm discharge needs a clear path away from the equipment.
A tight enclosure can cause warm air to circulate back through the unit. That makes heat transfer harder and can reduce cooling performance. Avoid treating the condenser like an object that can be tucked into any unused gap.
Keep the Unit in an Open Location
Fences, walls, roof overhangs, and dense shrubs can affect how air moves around the equipment. Some units discharge air upward, while others have a different configuration. A location should suit the selected unit's airflow pattern.
Shade can make an outdoor area more pleasant, but it shouldn't come at the expense of airflow. A dense hedge or a roof placed close over the equipment can create more trouble than it solves.
Provide a Practical Route for Repairs
A technician needs room to reach the service panel, electrical disconnect, refrigerant connections, and coil. There also needs to be a usable path for tools and replacement parts.
Think beyond the day of installation. A fence gate, pool deck, or future planting bed shouldn't make the unit difficult to reach. During a remodel, it's easier to reserve that path on the plan than to remove finished landscaping later.
Avoid Corners That Concentrate Sound
Hard surfaces can reflect equipment noise toward a bedroom. A condenser placed where two exterior walls meet may sound more noticeable than the same unit in a more open spot.
Narrow spaces can be troublesome, especially when they also restrict airflow. A side yard enclosed by a wall, fence, and overhang can hold sound near the house and create a difficult service area.
An open stretch of wall is often a better starting point than a recessed alcove. If the only available area is between buildings, consider the location of windows on both sides and keep the air path open.
The surface beneath the unit matters, too. Hard paving can reflect sound, so an expanse of concrete near a bedroom may affect what you hear. That doesn't mean a condenser should sit on bare soil: the equipment still needs a stable, properly installed base.
Reduce Vibration Through the Base and Connections
Airborne sound isn't the only issue. A low hum or rattle can travel through a mounting pad, bracket, wall, or rigid connection and become more noticeable inside the house.
Ground Pads and Mounts
A ground-mounted unit needs a stable, level base suited to the site. If the pad shifts or the equipment rocks, vibration and rattling can become more noticeable. In Southwest Florida, the installation also needs to account for water exposure and the home's wind-protection requirements.
Vibration-isolation components may help when they're suitable for the equipment and installation. They must work with the unit's anchoring system. Loose or improvised padding can interfere with stability, so leave changes to the HVAC professional.
Brackets and Lines Near Bedrooms
Wall brackets can be useful where ground space is limited, but they attach the equipment to the structure. If a bracket sits on a bedroom wall, vibration may carry through the framing.
Refrigerant lines and electrical connections can also transmit noise if they press against framing or exterior finishes. During installation or service, the technician can address contact points and use appropriate supports. Avoid bending refrigerant lines or loosening equipment connections yourself.
A low hum heard indoors can point to vibration through the structure, even when the unit doesn't sound unusually loud outside.
Use Screens and Landscaping Without Boxing In the Unit
A barrier can reduce the direct path between an outdoor unit and a bedroom window. Its effectiveness depends on the position of the equipment, the window, and the screen. Sound can travel around the sides and over the top.
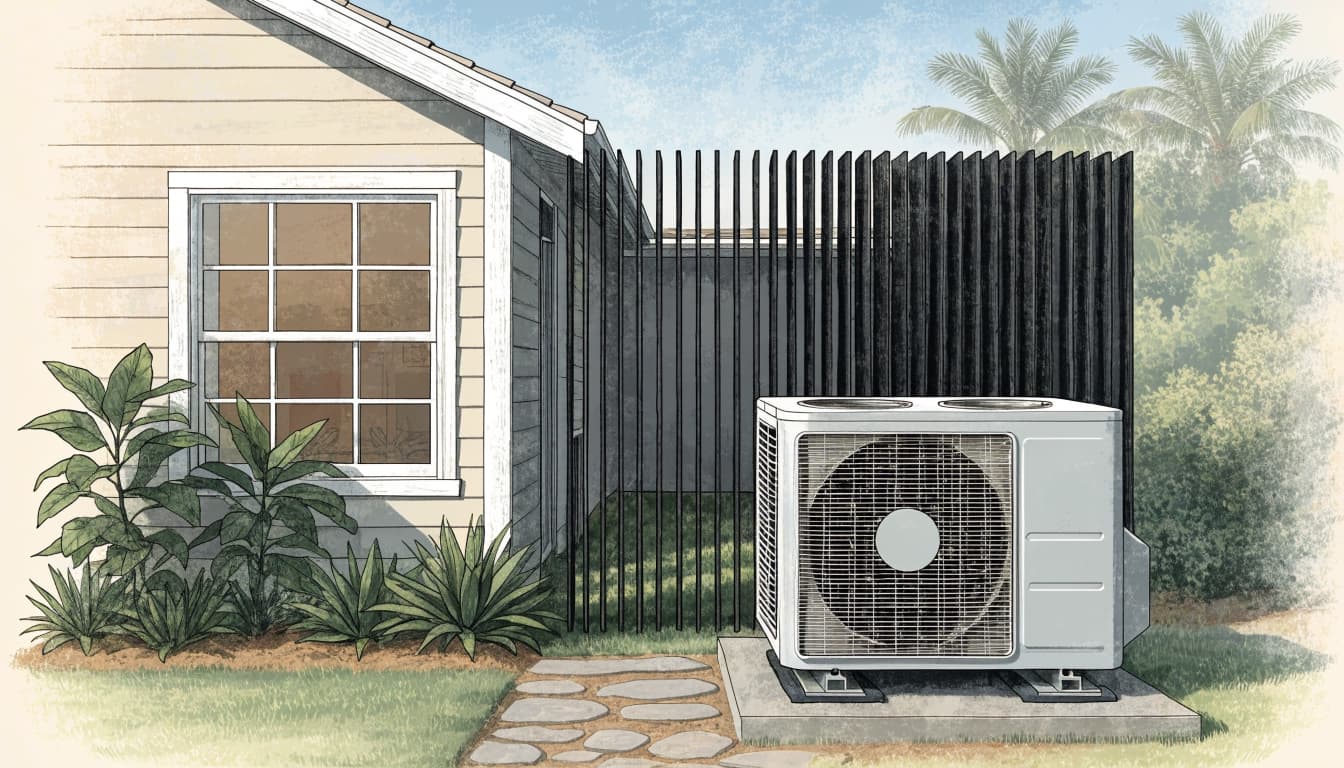
A solid, freestanding screen is generally more useful for blocking sound than an open lattice. Place it between the unit and the bedroom while keeping the fan discharge, coil, and service route open. A screen should not become a roofed enclosure around the equipment.
Landscaping can hide a condenser and soften its appearance, but leaves alone aren't a dependable sound barrier. Plants also grow. A bed that looks spacious when installed can become crowded as shrubs mature.
Keep vegetation, mulch, and fallen leaves away from the equipment. Plan irrigation so it doesn't constantly spray the cabinet, and leave a clear route for maintenance. In coastal areas, outdoor materials also need to stand up to moisture and salt exposure.
Weigh the Tradeoffs for Your Home and Lot
The quietest location on a floor plan may conflict with the pool, a lanai, or the neighbor's property. Compare the whole outdoor layout before choosing a spot.
Open Lots and Larger Homes
A larger lot may offer several exterior walls to consider. Even so, avoid placing the condenser beside a bedroom simply because the indoor equipment is nearby. A longer route may be worthwhile if the HVAC design supports it.
Longer refrigerant line runs can add installation work and may affect equipment selection. The HVAC professional should design the route for the chosen system rather than extending it without a plan. Larger homes may also use more than one system, which makes the location of each outdoor unit part of the conversation. Our guide to HVAC zoning options for large Estero homes covers related room-by-room planning.
Narrow Lots and Shared Outdoor Spaces
On a narrow lot, the available side yard may also contain a gate, drainage features, and utility equipment. Moving the condenser a short distance along the wall or around a corner may offer a better sound path without consuming the whole yard.
For homes with a pool or screened lanai, consider where people sit and where pool equipment will operate. Grouping mechanical equipment can preserve other areas, but it can also concentrate noise near an outdoor gathering space.
Plan the Location Before Construction Starts
New construction offers the most flexibility because walls, windows, utility routes, and outdoor features can be coordinated before work begins. Put the proposed condenser location on the site plan alongside the bedroom windows and outdoor living areas.
The HVAC design should also show how refrigerant lines and electrical connections reach the unit. Inside, leave space for ducts, returns, drainage, and equipment service. Sealing line penetrations at the building envelope is another detail to address before finishes conceal them.
An addition deserves the same attention. A new bedroom may end up beside an existing condenser, or the added space may change the home's cooling load. Our guide to planning air conditioning for a home addition explains why equipment capacity and duct design belong in the early plans.
Coordinate the condenser with other outdoor openings as well. A fresh-air intake, for example, needs a clean location that accounts for nearby exhaust outlets and other contaminant sources. Ventilation planning for new Florida homes covers those decisions in more detail.
Before finishes and landscaping are installed, walk through the planned service route. A location that looks open on paper can feel cramped once a fence, gate, and planting bed are in place.
Address Noise From an Existing Outdoor Unit
Relocation is one option, but it isn't always the first one to pursue. Start by identifying the type of sound and when it occurs.
Separate Normal Operation From a New Noise
A steady fan sound differs from a new metallic rattle, scraping noise, or pronounced vibration. Loose cabinet panels, worn components, debris, or an unstable base can make a system noisier than it should be.
Have an HVAC technician inspect unusual or worsening sounds. Don't remove panels, reach into the unit, or attempt to repair electrical or refrigerant components yourself. If the unit struggles to cool or repeatedly stops, arrange service rather than treating the sound as the only problem.
Consider Improvements Before Relocating
If the equipment operates normally, a suitable barrier or approved vibration isolation may reduce the disturbance. Clearing overgrown vegetation can also restore an open airflow path, although it won't necessarily make a healthy unit quieter.
When the unit remains too close to a bedroom, relocation may be practical as part of a larger remodel or equipment replacement. Moving it involves refrigerant and electrical work, and the new location must support the equipment and its service route.
For a replacement, compare manufacturer sound ratings as well as capacity and efficiency. Ratings are most useful when they describe the same measurement and operating conditions.
Give Bedroom Comfort a Place in the Plan
A quieter bedroom starts with a thoughtful equipment location. Distance, the path sound takes, and the way the unit is mounted all matter.
The best location also leaves the condenser open to airflow and accessible for service. Address those details together before construction, or use them to guide improvements to an existing installation.